


SECTION8: MAINTAININGYOURLAWNTRACTOR
NOTE: Refer to MaintenanceCharton page 31 for a
reference of recommended maintenance intervals.
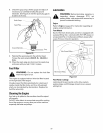
WARNING: Before performing any
maintenance or repairs, disengage PTO, set
parking brake, stop engine and remove key to
prevent unintended starting.
Engine
Maintenance, repair, or replacement of the emission
control devices and systems, which are being done at
the customer's expense, may be performed by any
engine repair establishment or individual. Warranty
repairs must be performed by an authorized Toro
service dealer.
EngineOil
The engine-crankcase is filled with 10W-30 oil at the
factory.
The engine oil must be drained and replaced with new
oil after the initial 50 hours of engine operation and
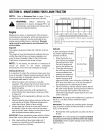
every 50 hours thereafter. Refer to the Oil Viscosity
Chart below to determine the proper oil type.
NOTE: To aid starting, the selection of crankcase oil
should be based on the lowest anticipated
temperatures prior to the next scheduled oil change.
Checkingthe 0il Level
It is important to check the oil level at least every four
hours of operation. Regular checking during the first 24
hours of operation is especially important. Check the oil
level before each use as follows:
1. Allow the engine a few minutes to rest after
operation. This will give the oil time to drain into the
crankcase sump and result in a more accurate
dipstick reading.
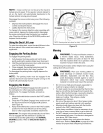
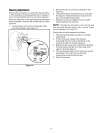
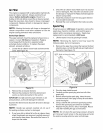
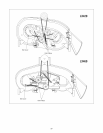
2. Clean the area around the oil fill cap/dipstick to
prevent debris from entering the crankcase. Refer
to Figure 16.
3. Remove the oil fill cap/dipstick by lifting it out of the
oil fill tube.
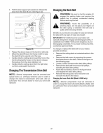
4. Wipe the dipstick clean before pushing itall the way
back into the oil fill tube. Withdraw the dipstick to
check the oil level. Refer to figure at right.
5. Always keep the oil level at or near the F mark on
the dipstick. If the oil is low, add oil of the proper
type up to the F mark. Always re-check the oil level
with the dipstick before adding more oil.
IMPORTANT: Never operate the engine with the oil level
below the L mark or above the F mark on the dipstick.
6. After checking the oil level (and adding oil, if
necessary), reinstall the oil fill cap/dipstick by
inserting it into the oil fill tube
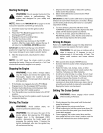
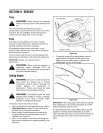
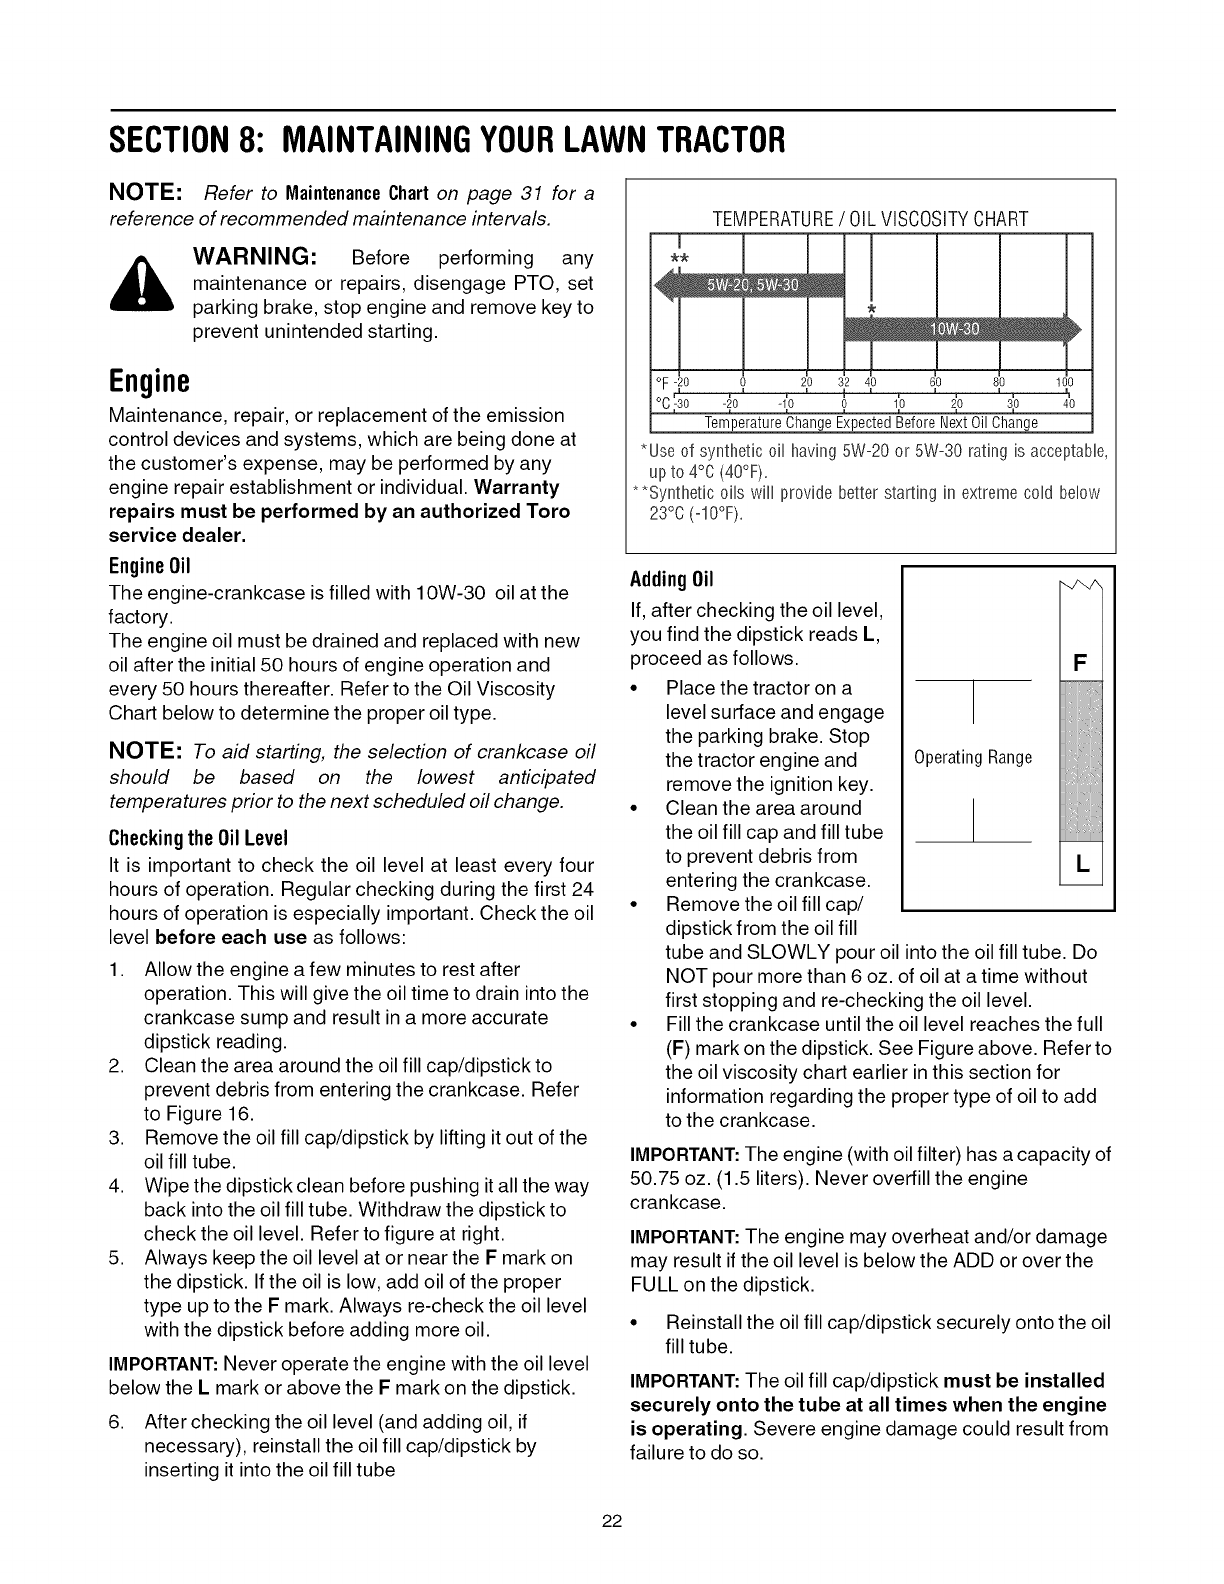
TEMPERATURE/ OILVISCOSITYCHART
I
oF -20 0 2:0 32 40 6_0 8! 100-=-
I
°C )30 -!0 -1:0 0 1;0 2_0 3'0 40
TemperatureChangeExpectedBeforeNextOilChange
*Use of synthetic oHhaving 5W=20or 5W=30rating is acceptaNe,
up to 4°0 (40%),
**Synthetic oils wHnprovide betterstarting in extreme condbenow
23% (=10%),
AddingOil
If, after checking the oil level,
you find the dipstick reads L,
proceed as follows.
• Place the tractor on a
level surface and engage
the parking brake. Stop
the tractor engine and
remove the ignition key.
• Clean the area around
the oil fill cap and fill tube
to prevent debris from
entering the crankcase.
• Remove the oil fill cap/
dipstick from the oil fill
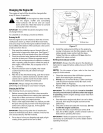
OperatingRange
iiiiiiiiiiiiiiii!
tube and SLOWLY pour oil into the oil fill tube. Do
NOT pour more than 6 oz. of oil at a time without
first stopping and re-checking the oil level.
Fill the crankcase until the oil level reaches the full
(F) mark on the dipstick. See Figure above. Refer to
the oil viscosity chart earlier in this section for
information regarding the proper type of oil to add
to the crankcase.
IMPORTANT:The engine (with oil filter) has a capacity of
50.75 oz. (1.5 liters). Never overfill the engine
crankcase.
IMPORTANT:The engine may overheat and/or damage
may result if the oil level is below the ADD or over the
FULL on the dipstick.
• Reinstall the oil fill cap/dipstick securely onto the oil
fill tube.
IMPORTANT:The oil fill cap/dipstick must be installed
securely onto the tube at all times when the engine
is operating. Severe engine damage could result from
failure to do so.
22