


www.tanaka-usa.com 4 custsvc@tanaka-ism.com
Owner’s Manual
T
HT-210/210S/2000/2100/2120/2520, THT-240/2510/2530/2540/262
HTD
-
2520PF/
2522PF/2526PF/2530PF
,HTS
-
2530PF
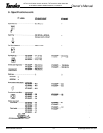
3. Assembly procedures
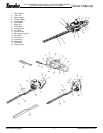
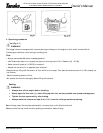
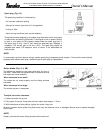
Handle B (3) and Gathering Plate (4) (Fig, 1-1)
1. Remove the four washers and nuts (1) from cutting blade end.
NOTE! In case of Handle B installation only, remove only the nut on the longest bolt.
2. Set the gathering plate on the guide bar, then finger tighten the three washers and nuts. *Use one each (5)
of the two washers, which have been provided, under the gathering plate or on the two blade-fixing bolts
from the cutting-blade end to install the gathering plate on THT-2540. (If so equipped)
3. Set the handle B on the longest bolt and finger tighten with the washer and nut.
4. Before securing the finger-tighten nuts, screw the blade fixing bolts (2) to be seated, then loosen the bolts
approx. 1/2 turn.
5. With the bolts set at that position tighten the blade fixing nuts.
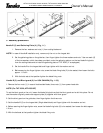
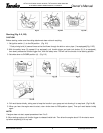
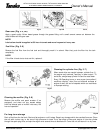
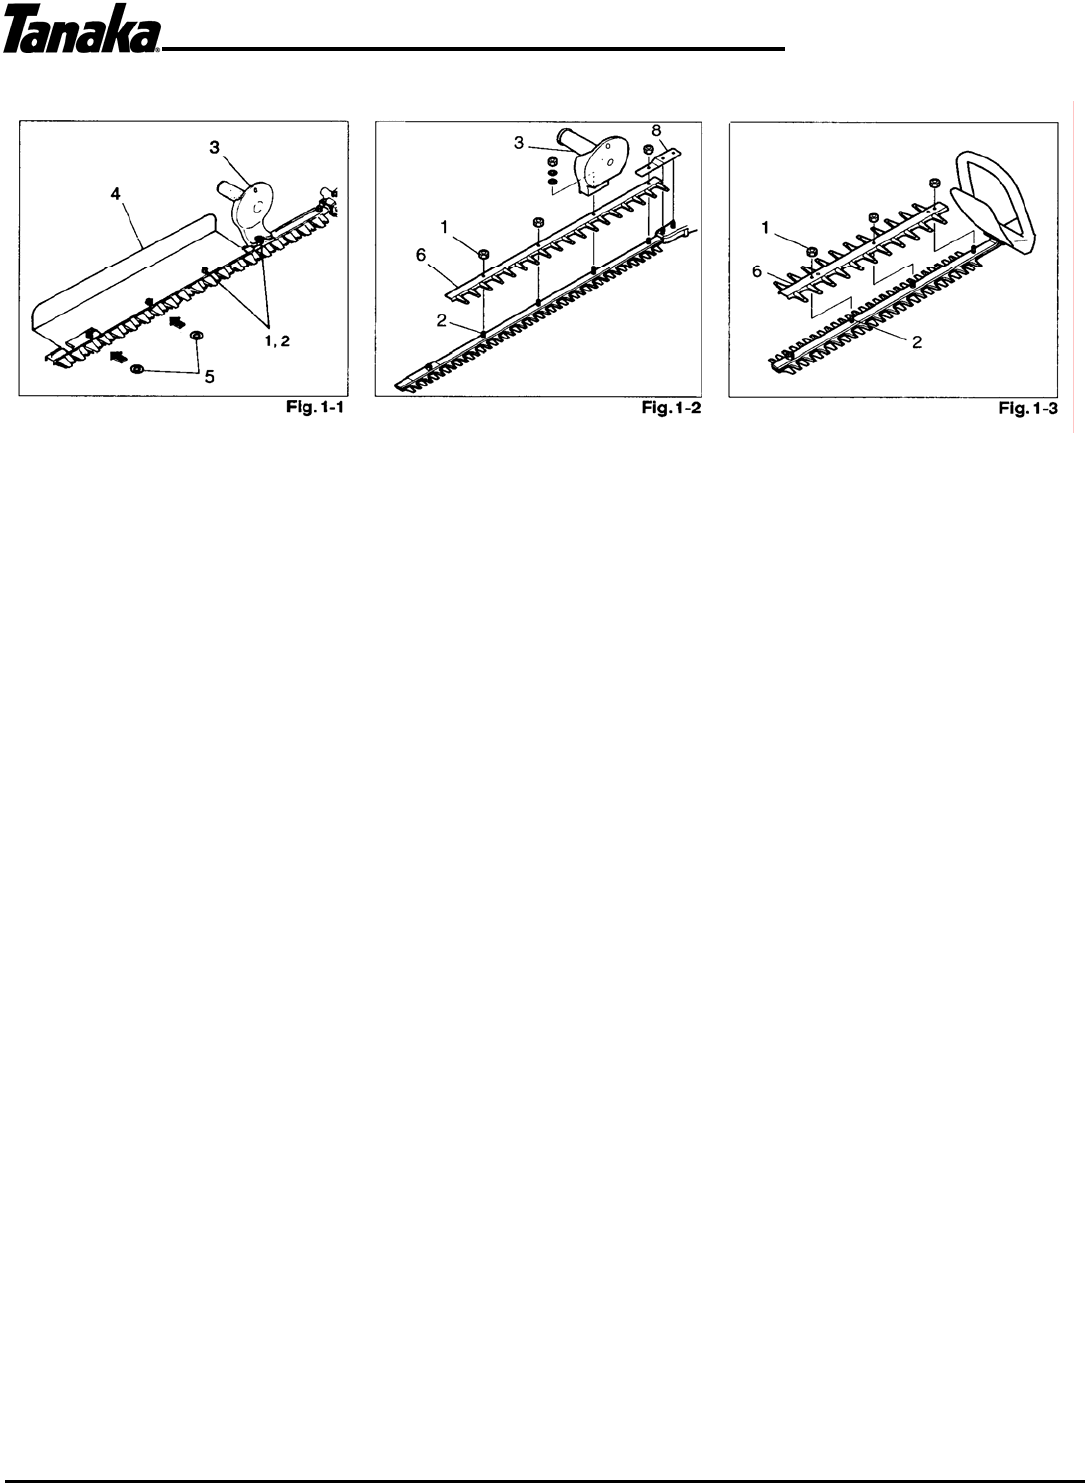
Handle B (3) and Blunt guard (6) for USA/CANADA (Fig. 1-2,3)
1. Remove the four nuts (1) (in case of double sided blade, three nuts (1)) from power head side.
NOTE! (For THT-2520,HTD-2530PF)
To set the blunt guard on the unit, loosen the blade fixing bolts so that the blunt guard can be slid into place. Do not
use the washer originally used under support plate (8) together with blunt guard.
2. Set the blunt guard on the guide bar, then finger tighten the three nuts.
3. Set the handle B (3) on the longest bolt (Single sided blade) and finger tighten with the washer and nut.
4. Before securing the finger-tighten nuts, screw the blade fixing bolts (2) to be seated, then loosen the bolts approx.
1/2 turn.
5. With the bolts set at that position tighten the blade fixing nuts.