


10
Section 2 - OPERATING INSTRUCTIONS
WARNING
DO NOT attempt any maintenance, adjustments or
service with engine and blade running. STOP engine
and blade. Disconnect spark plug wire and secure
away from spark plug. Engine and components are
HOT. Avoid serious burns, allow sufficient time for
all components to cool.
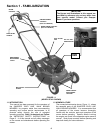
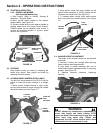
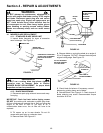
2.6 INSTALLATION OF SIDE DISCHARGE
DEFLECTOR
STEP 1: Remove recycling cover. Refer to Section
“Recycling Operation”.
STEP 2: Install deflector to deck in place of recycling cover,
making sure that: 1) front hole on outside front of deflector
fits over stud where front of recycling cover was originally
secured, 2) slot on top of deflector slips under restraining
nut on top of deck (under right front corner of engine), and
3) slot on inside rear of deflector slips onto stud behind rear
of discharge opening, where rear of recycling cover was
originally secured. Install internal/external tooth lock
washers and knob nuts onto studs and tighten securely.
See Figure 2.13.
FIGURE 2.13
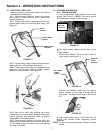
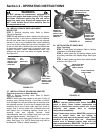
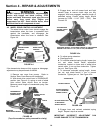
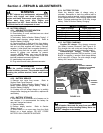
2.7 INSTALLATION OF GRASS BAG ADAPTER
(Optional Accessory on Some Models)
STEP 1: Remove recycling cover. Refer to Section
“Recycling Operation”.
STEP 2: Install grass bag adapter to the deck in place of
recycling cover, making sure that: 1) front hole on outside
front of adapter fits over stud where front of recycling cover
was originally secured, 2) slot on top of adapter slips under
restraining nut on top of deck (under right front corner of
engine), and 3) slot on bottom rear of adapter slips onto
stud behind rear of discharge opening, where rear of
recycling cover was originally secured. Install
internal/external tooth lock washers and knob nuts onto
studs and tighten securely. See Figure 2.14.
STEP 3: Route recoil rope around outside of rope guide
pulley. See Figure 2.14. (NOTE: Recoil rope may need to
be slackened. Refer to “Handle Assembly”.)
FIGURE 2.14
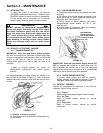
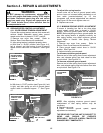
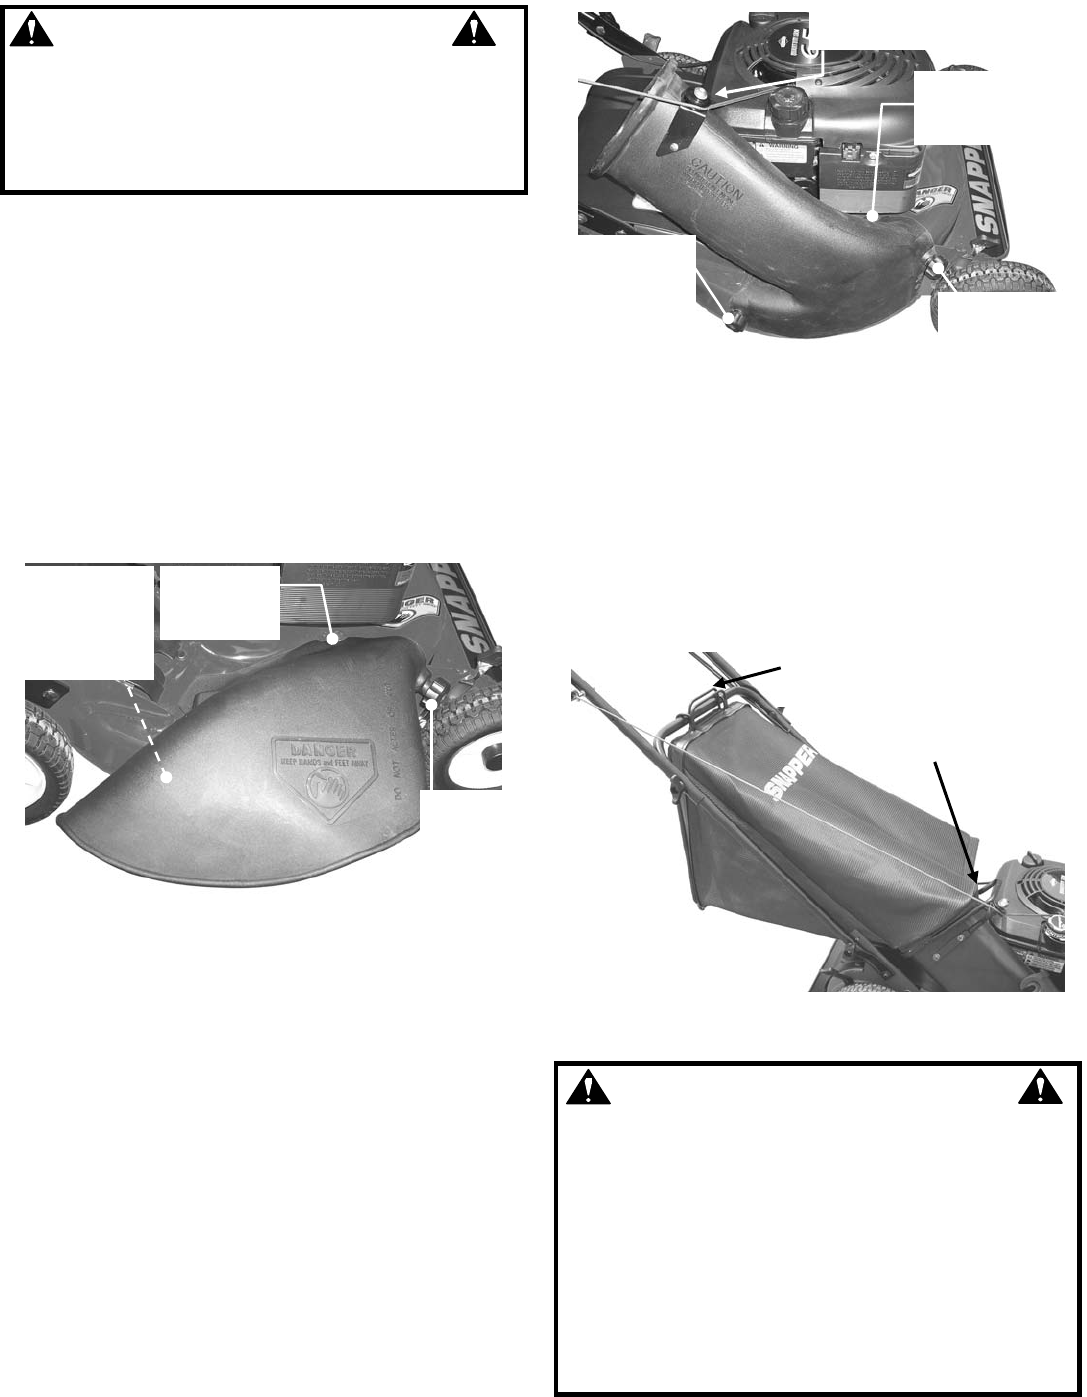
2.8 INSTALLATION OF GRASS BAG
(Door Type Bag)
STEP 1: Install grass bag adapter. Refer to Section
“Installation of Grass Bag Adapter”.
STEP 2: Install grass bag by opening adapter cover
and sliding connector over adapter flange. See Figure
2.15.
STEP 3: Attach grass bag hooks over middle handle
cross bar. See Figure 2.15.
FIGURE 2.15
WARNING
DO NOT operate without entire Grass Catcher or
guard in place. Grass Catcher components are
subject to deterioration during normal use. Inspect
frequently and replace worn or damaged
components immediately.
Grass Catcher bags used on SNAPPER products are
made of woven fabric, and are subject to
deterioration and wear during normal usage. Check
condition of bag before each use. Immediately
replace worn or damaged catcher bags with only
bags recommended by SNAPPER. The grass catcher
is optional equipment on some models.
TOP
SLOT
UNDER NUT
FRONT HOLE
OVER STUD;
INSTALL LOCK
WASHER AND
KNOB NUT
REAR SLOT
OVER STUD;
INSTALL LOCK
WASHER AND
KNOB NUT
ROUTE RECOIL ROPE
AROUND PULLEY
HOOK DOOR AND
BAG HOOKS TO
MIDDLE HANDLE
SLIDE CONNECTOR
OVER FLANGE
TOP
SLOT
UNDER NUT
REAR SLOT
OVER STUD;
INSTALL LOCK
WASHER AND
KNOB NUT
FRONT HOLE
OVER STUD;
INSTALL LOCK
WASHER AND
KNOB NUT