


22
Adjustments
SPEED SELECTOR PIVOT ADJUSTMENT
The speed selector is factory set for optimal performance
at each forward and reverse speed setting. However, if
drive system components have been replaced, adjust-
ment may be necessary.
Adjust as follows:
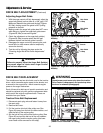
1. Move the ground speed control (A, Figure 19) fully
forward.
2. Loosen the hardware (B) securing the upper and
lower shift rods.
3. Push the lower rod (C) down fully (into the housing).
4. Make sure the ground speed control (A) is in the full
forward (5th gear) position. Pull the two rods apart
and tighten the shift rod hardware (B).
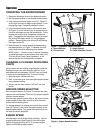
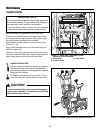
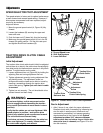
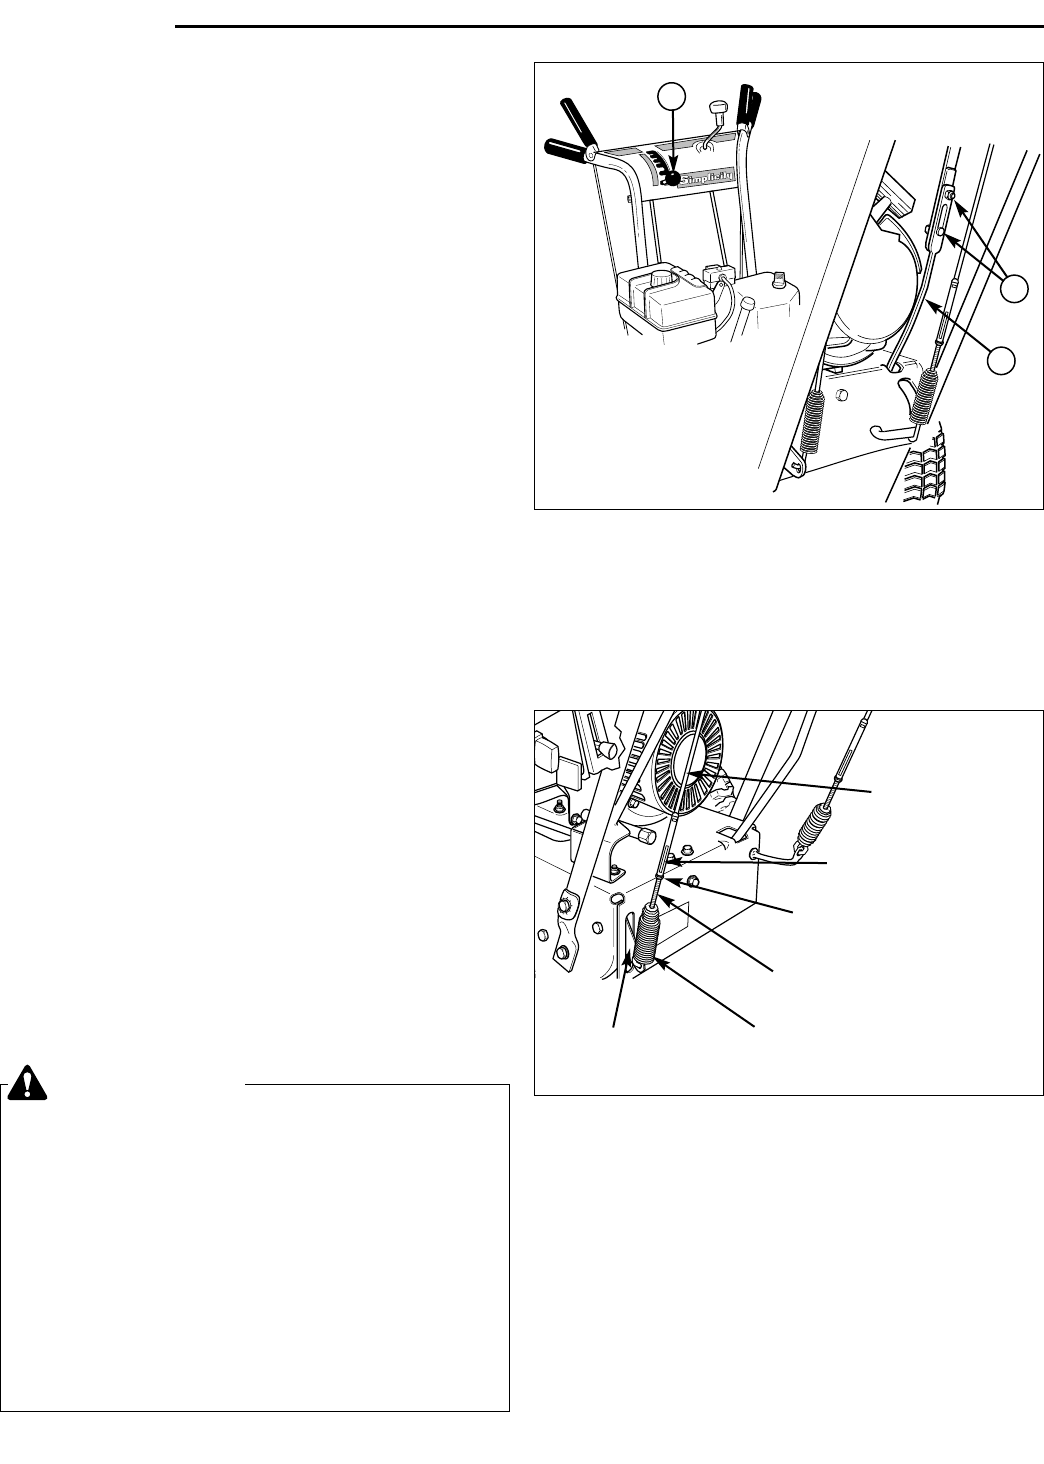
Figure 19. Speed Selector Linkage Adjustment
A. Ground Speed Lever
B. Shift Rod Hardware
C. Lower Shift Rod
TRACTION DRIVE CLUTCH CABLE
ADJUSTMENT
Initial Adjustment
The traction drive clutch cable should initially be adjusted
so that there is no slack in the cable when moved slightly
from side to side, but bellcrank arm remains in fully down
position. To adjust tension on the cable:
1. Loosen adjustment hex nut (Figure 20) by holding the
adjusting flats and turning adjustment hex nut.
2. Tighten adjustment screw by turning adjustment flats
and holding screw. The adjustment screw is a
phillips screw and the head can be held or turned by
inserting a screwdriver through the traction drive
clutch cable spring. Tighten just until slack in cable
is removed.
3. Tighten hex nut securely. The unit should able to be
pushed forward and back freely.
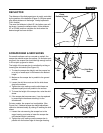
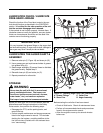
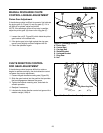
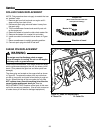
Figure 20. Traction Drive Clutch Cable Adjustment
Traction Drive
Clutch Cable
Traction Drive
Clutch Cable Spring
Adjustment
Screw
Traction Drive
Bellcrank Arm
Run-In Adjustment
1. After 5 hours of use, check for proper adjustment.
Readjust clutch cable if necessary by increasing ten-
sion on cable. A small amount of bellcrank arm
movement is permissible if unit passes operating
checks described in the Caution at left. Optimal
adjustment provides 3/16" clearance between
traction drive disc and rubber ring on friction disc
when drive lever is released (see Figure 15 for fric-
tion disk location).
WARNING
Do not over-tighten, as this may cause traction
drive to engage without depressing the traction
drive control (bellcrank arm must remain in down
position).
Verify that the cables are not over-tightened: With
speed selector in position 1 and traction drive
control fully released, push snowthrower forward.
The unit should move forward freely.
If unit does not move forward freely, the cable has
been over-tightened. To remedy, loosen tension
on clutch cable slightly, and recheck.
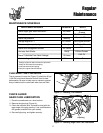
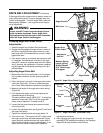
A
B
C
Adjustment
Flats
Adjustment
Hex Nut