


10
SECTION 1 - INSTALLATION
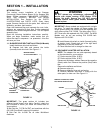
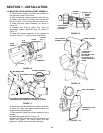
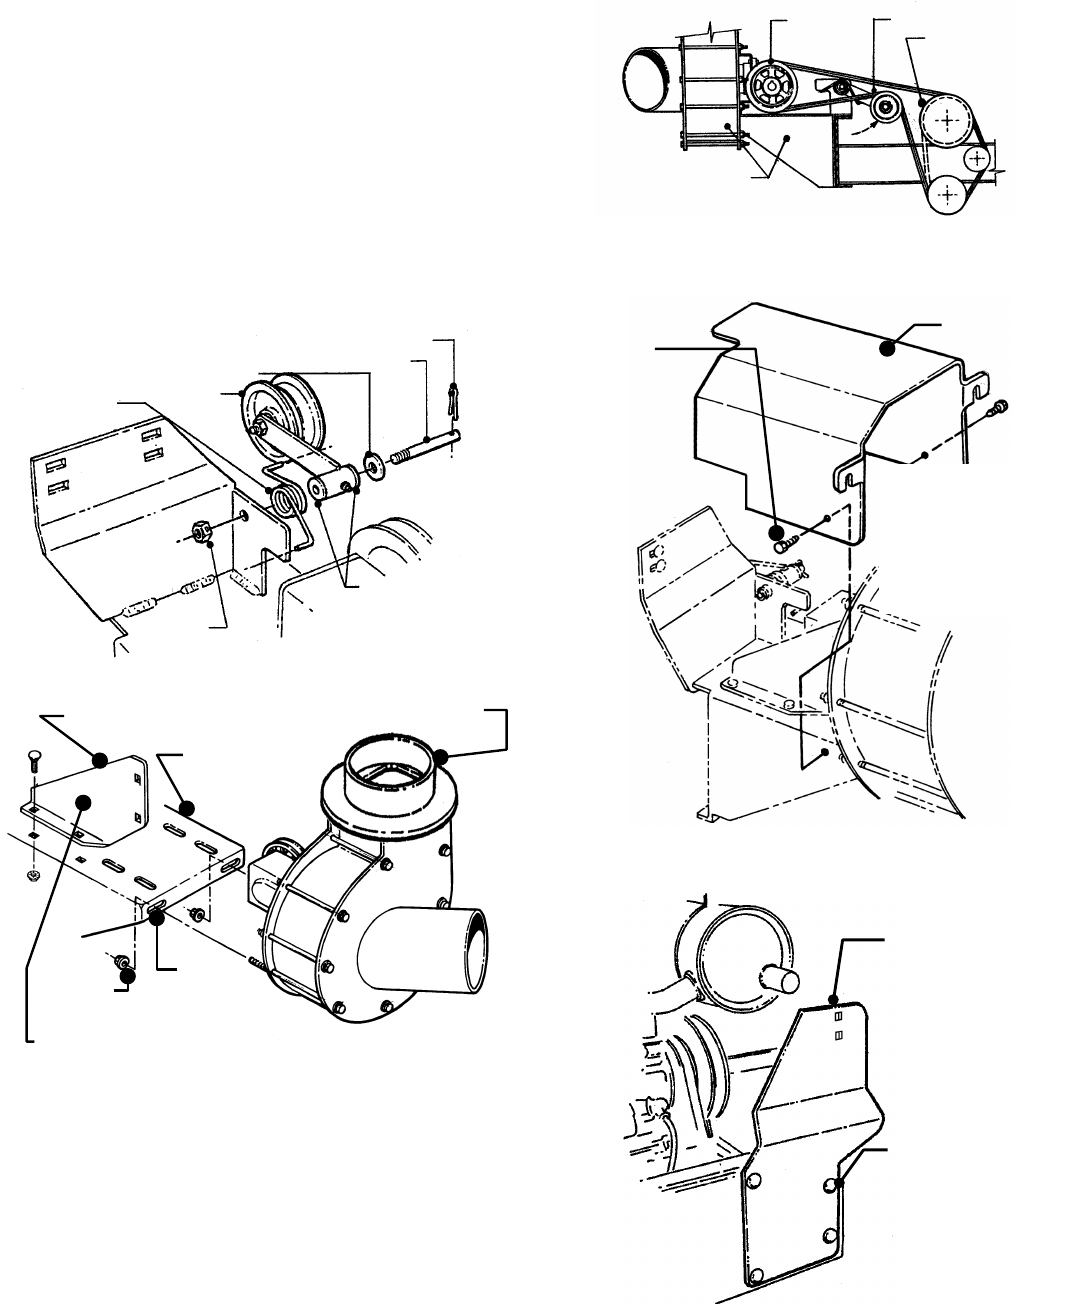
1.5 MOUNTING THE BLOWER SUPPORT ASSEMBLY
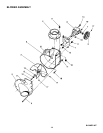
1. Place blower support assembly into position on
the right rear corner of the frame.
2. Align the blower support assembly with the four
(4) holes in the side of the frame and secure with
four (4) 5/16-18 x 3/4” carriage bolts and Nyloc nuts.
3. Install the idler pulley assembly as shown in
Figure 1.6.
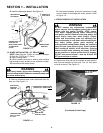
4. Remove the 5/16-18 Nyloc nuts from the
appropriate blower assembly bolts as shown in
Figure 1.7.
5. Attach the blower assembly to the support as
shown in Figure 1.7. Leave room for adjustment.
FIGURE 1.6
FIGURE 1.7
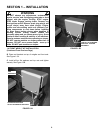
6. Install belt onto idler and blower pulleys as shown
in Figure 1.8. Align idler pulley, blower pulley, and
engine drive pulley using belt.
7. Once aligned, tighten the blower assembly to the
support.
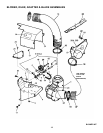
8. Install belt guard. Refer to Figure 1.9.
9. Mount the left hand brace to the left hand side of
frame. See Figure 1.10. Check pulley and belt
alignment. Tighten all nuts and bolts securely.
FIGURE 1.8
FIGURE 1.9
FIGURE 1.10
P/N 72399 ATTACHES FROM BLOWER SUPPORT TO
GEAR BOX MOUNT USING
(
4
)
P/N 91508 &
(
4
)
P/N 91298
BLOWER ASSEMBLY
BLOWER SUPPORT
BLOWER BRACE
SLOTTED
HOLES
NUTS
IDLE
R
SPRING
FLAT
WASHER
IDLE
R
PULLEY
IDLE
R
PIVOT SHAFT
COTTE
R
PIN
BUSHINGS
LOCKNUT
MOVE BLOWE
R
& SUPPORT TO
ALIGN BELT
ENGINE
DRIVE
PULLEY
IDLER PULLEY
BLOWE
R
PULLEY
BELT GUARD
SELF-TAPPING
SCREWS
LOOSEN NUTS
FROM ONE
BLOWER BOLT ON
EACH SIDE.
RETIGHTEN NUTS
AFTER GUARD IS IN
PLACE.
LEFT HAND BRACE
CARRIAGE BOLTS &
LOCKNUTS