


520 Single Stage Snowthrower
5/2005
8
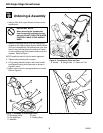
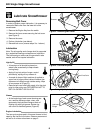
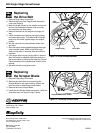
Figure 10. Cover Removal & Installation
Insert front
tabs first
when
reinstalling
cover.
Align rear
tabs & side of
cover when
reinstalling.
Lift Cover
from Rear
of unit
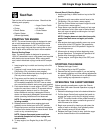
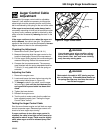
Figure 9. Remove and/or loosen Cover Screws
Remove two
rear fasteners
securing
cover
Remove
Fuel Tank
Cap
Removing
Engine Cover
Note: In many of the following adjustment and service
tasks, it will be necessary to remove and reinstall the
engine cover. To remove the cover, proceed as fol-
lows:
1. Remove the Engine Key from the switch.
2. Remove the two rear fasteners securing the back
of the cover housing. (Figure 9).
3. Remove the fuel tank cap.
4. Remove the cover (see Figure 10).
5. Temporarily reinstall the fuel tank cap.
6. Perform the adjustments or service desired.
7. Reinstall the cover by reversing the removal steps.
Note: The tabs at the lower front of the cover must
be positioned correctly.
WARNING
To avoid the possibility of serious bodily injury when
performing adjustments, maintenance or lubrication,
stop engine and remove key from switch.
Carburetor
Adjustment
The carburetor is properly calibrated and preset at the
factory for efficient cold weather operation. There are
no adjusting screws on the carburetor.
If it is apparent that the carburetor is not providing sat-
isfactory fuel supply to engine, contact your nearest
Authorized Tecumseh Service Outlet for service.
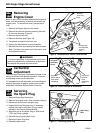
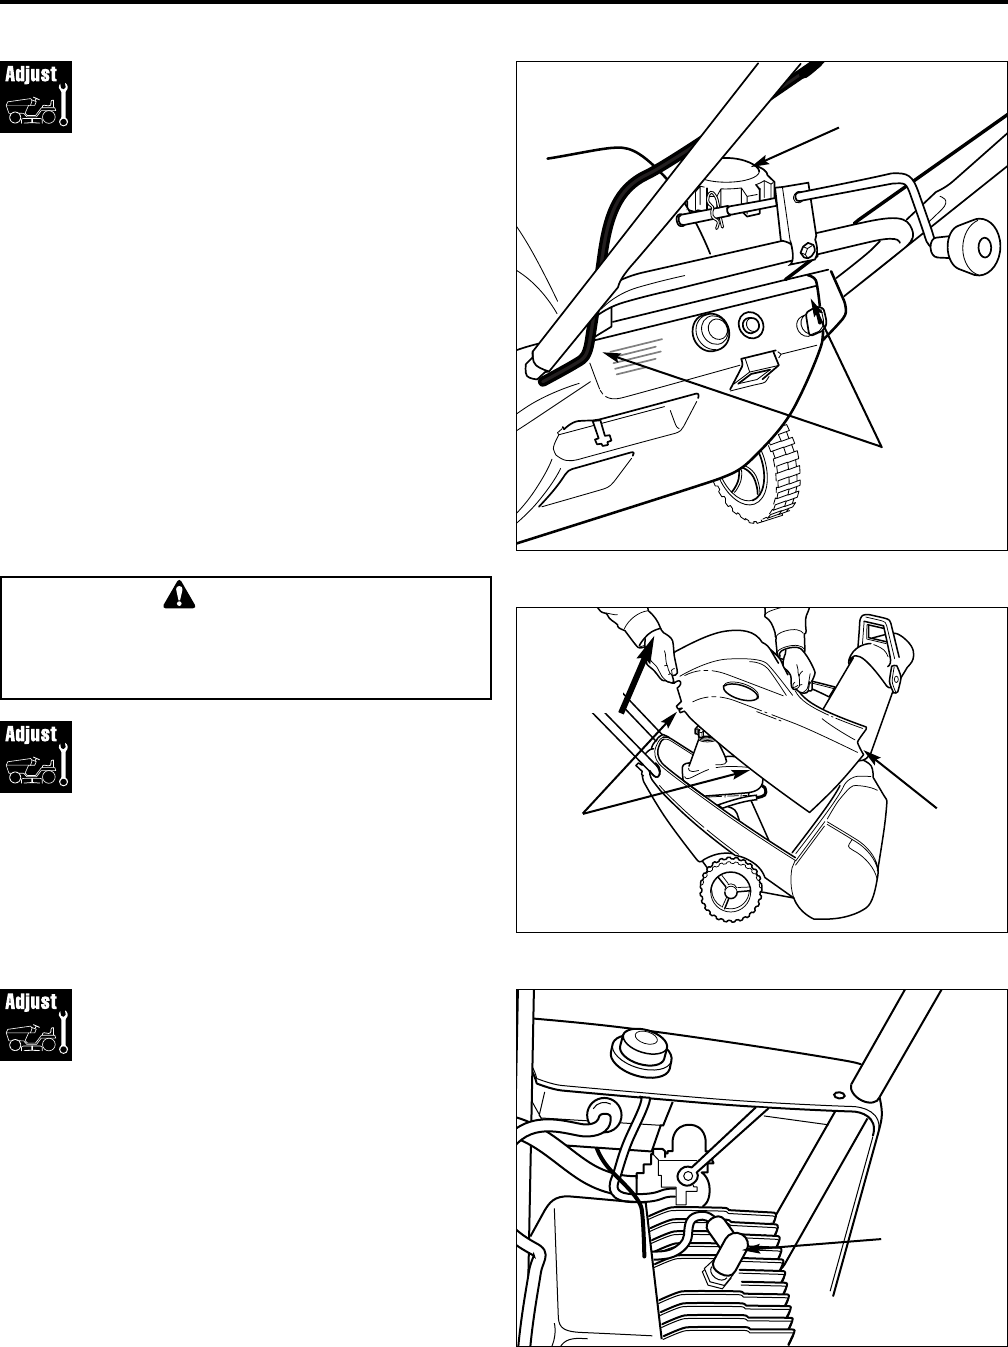
Servicing
the Spark Plug
1. Remove Engine Key from switch.
2. Remove the engine cover. (See procedure above.)
3. Disconnect the wire from the spark plug.
4. Inspect the Spark Plug and clean. If necessary,
replace the it with a new Spark Plug as recom-
mended in the Engine Owners Manual.
5. Adjust the gap on the Spark Plug to .030 inches
(.762 mm) using a gauge.
6. Reinstall the plug and tighten firmly.
7. Reconnect Spark Plug wire.
8. Reinstall engine cover.
Figure 11. Servicing Spark Plug
Spark Plug
Wire