


17
Operating the Tractor
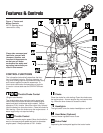
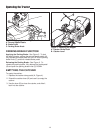
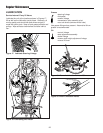
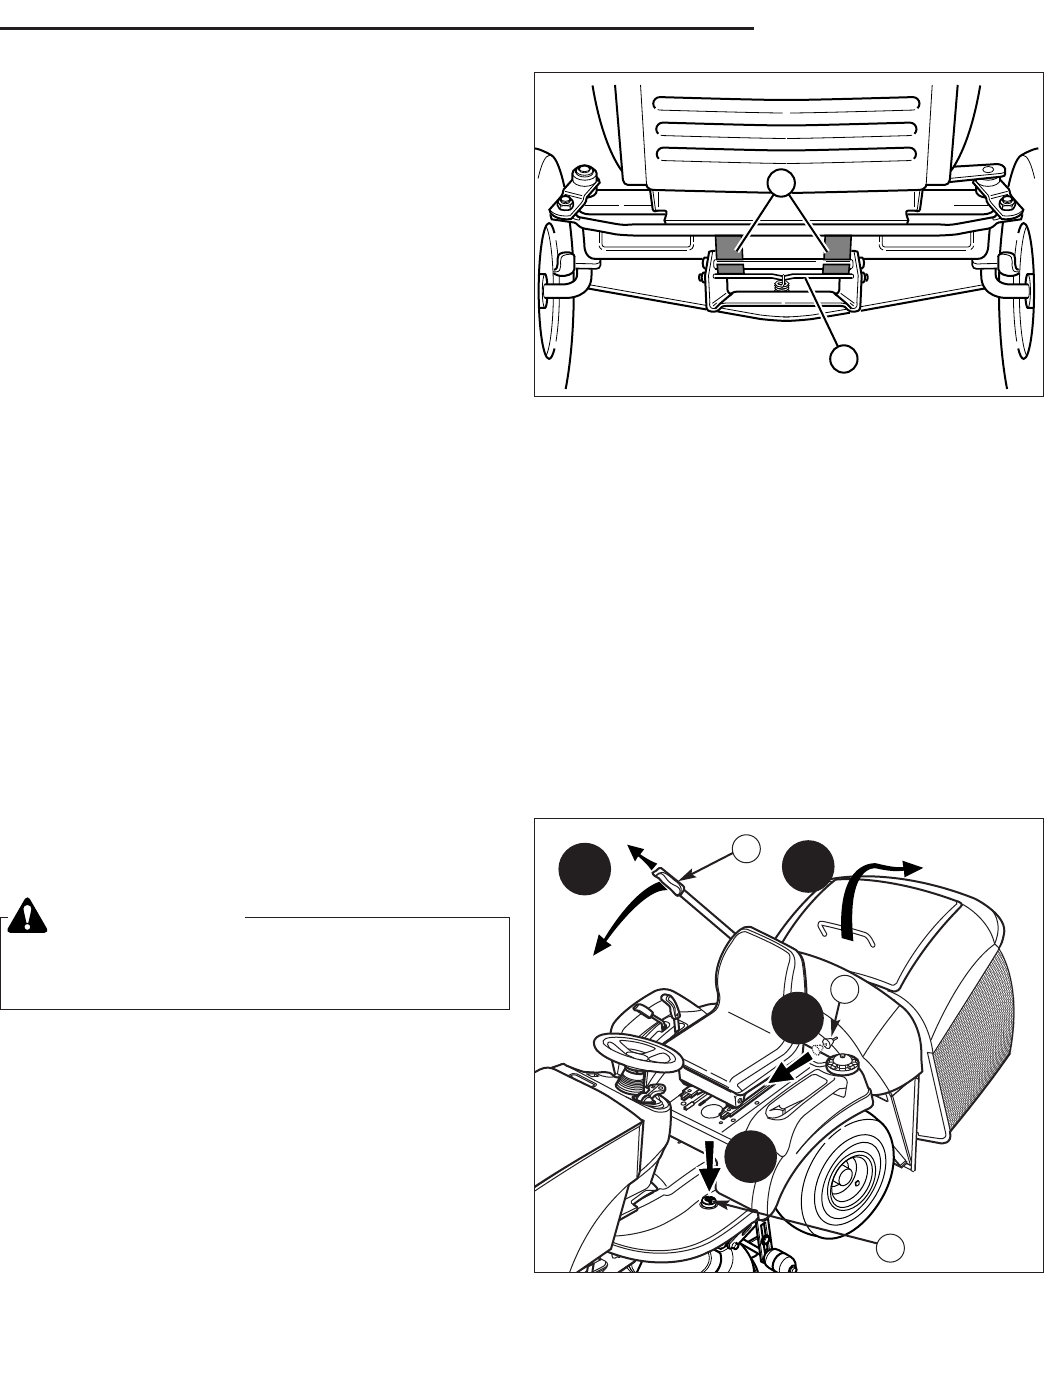
Figure 10. Mower Hitch
A. Tractor Hitch Brackets
B. Spring-Loaded Lever
A
B
Installing the Mower Deck
1. Park tractor, shut off PTO and engine, remove the
key and apply parking brake. Turn the wheels fully to
the left.
2. From the rear with the grass catcher open pull dis-
charge chute to rear.
3. Place mower height adjuster (A, Figure 6) in the low-
est cutting position. Place the mower lift lever (A) in
the lowest position. Slide mower deck under right
side of tractor so that mower hitch is aligned with
front tractor hitch.
4. See Figure 9. Slide the discharge tube onto the
mower discharge opening.
5. See Figure 10. Turn wheels straight. Pull back on
the spring-loaded lever (B) while lifting up on the
mower hitch. Install mower hitch onto tractor hitch
brackets (A). When properly installed, the spring-
loaded lever should seat fully underneath the brack-
ets.
6. Connect the trunions (B, Figure 7) to mower deck lift
arms (C) secure with hair pins (A).
7. See Figure 8. Move idler arm (A) to relieve belt ten-
sion. Install belt onto the PTO pulley (B).
8. Check that the discharge tube and mower opening
are aligned and connected.
9. Install the grass catcher (see Catcher Removal &
Installation).
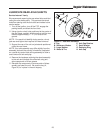
CATCHER REMOVAL &
INSTALLATION
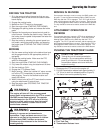
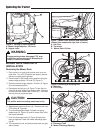
1. Move the catcher removal knob (C, Figure 11) for-
ward to unlock the catcher from the rear support
arms.
2. Depress the catcher dump lock pedal (A).
3. Use the catcher lever (B) to open the catcher slightly.
4. Lift the catcher off the rear support arms.
5. Install in reverse order of removal. To assist
installing the catcher, be sure to line up the alignment
marks on the catcher and rear of the tractor.
WARNING
Do not operate the unit without the hopper or
deflector in place.
Figure 11. Emptying the Hopper
A. Catcher Dump Pedal
B. Catcher Lever
C. Catcher Lock Knob
3
4
1
2
A
C
B