


Section 2 -OPERATING INSTRUCTIONS
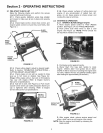
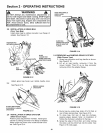
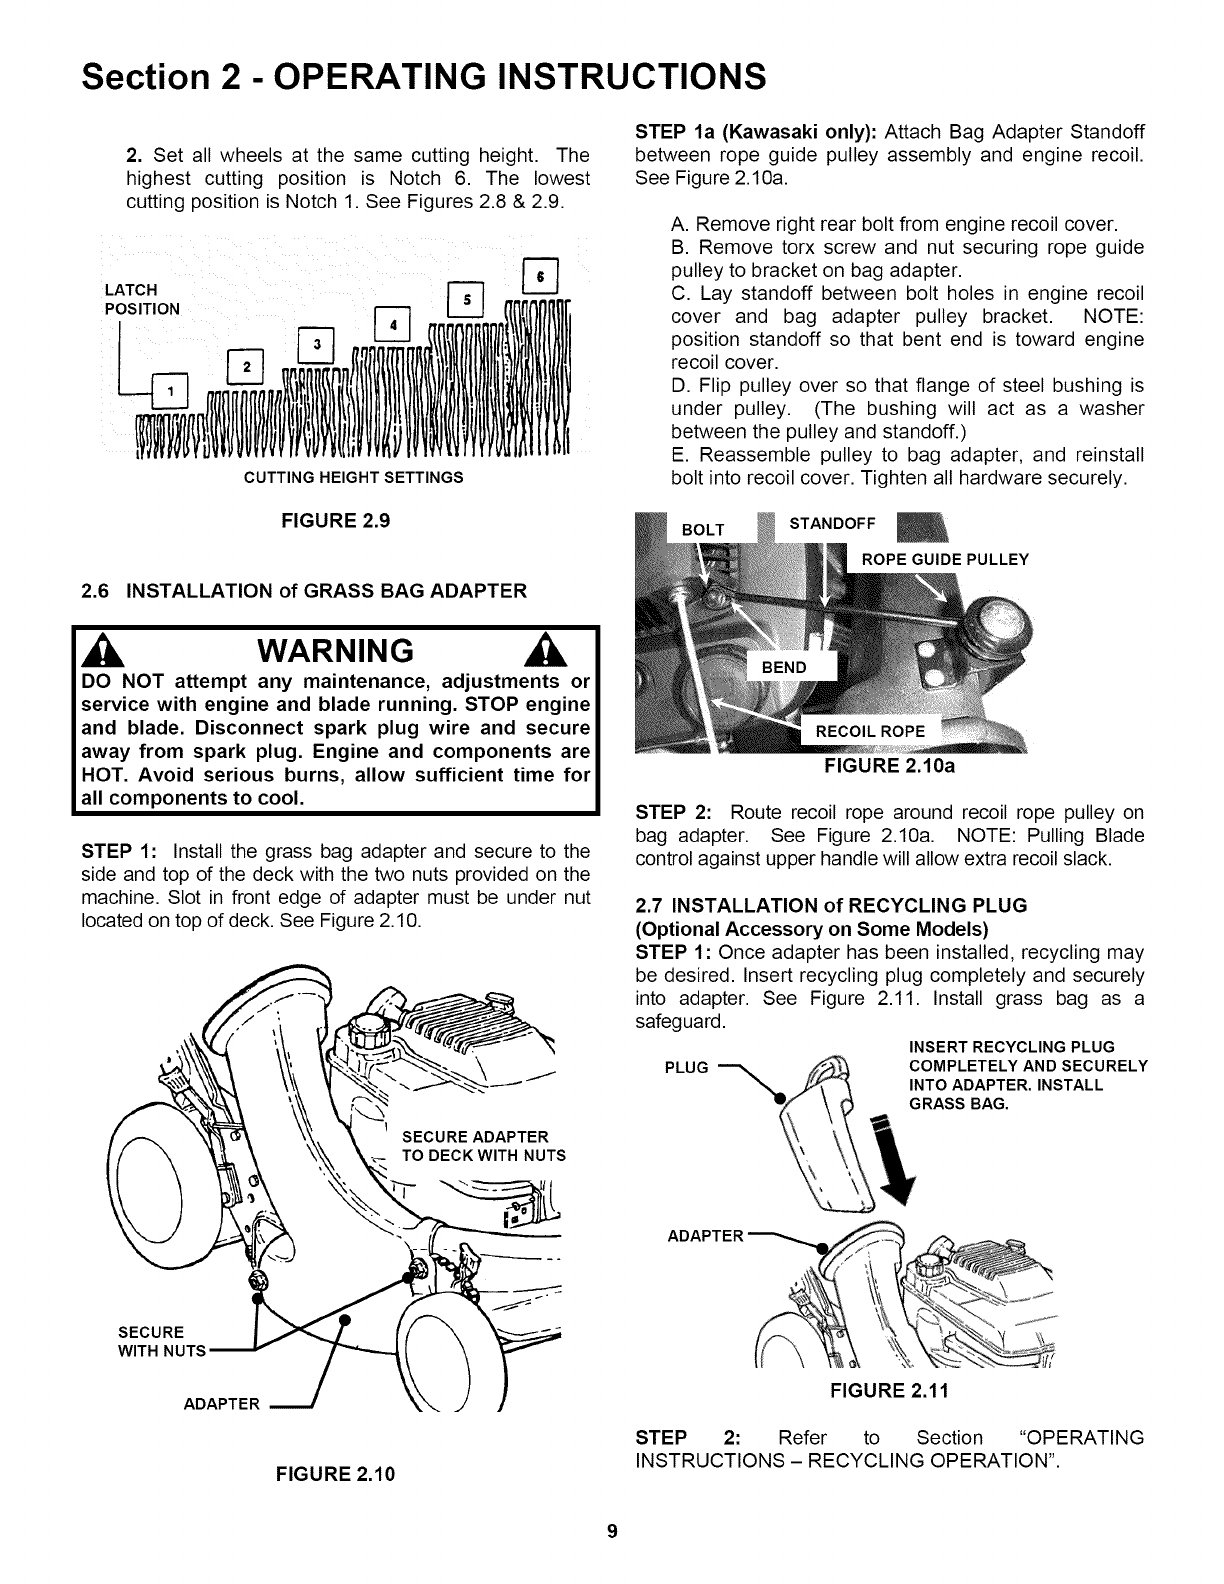
2. Set all wheels at the same cutting height. The
highest cutting position is Notch 6. The lowest
cutting position is Notch 1. See Figures 2.8 & 2.9.
LATCH
POSITION
Fq
CUTTING HEIGHT SETTINGS
FIGURE 2.9
2.6 INSTALLATION of GRASS BAG ADAPTER
WARNING
DO NOT attempt any maintenance, adjustments or
service with engine and blade running. STOP engine
and blade. Disconnect spark plug wire and secure
away from spark plug. Engine and components are
HOT. Avoid serious burns, allow sufficient time for
all components to cool.
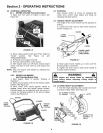
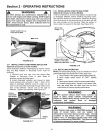
STEP 1: Install the grass bag adapter and secure to the
side and top of the deck with the two nuts provided on the
machine. Slot in front edge of adapter must be under nut
located on top of deck. See Figure 2.10.
!
SECURE ADAPTER
TO DECK WITH NUTS
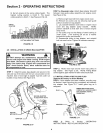
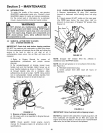
STEP la (Kawasaki only): Attach Bag Adapter Standoff
between rope guide pulley assembly and engine recoil.
See Figure 2.10a.
A. Remove right rear bolt from engine recoil cover.
B. Remove torx screw and nut securing rope guide
pulley to bracket on bag adapter.
C. Lay standoff between bolt holes in engine recoil
cover and bag adapter pulley bracket. NOTE:
position standoff so that bent end is toward engine
recoil cover.
D. Flip pulley over so that flange of steel bushing is
under pulley. (The bushing wilt act as a washer
between the pulley and standoff.)
E. Reassemble pulley to bag adapter, and reinstall
bolt into recoil cover. Tighten all hardware securely.
BOLT
STANDOFF
ROPE GUIDE PULLEY
FIGURE 2.10a
STEP 2: Route recoil rope around recoil rope pulley on
bag adapter. See Figure 2.10a. NOTE: Pulling Blade
control against upper handle will allow extra recoil slack.
2.7 INSTALLATION of RECYCLING PLUG
(Optional Accessory on Some Models)
STEP 1: Once adapter has been installed, recycling may
be desired. Insert recycling plug completely and securely
into adapter. See Figure 2.11. Install grass bag as a
safeguard.
INSERT RECYCLING PLUG
PLUG COMPLETELY AND SECURELY
INTO ADAPTER. INSTALL
GRASS BAG.
SECURE
WITH NUTS
ADAPTER
FIGURE 2.10
FIGURE 2.11
STEP 2: Refer to Section "OPERATING
INSTRUCTIONS - RECYCLING OPERATION".