


Initial Counter Balance & Weight
Carrier Installation
10
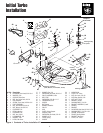
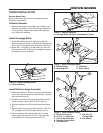
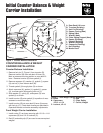
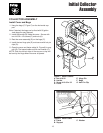
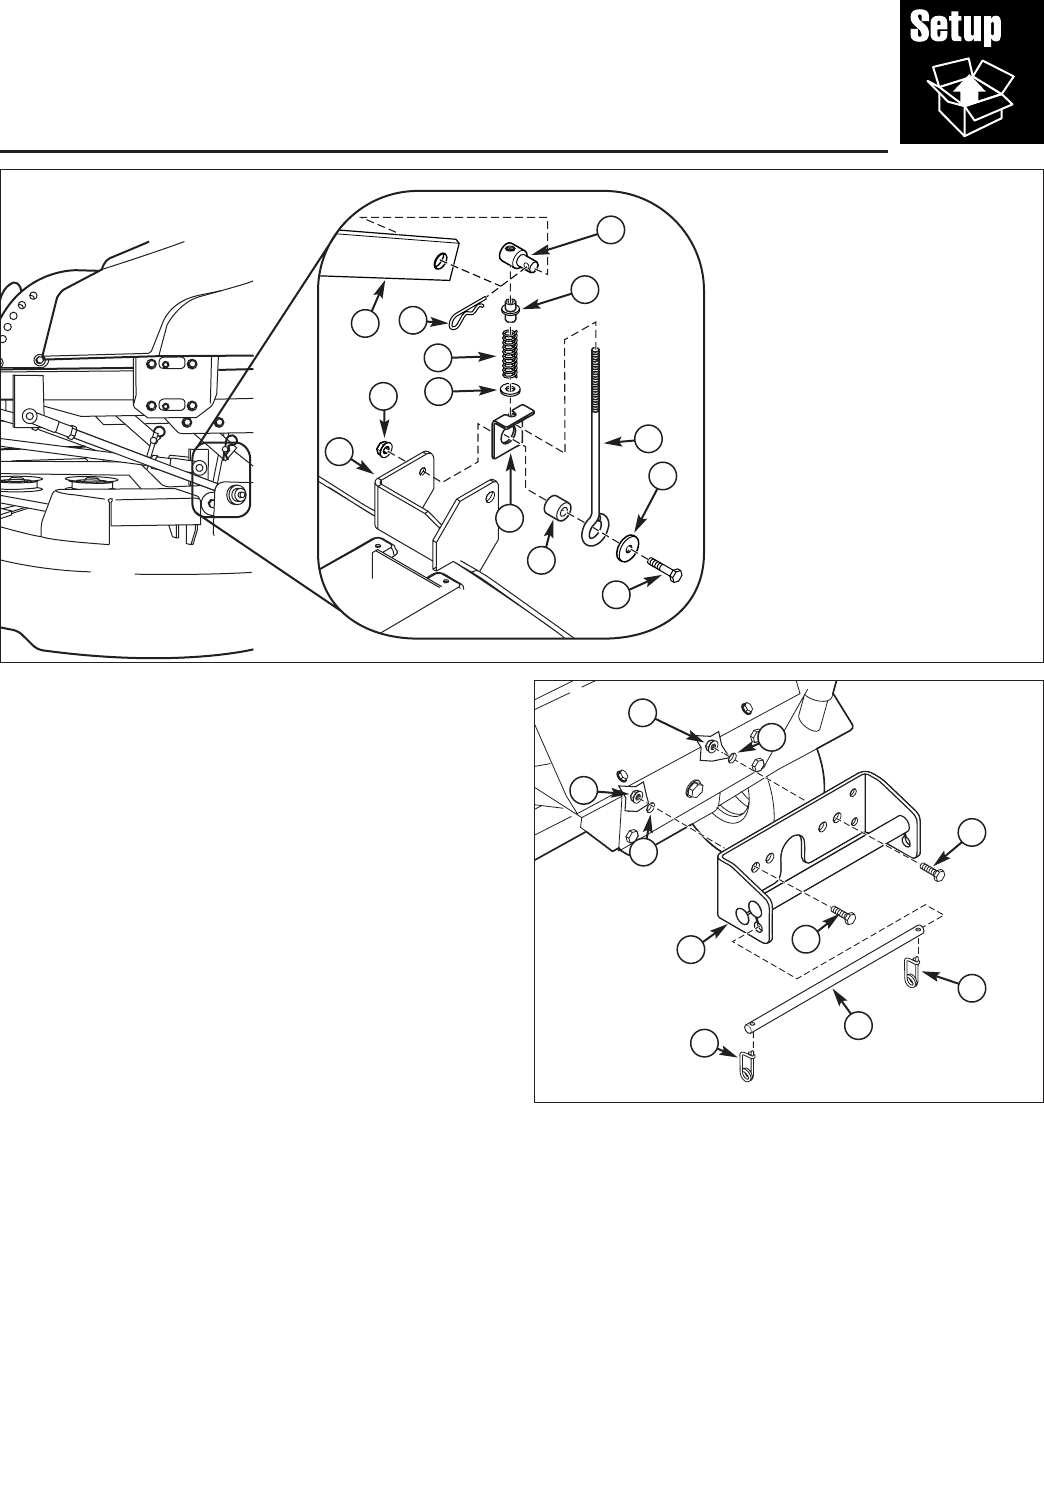
Figure 1. Counter Balance Installation
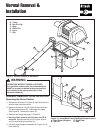
Figure 2. Front Weight Carrier Installation
A. Holes D. Rod
B. Capscrews, E. Clips, Safety
1/2-13 x 1-1/4 F. Carrier, Weight
C. Locknut, 1/2-13
B
D
A
L
F
G
H
K
I
J
E
C
M
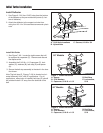
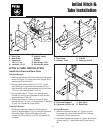
A. Rear Deck Lift Lever
B. Trunnion (Existing)
C. Hair Pin (Existing)
D. Spacer, Spring (New)
E. Spring (New)
F. Washer (New)
G. Plate, Spring Support (New)
H. Spacer (Existing)
I. Eyebolt (Existing)
J. Washer (Existing)
K. Capscrew (Existing)
L. Nut (Existing)
M. Mower Deck
D
F
B
B
E
COUNTER BALANCE & WEIGHT
CARRIER INSTALLATION
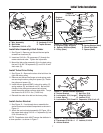
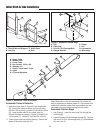
Counter Balance Installation
1. Remove hair pin (C, Figure 1) from trunnion (B).
Remove trunnion (B) from rear deck lift lever (A).
Mark or measure trunnion position on rear deck lift
lever. Remove trunnion (B) from eyebolt (I).
2. Remove capscrew (K), washer (J), eyebolt (I), spacer
(H) and nut (L) from mower deck (M).
3. Thread eyebolt (I) through plate (G) as shown.
4. Attach capscrew (K), washer (J), eyebolt (I), spacer
(H), to mower deck (M) securing with nut (L).
5. Slide washer (F), spring (E), and spacer (D) onto
eyebolt (I) as shown.
6. Install trunnion (B) onto eyebolt (I) to position of mea-
surement or mark from step 1.
7. Install trunnion (B) into rear deck lift lever (A) secure
with hair pin (C). Check deck leveling as described in
Operators Manual and make necessary adjustments.
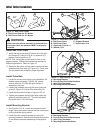
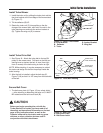
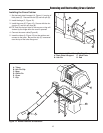
Front Weight Carrier Installation
1. Install carrier (F) as shown securing with 1/2-13 x 1-1/4
capscrews (B), and 1/2-13 locknuts (C).
2. Rod (D) and safety clip (E) are used to secure required
weights.
E
A
A
C
C