


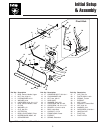


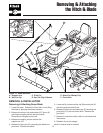


Figure 9. Install pivot hitch Assembly
A. Safety Clip C. Long Hitch Pin
B. Pivot Hitch D. Sub-Frame Hitch
10
Initial Setup & Assembly
INITIAL SETUP & ASSEMBLY
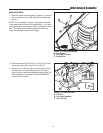
Assemble Blade
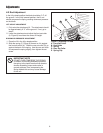
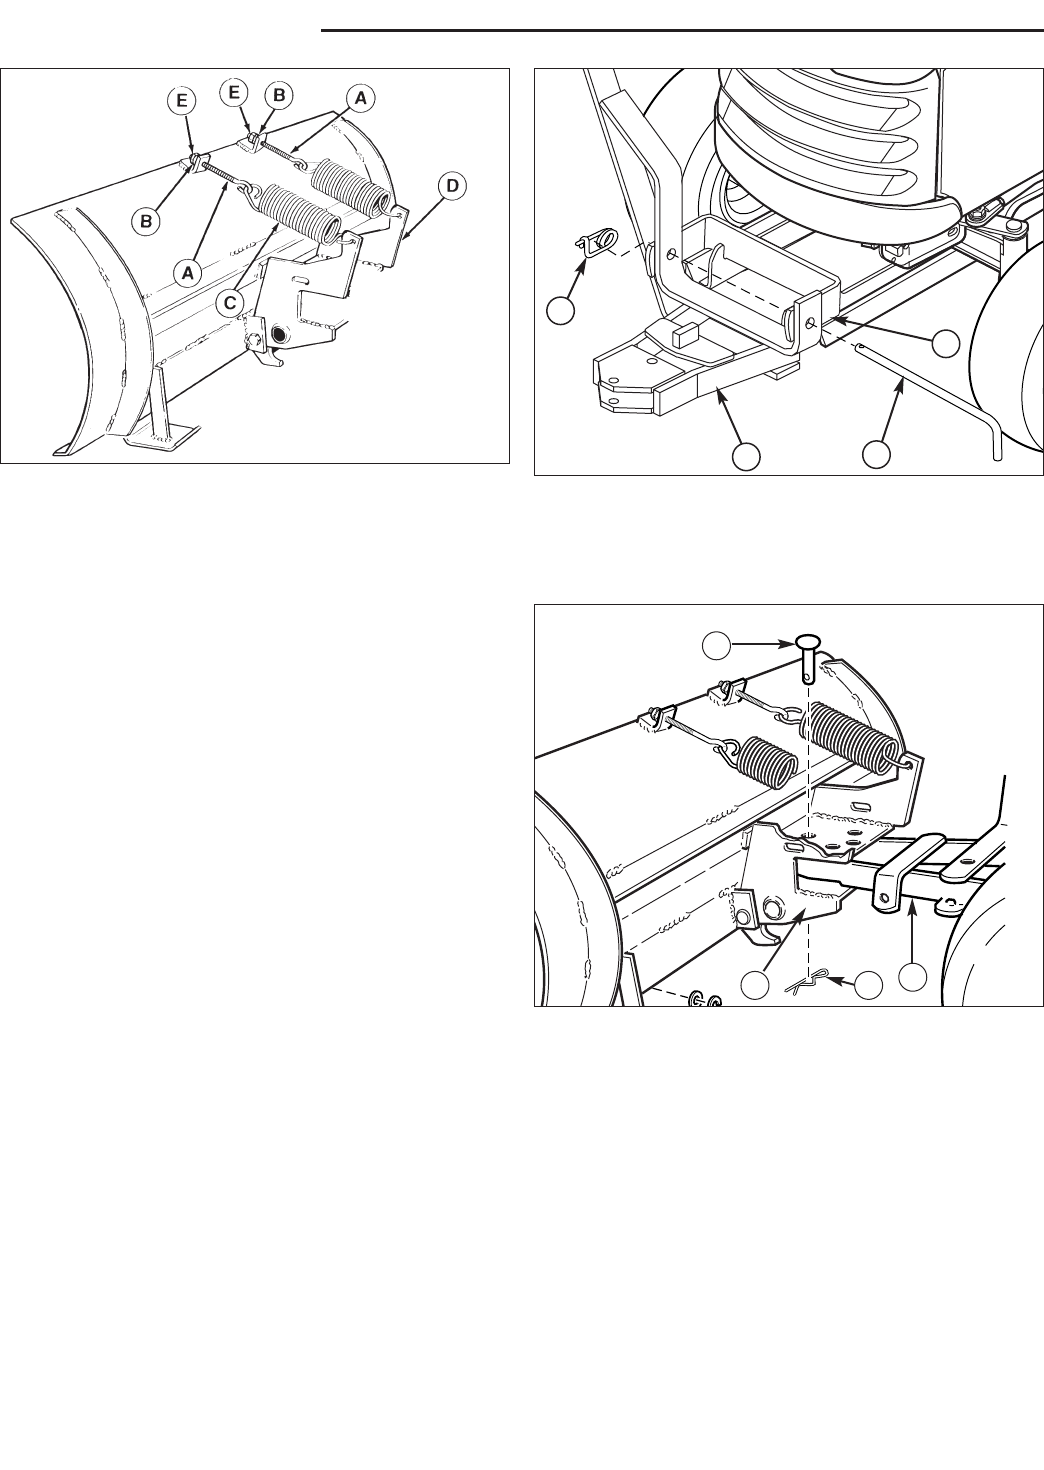
1. See Figure 8. Insert threaded end of eyebolt (A)
through lug on blade, and screw on 5/16 nut (B) just
far enough so that it is flush with the end of the eye-
bolt.
2. See Figure 8. Hook the springs (C) into the pivot
frame (D). Using a pliers, stretch the springs to hook
the opposite ends to the eyebolts (A).
3. See Figure 8. Tighten the nut (B) on each eyebolt
enough to expose about 3/4" (19 mm) of thread.
4. See Figure 8. Holding the first nut (B) with a
wrench,add a second nut (E) to each eyebolt, and
tighten securely against the first nut to act as a jam
nut.
Install Pivot Hitch
1. Position the pivot hitch (B, Figure 9) under the front of
the sub-frame hitch (D).
2. Secure the pivot hitch (B) to the front set of holes in
the sub-frame hitch (D) and secure using the long
hitch pin (C, included with the sub-frame hitch) and
safety clip (A).
Install Dozer Blade
1. Insert the front of the pivot hitch (A, Figure 10) into
pivot frame (B) on rear of blade. Then install pivot pin
(C) down thru front holes in blade and push bar.
Secure the pivot pin (C) with a spring clip (D).
Figure 8. Tension Springs
A. Eyebolt D. Pivot Frame
B. Nut, 5/16 E. Nut, 5/16
C. Spring
Figure 10. Dozer Blade Assembled and Installed
A. Pivot Hitch C. Pivot Pin
B. Pivot Frame D. Spring Clip
A
B
C
D
A
B
C
D