


3
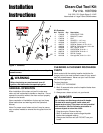
Clean-Out Tool Kit Installation Instructions
(TUBE HANDLE MODELS)
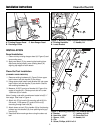
1. Remove existing hardware (A, Figure 5) from upper
hole on left side handle (C) as shown. Discard cap-
screw (D).
2. Using square hole install lower bracket (B) into upper
hole on left side handle (C) as shown. Secure with
new 5/16-18 x 2 capscrew (D) and nut (A).
Note: In some cases the upper hole in the left side han-
dle is crimped flat. If so use 5/16-18 x 1 capscrew (D).
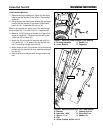
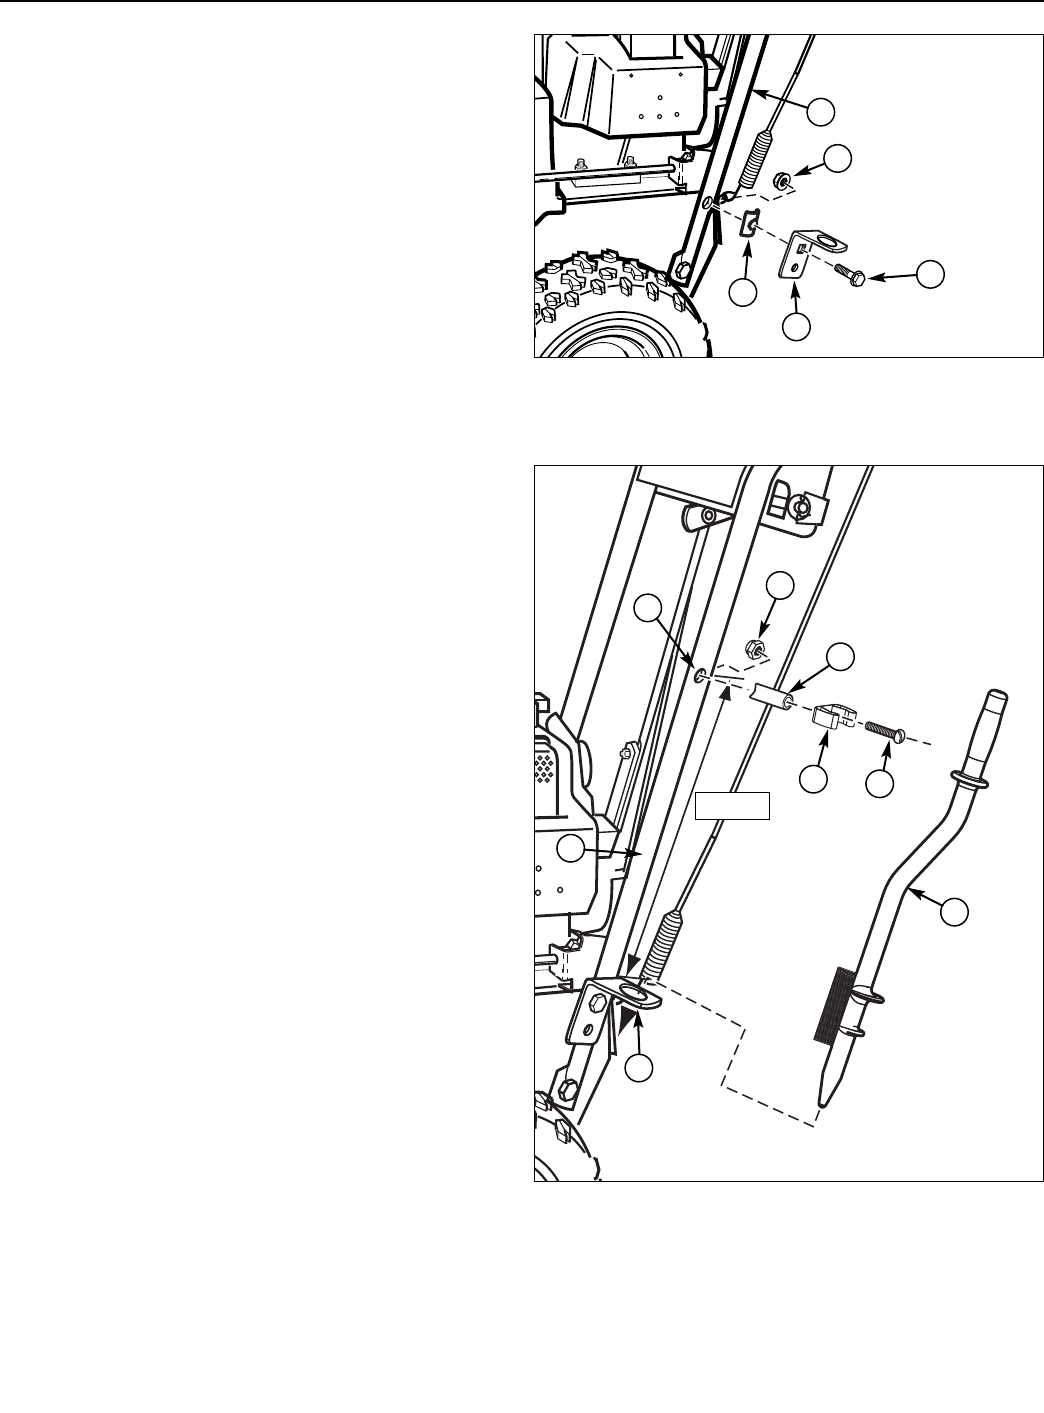
3. Measure 16-3/8” from top of bracket (A, Figure 6) to
center of handle (B). Center punch and drill a new
13/64 hole (B) in handle (H).
4. Attach clip (D) to handle (H) securing with #10-24 x
2-1/2 screw (E), 1-1/4” spacer (C), and #10-24 lock-
nut (F) mounting through new hole (B).
5. Attach clean out tool (G) to handle (H) by first placing
pointed end into bracket (A), then pushing hand grip
into clip (D).
6. Read and follow warnings when using the clean-out
tool.
Figure 5. Mounting Lower Bracket (Tube Handle)
A. Existing Hardware C. Handle, LH
B. Lower Bracket D. Capscrew
A
C
B
D
A
16-3/8”
A
C
B
D
E
F
H
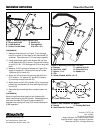
Figure 6. Mounting Clean-Out Tool (Tube Handle)
A. Bracket F. Locknut, #10-24
B. New Hole, 13/64” G. Clean-Out Tool
C. Spacer, 1-1/4” H. Handle, LH
D. Clip
E. Screw, Slotted, #10-24 x 2-1/2
G