


2
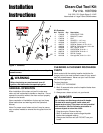
Installation Instructions Clean-Out Tool Kit
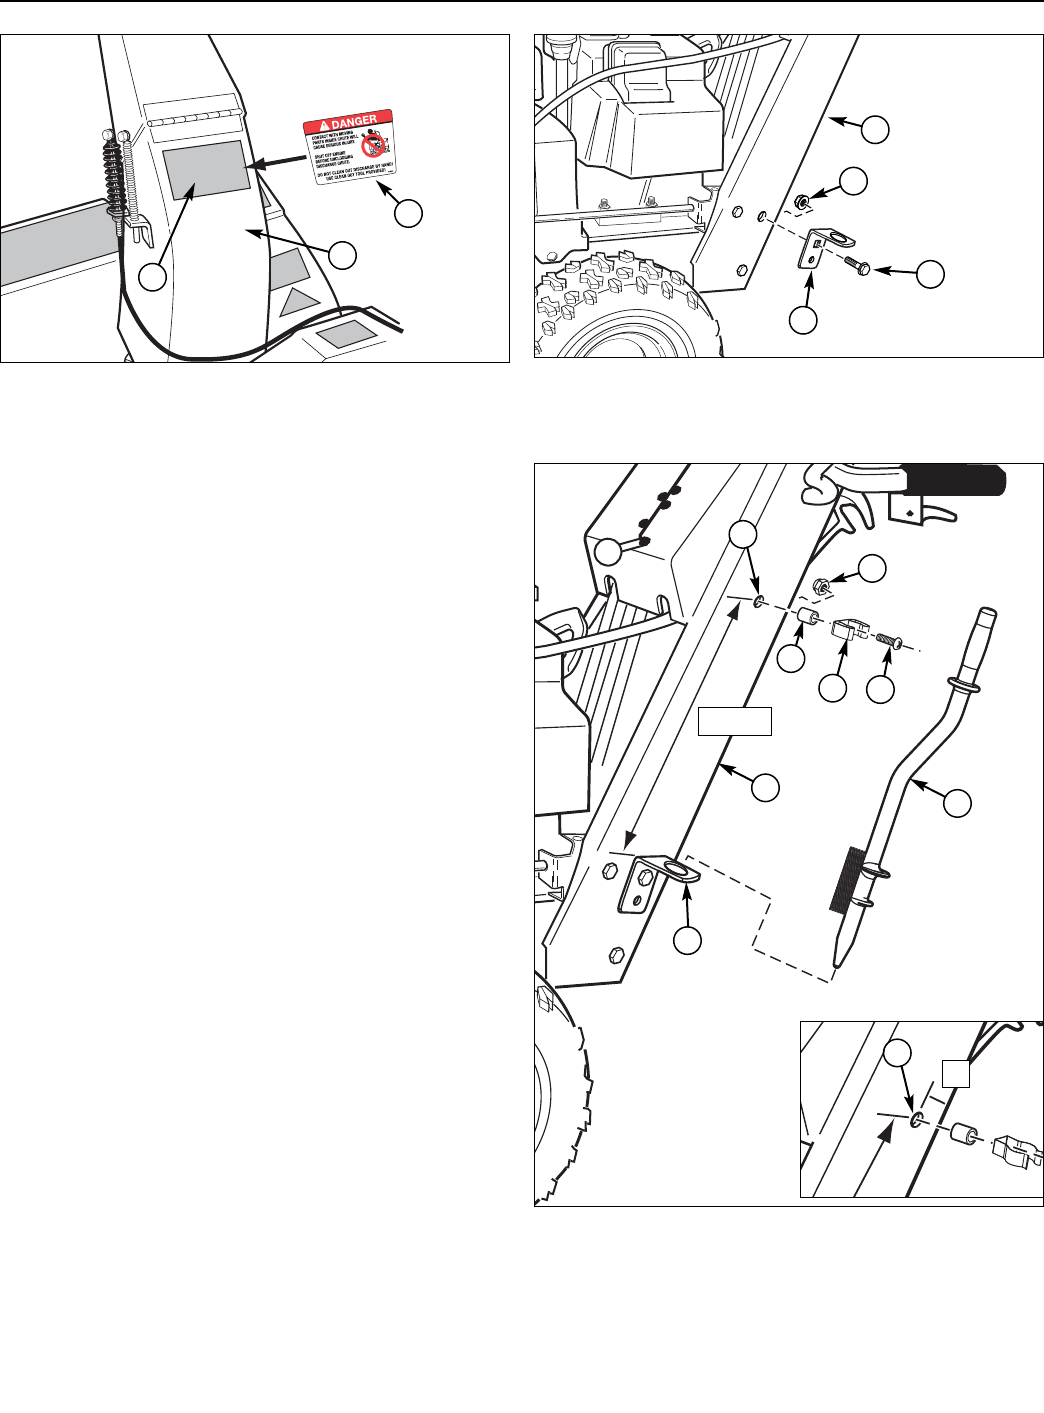
INSTALLATION
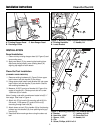
Decal Installation
1. Clean and dry existing danger decal (A, Figure 2) and
surrounding area.
2. Apply new decal (C) by removing the backing from
decal and placing directly over existing decal (A)
aligning top edges of both decals.
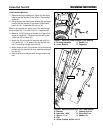
Clean-Out Tool Installation
(CHANNEL HANDLE MODELS)
1. Remove existing hardware (A, Figure 3) from upper
back hole on left side handle (C) as shown.
2. Using square hole install lower bracket (B) into upper
back hole on left side handle (C) as shown. Secure
with existing hardware (A).
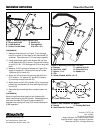
3. Measure 16-3/8” from top of bracket (A, Figure 4) to
center of handle (B). Center punch and drill a new
13/64 hole (B) in handle.
Note: If using a cab with snowthrower locate hole (B) 1”
from edge. See inset in Figure 4.
4. Attach clip (D) to handle (H) securing with #10-24 x
3/4 screw, 11/32 spacer (C), and #10-24 nut (F)
mounting through new hole (B).
5. Attach clean out tool (G) to handle (H) by first placing
pointed end into bracket (A), then pushing hand grip
into clip (D).
6. Read and follow warnings when using the clean-out
tool.
Figure 2.
A. Existing Danger Decal C. New Danger Decal
B. Discharge Chute
A
C
B
Figure 3. Mounting Lower Bracket (Channel Handle)
A. Existing Hardware C. Handle, LH
B. Lower Bracket
16-3/8”
A
C
B
A
C
B
A
Figure 4. Mounting Clean-Out Tool (Channel Handle)
A. Bracket F. Locknut, #10-24
B. New Hole, 13/64” G. Clean-Out Tool
C. Spacer, 11/32, H. Handle, LH
D. Clip
E. Screw, Phillips, #10-24 x 3/4
D
E
G
F
1”
B
H