


36
www.simplicitymfg.com | www.snapper.com
MAINTENANCE
ROLLER BAR LEVELING
(SELECT MODELS)
The rollers on this Zero Turn unit are not intended to
ride on the ground. DO NOT adjust rollers to ride on
the ground. Rollers riding on the ground will damage
turf and or unit.
1. First level the mower deck using the procedure
found in MOWER DECK LEVELING.
2. With the mower installed, place the rider on a
smooth, level surface such as a concrete floor.
Turn the front wheels so they are straight.
3. Place the mower cutting height pin in the 4th hole
from the bottom (C, Figure 36).
4. Measure the distance between the outside ends of
the roller bar and the ground. If there is more than
1/8” (3mm) difference between the measurements
on each side, proceed to step 5.
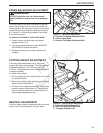
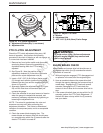
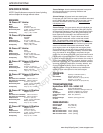
5. Locate the roller bar leveling eccentric and
locknuts (A, Figure 35). Loosen the locknut and
turn the eccentric to raise or lower a side. When
the correct level is achieved, hold the eccentric
with a wrench and tighten the locknut. Repeat
step 4 if necessary.
Figure 35. Roller Bar Leveling
A. Eccentric and Locknut
A
MOWER BELT REPLACEMENT
1. Park the rider on a smooth, level surface such as
a concrete floor. Disengage the PTO, engage the
parking brake, turn off the engine, and remove the
ignition key.
2. Raise the mower deck to transport position.
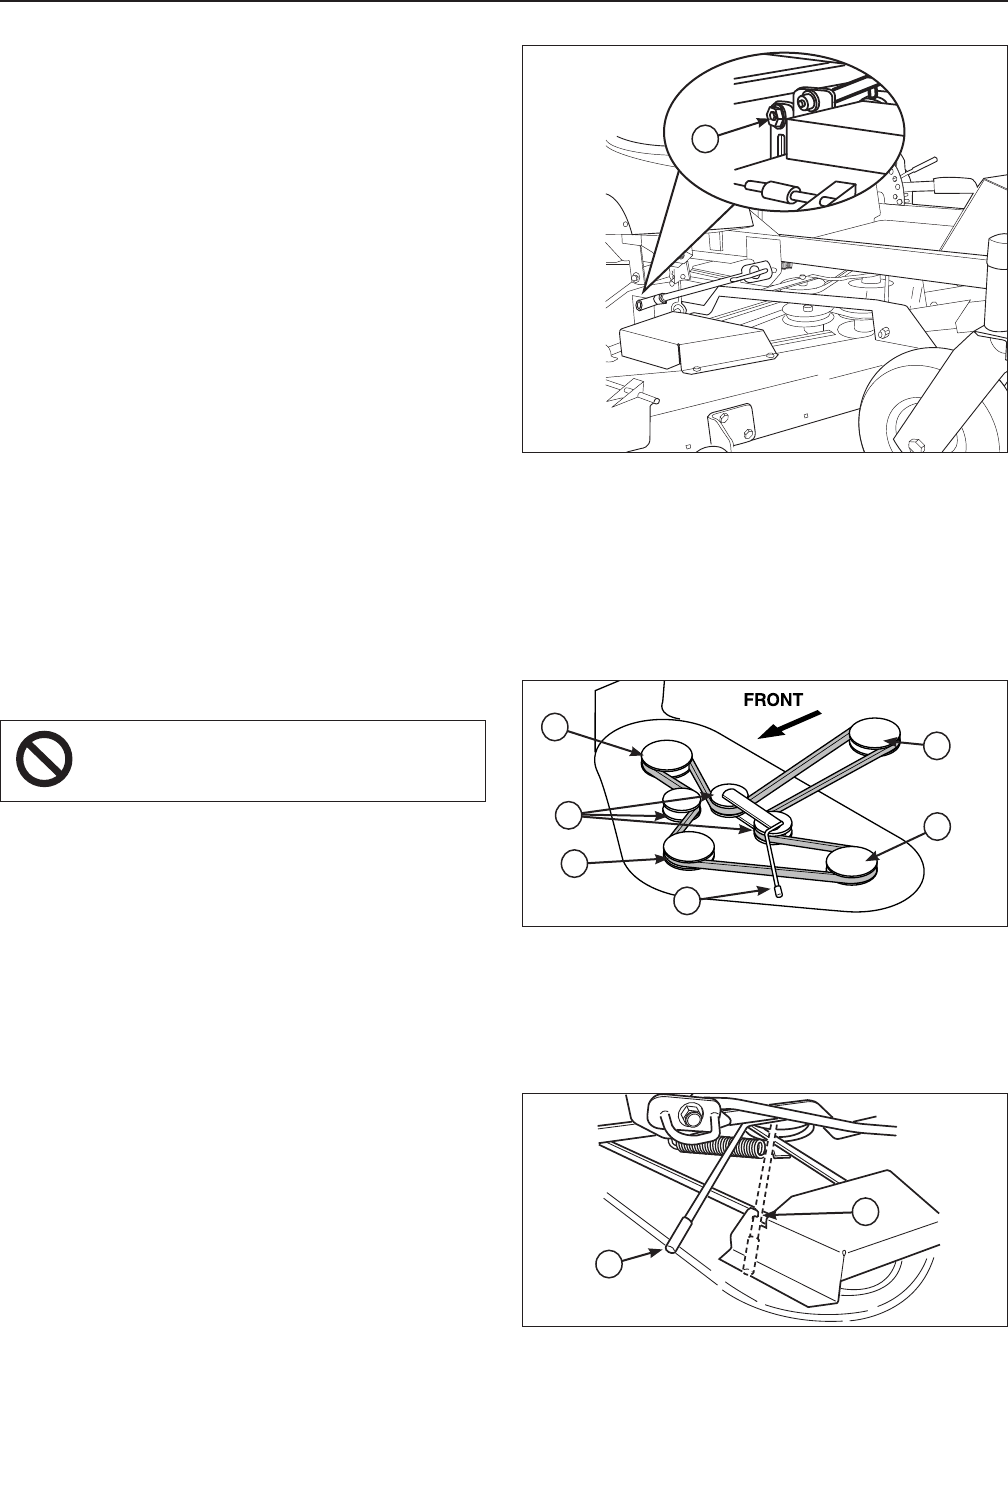
Pull the lever (A, Figure 37) towards the rear of
the machine to release tension on the mower
belt. Secure the lever in the guard notch (B), if
equipped.
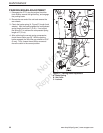
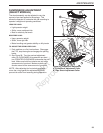
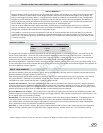
3. Remove the old drive belt and install the new
one as shown in Figure 36. Note that the back
of the drive belt must ride against the back-side
idler pulleys (B). Use the belt tension lever (A,
Figure 37) to release tension on the idler pulley for
installation.
To avoid damaging belts, DO NOT
PRY BELTS OVER PULLEYS.
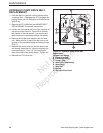
Figure 36. Mower Belt Routing
A. Arbor Pulleys
B. Back-Side Idler Pulleys
C. PTO Pulley
D. Belt Tension Release Lever
A
A
A
C
D
B
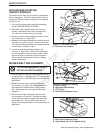
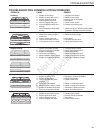
Figure 37. Release Belt Tension
A. Belt Tension Release Lever
B. Guard Notch (44” & 50” Models Only)
A
B
Not for
Reproduction