


300 Hour Maintenance
9
Maintenance
WARNING!
Before performing any main-
tenance, repair, or cleaning work on
the unit, make sure the engine and
cutting attachment are completely
stopped. Disconnect the spark plug
wire before performing service or
maintenance.
WARNING!
Non-standard acces-
sories, cutting attachment, or
replacement parts may not oper-
ate properly with your unit and
may cause damage and lead to
personal injury.
Prior to each work day, perform the
following:
Remove all dirt and debris from the ■
engine, check the cooling ns and
air cleaner for clogging, and clean
as necessary.
Make sure nuts, bolts, and screws ■
(except carburetor idle speed ad-
justing screws) are tight.
Daily Maintenance
Carefully remove any accumulations ■
of dirt or debris from the mufer and
fuel tank. Check cooling air intake
area at base of crankcase. Remove
all debris. Dirt build-up in these areas
can lead to engine overheating, re,
or premature wear.
Clean any debris or dirt from the ■
cutting attachment.
Check for loose or missing screws ■
or components. Make sure the
cutter attachment is securely
fastened.
Check the entire unit for leaking ■
fuel or grease.
IMPORTANT!
For detailed maintenance information
about your unit, consult the owner's
manual that was provided with it. If it
has been lost or misplaced, contact
Shindaiwa for a replacement.
NOTE
Using non-standard replacement
parts could invalidate your Shindaiwa
warranty.
Gearcase Lubrication
The gearcase should be lled with 60
cc (2.0 .oz.) of Mobil SHC634 Syn-
thetic Gear Oil. A maximum of 75-80 cc
can be used, but never to exceed 80
cc. Operation with excessive oil level
will result in high operating tempera-
tures. Do not overll!
Replacing the gearcase oil
Turn the gearcase to the LH side 4.
and and allow all used gearcase oil
to drain into a small container.
NOTE:
It may be necessary to use a heat gun
to soften the sealer material.
WARNING!
BURN DANGER! The
gearcase will be extremely hot
after use!
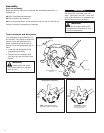
Disconnect spark plug wire at 1.
engine.
Remove the LH Drum and axle 2.
assembly (as viewed from the oper-
ating position). Wipe the sideplate
clean and remove four screws (it
is not necessary to remove the
gearcase from the outer tube).
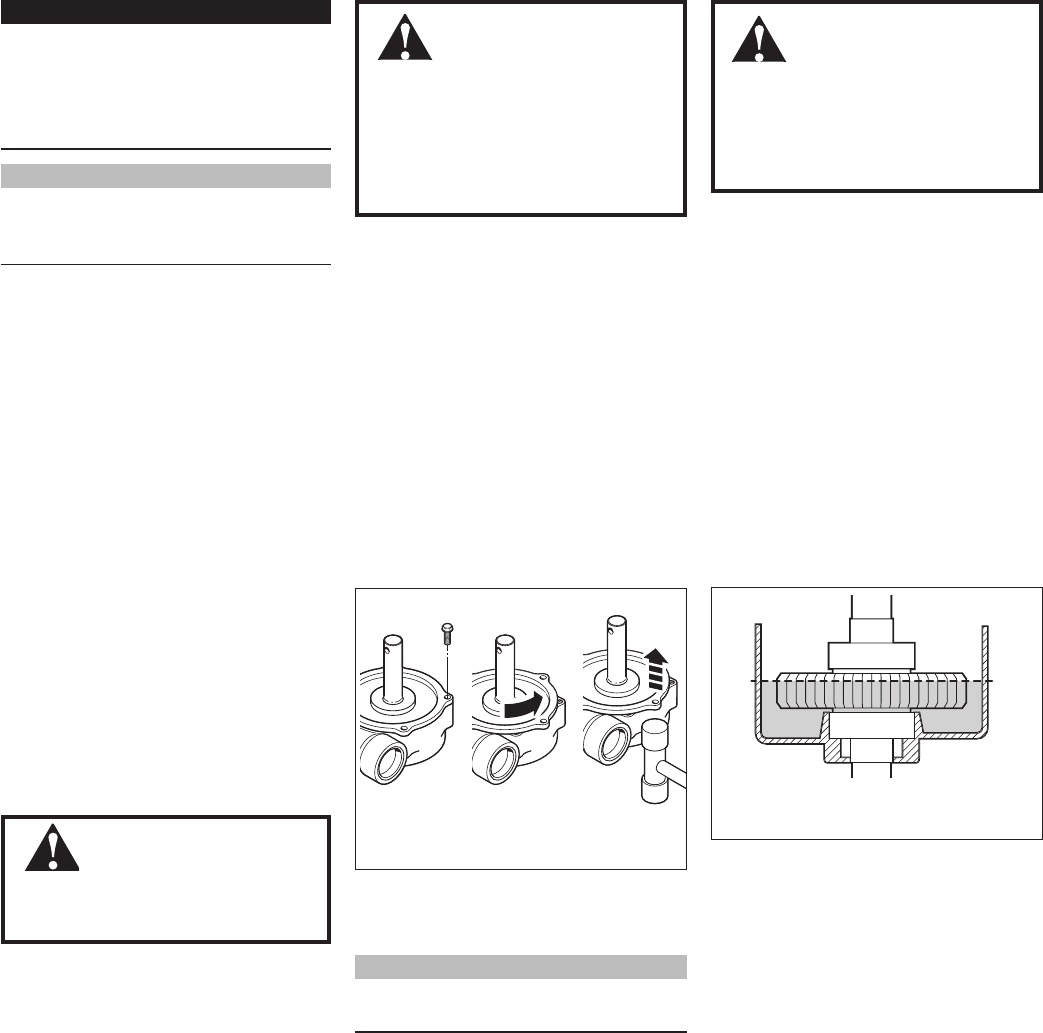
Turn gearcase side plate to break 3.
the seal and lift the plate from the
gearcase.
Inspect the sideplate for damage and 6.
clean off all remaining liquid gasket
material with brake cleaner or ace-
tone. Coat the outer sealing ange
of the sideplate with Loctite Ultragrey
Silicon Sealant or Threebond No.
1104 Liquid Gasket.
Replace the cover and install the 7.
four sideplate screws. Tighten
securely.
Reinstall the drum and axle assem-8.
bly per the sweeper assembly
instructions.
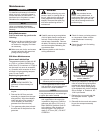
Place the gearcase on the RH side 5.
and supported so the outer tube
is parallel to the ground. Rell the
gearcase with 60 cc (2.0 .oz) of
Mobil SHC634 Synthetic Gear Oil
to the bottom of the chamfer on
the output gear. The correct oil
depth is 15.5 mm (5/8"). DO NOT
OVERFILL!
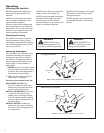
Turn gearcase side plate to break the seal
and lift the plate from the gearcase
Fill the gearcase to the bottom of
the chamfer on the output gear.
DO NOT OVERFILL!