


3
Connecting
Rod
Lever
Washer
Hitch Pin
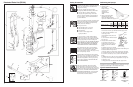
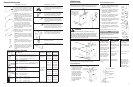
Install the Pump Lever and
Connecting Rod
Washer
Washer
Hitch Pin
Pump Lever
Shaft
1. Lightly grease the end of the pump lever connecting rod
and insert into the upper hole in the pump lever. Secure
with flat washer and hitch pin.
2. Install a flat washer on the opposite end of the connecting
rod. Lightly grease the rod end and insert it into the hole on
the top of the pump chamber. Secure with flat washer and
hitch pin.
3. Install a flat washer on the pump lever shaft.
4. Lightly grease the hole on the end of the pump lever and
assemble on to the pump lever shaft. Secure with flat
washer and hitch pin.
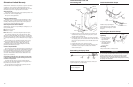
Push the wand into the trigger valve and secure with screw
cap. Hand tighten to prevent leakage.
CAUTION!
Do not overtighten!
Trigger
Valve
Wand Screw
Cap
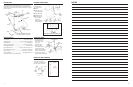
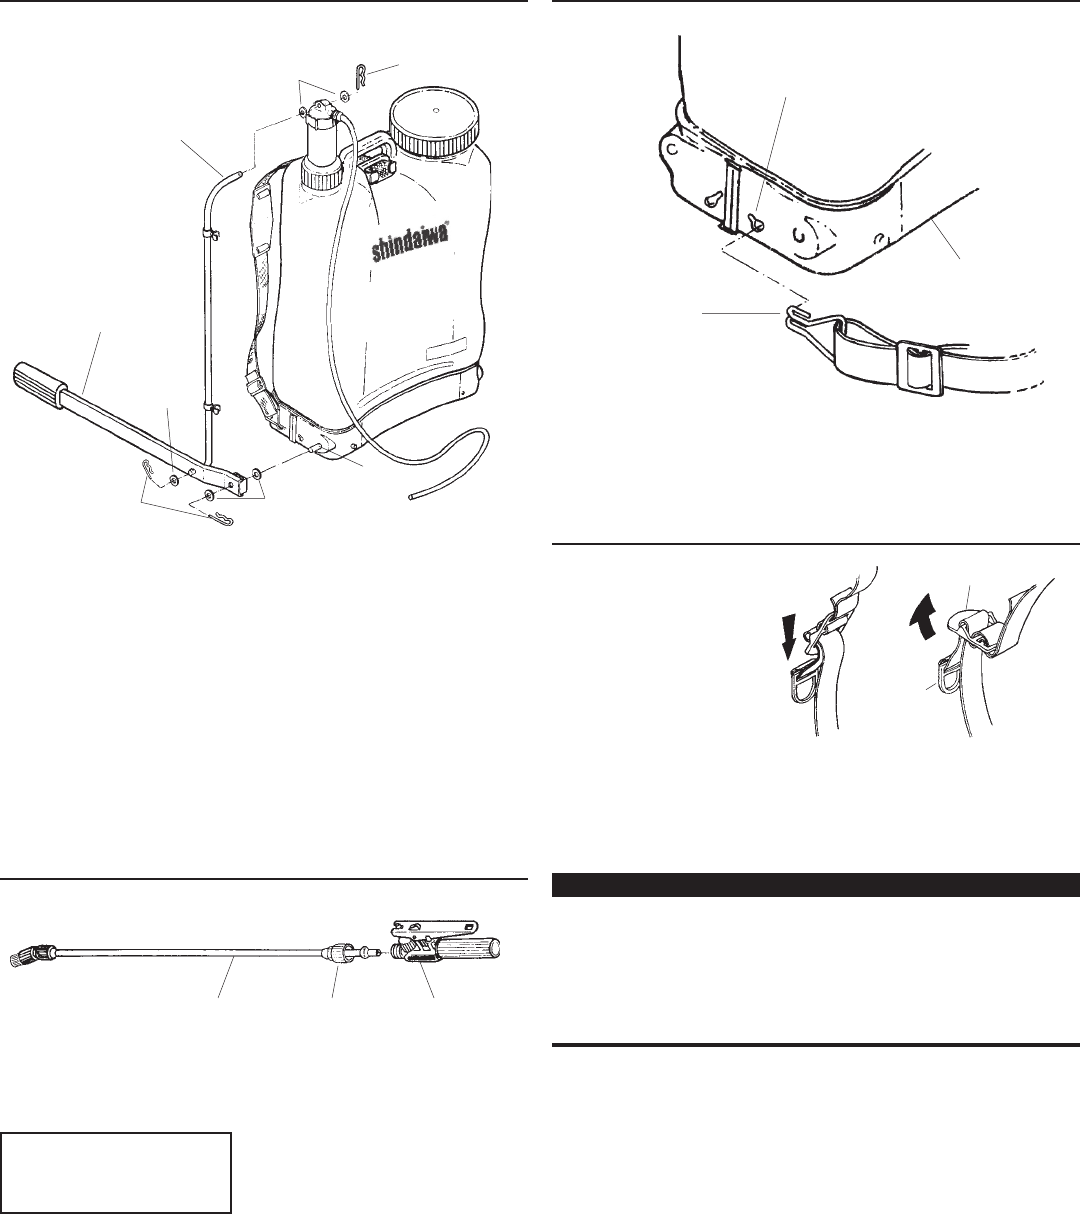
Install the Shoulder Straps
Install the straps by fitting the
strap hook into the slot in the tank
base and then turning it 90
0
to lock
into place.
Tank
Base
Strap
Hook
Slot
Assembling the Spray Wand
Adjustment
Ring
Buckle
Tightening
1. Place the sprayer on
your back with the
staps loosened.
2. Hold the adjustment
ring firmly and pull
until backpack is
secure in place.
Loosening
Lift up on the buckle to release tension.
Adjusting the Shoulder Straps
IMPORTANT!
After assembling the sprayer, fill the tank with clear water and
lay it on its side. Check for leaks. Return sprayer to its upright
position. Pump the lever 10-15 times and check for leaks.
Most leaks can be stopped by tightening the appropriate
connection or fitting. Any leaks must be stopped prior to filling
the sprayer with chemicals.
10
Shindaiwa Inc. manufactures its products to superior standards
of quality to ensure customers obtain the highest level of
satisfaction. In keeping with this goal, Shindaiwa Inc. warrants
the SP518 sprayer to the original purchaser as follows:
Warranty Period
One year from the delivery date to the original purchaser for
consumer and commercial applications.
90 days for rental applications.
Warranty Administration
Within the covered warranty period, Shindaiwa Inc. will, at
their option, repair or replace any defect in material or work-
manship, without charge for parts or labor, if this product is
presented at an authorized Shindaiwa dealer.
Warranty Exclusions and Limitations
Shindaiwa Inc. assumes no responsibility for damages, loss, or
injury resulting from:
■ Normal wear and tear
■ Misuse or neglect
■ Modifications to or removal of original component parts
The warranty is limited to the terms stated herein. Shin-
daiwa Inc. disclaims all liability for incidental or consequential
damages. Some states do not allow the exclusion of incidental
or consequential damages, so these limitations may not apply to
you.
This warranty give you specific legal rights, and you may
also have other rights which may vary from state to state.
Shindaiwa reserves the right to change the design or
specifications of this product without obligation to modify
previously manufactured products.
Owner’s Responsibilities
The owner of the sprayer must demonstrate reasonable care
in the use, maintenance, and storage of this Shindaiwa product.
If a warrantable failure should occur, the owner must deliver
the product to an authorized Shindaiwa servicing dealer for
correction. All residual chemicals must be flushed from the
sprayer prior to delivery.
Unidentified chemicals left in the sprayer tank can pose
a serious health threat to anyone servicing the unit and
unaware of its presence!
To obtain warranty service, proof of purchase must be
presented to the authorized Shindaiwa servicing dealer when
the product is presented for repairs.
Proof of purchase must include date of purchase and the
name and address of the selling dealer.
Shindaiwa Limited Warranty