


9
Every 10 to 15 hours of operation:
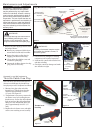
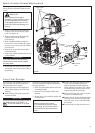
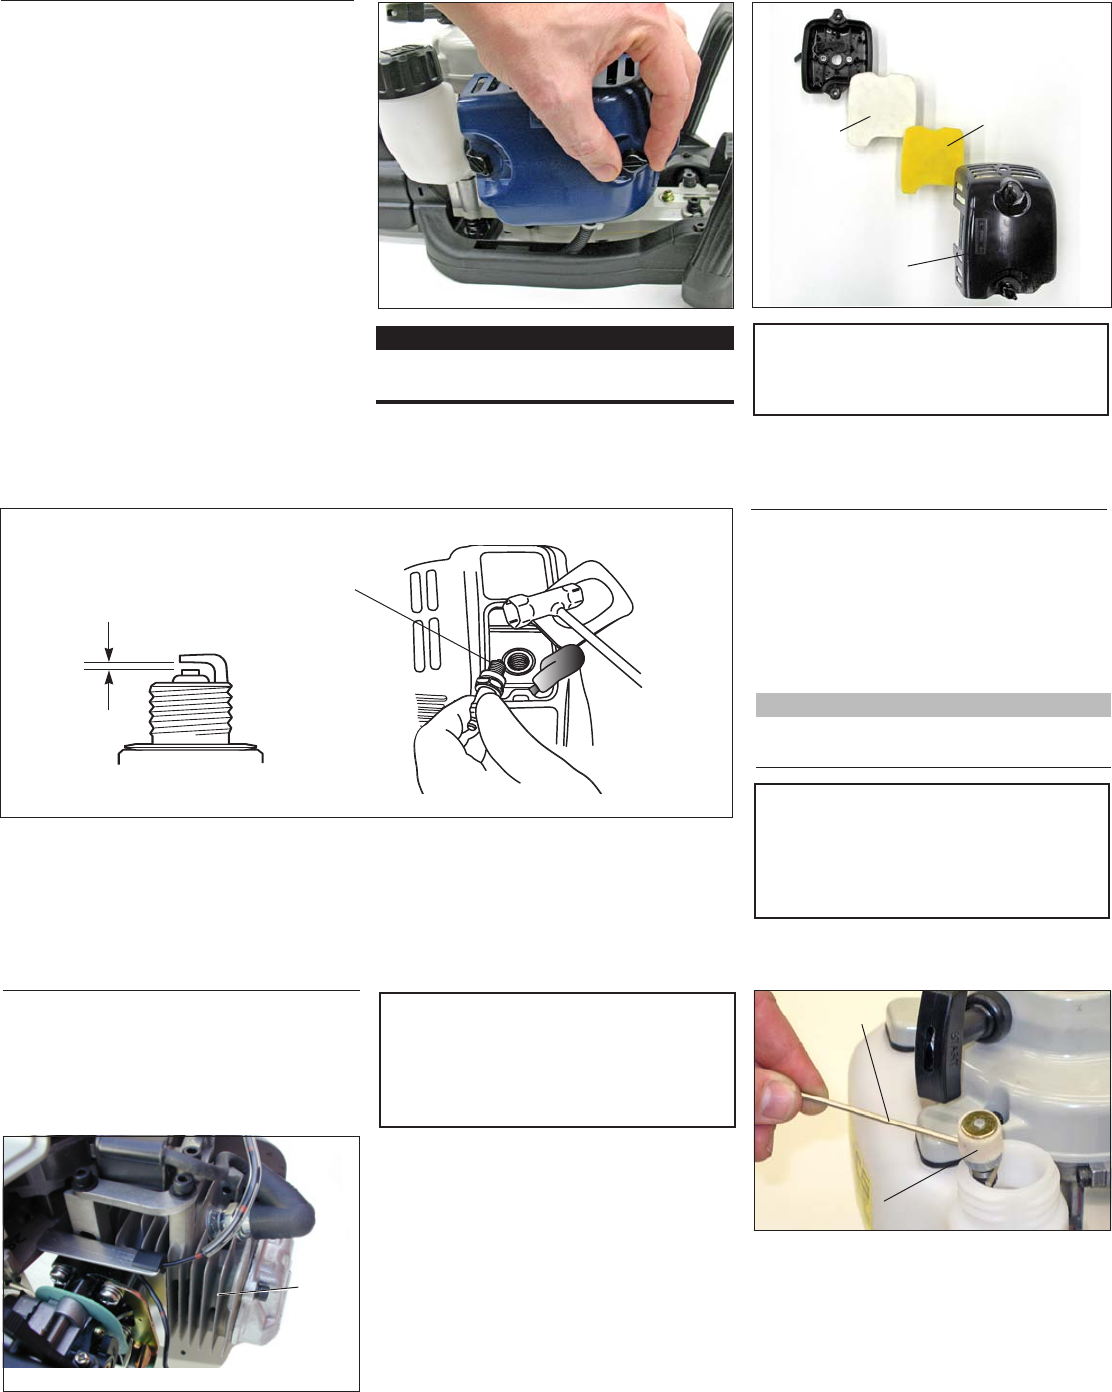
n Remove and clean the spark plug. Adjust
the spark plug electrode gap to 0.6 - 0.7
mm. If the spark plug must be replaced,
use only an NGK CMR5H or equivalent
resistor type spark plug of the correct
heat range. See Figure 17.
CAUTION!
Before removing the spark plug, clean
the area around the plug to prevent
dirt and debris from getting into the
engine’s internal parts.
Clean the spark plug
and check the gap at
the electrode.
10/15-Hour Maintenance
0.6–0.7 mm
Figure 17
NOTE:
The NGK CMR5H also meets the require-
ments for electro magnetic compliance (EMC).
n Remove and clean the cylinder cover and
clean grass and dirt from the cylinder fins.
Every 50 hours of operation
(more often in dusty or extreme
conditions)
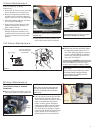
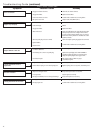
Clean
Debris
Hooked
Wire
Figure 18
50-Hour Maintenance
Filter Element
Figure 19
CAUTION!
Make sure you do not pierce the fuel
line with the end of the hooked wire.
The line is delicate and can be dam-
aged easily.
n Use a wire hook to extract the fuel filter
from inside the fuel tank. (Figure 19).
Inspect the fuel filter element. If it shows
signs of contamination from debris,
replace it with a genuine Shindaiwa
replacement fuel filter element. Before
reinstalling the filter, inspect the fuel
line. If you discover damage or deterio-
ration, the unit should be removed from
service unitl it can be inspected by a
Shindaiwa-trained service technician.
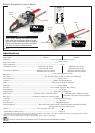
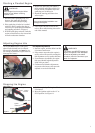
Figure 16 B
Filter
Element
Air Cleaner
Cover
Pre-
Filter
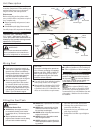
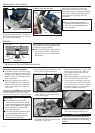
10-Hour Maintenance
(more frequently in dusty
conditions)
1.
Remove the air cleaner cover by loosening
the two thumbscrews. See Figure 16A
.
2. Remove and inspect the pre-filter. If the
pre-filter is torn or otherwise damaged,
replace it with a new one. See Figure 16B.
3. Clean the pre-filter with soap and water.
Let dry before reinstalling.
4. Inspect the air cleaner element. If the
element is damaged or distorted, re-
place it with a new one.
5. Tap filter gently on a hard surface to
dislodge debris from element or use
compressed air from the inside to blow
debris out and away from the air filter
element.
CAUTION!
Never operate the unit if the air cleaner
assembly is damaged or missing!
IMPORTANT!
Direct the air stream at the inside face of
the lter only!
6. Install the filter element, pre-filter and
cover in the reverse order of removal.
Figure 16 A