


8
The engine must return to idle speed
whenever the throttle lever is released.
Idle speed is adjustable, and must be set
low enough to permit the engine clutch to
disengage the cutters.
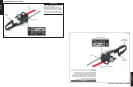
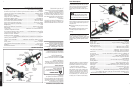
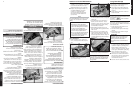
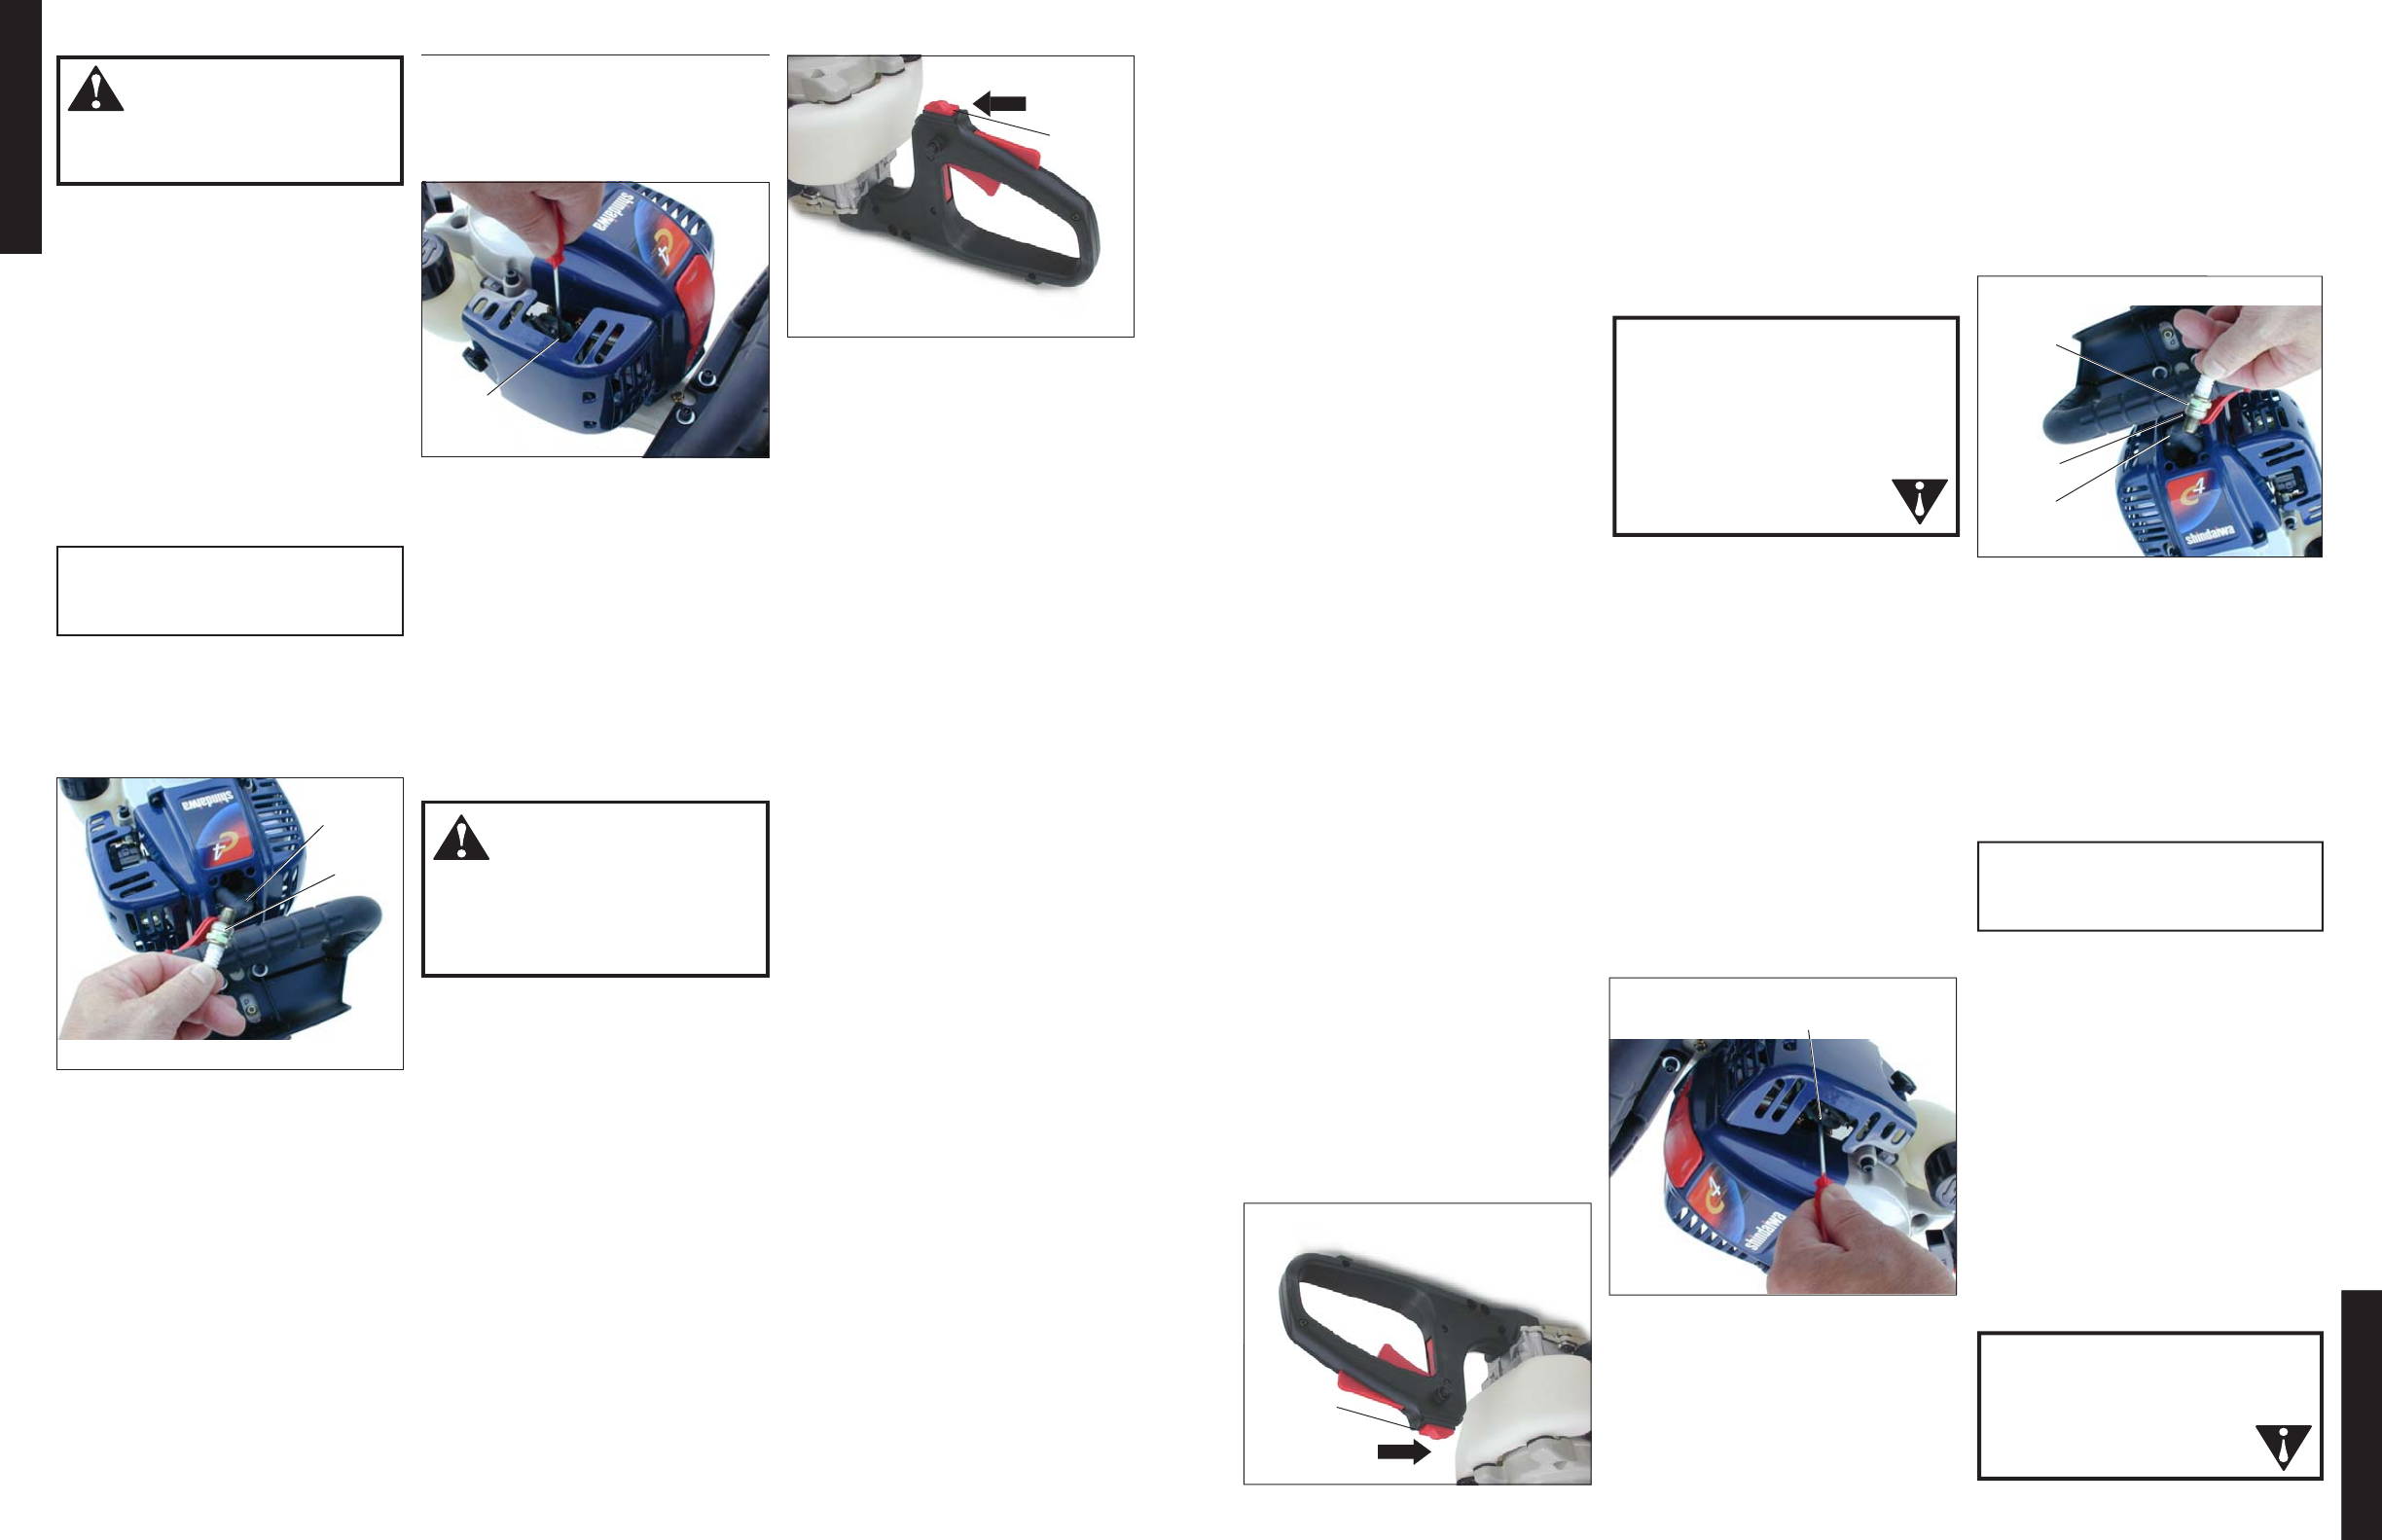
Adjusting Engine Idle Stopping the Engine
Idle Adjust-
ment Screw
Ignition
Switch
Ignition OFF
1. Cool the engine by allowing it to idle for
2–3 minutes.
2. Move the ignition switch to the “O” or
STOP position. See Figure 11.
WARNING!
The cutters must NEVER engage at
engine idle speeds! If the idle speed
cannot be adjusted by the above
procedure, return the trimmer to your
dealer for inspection.
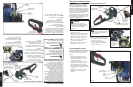
Idle Speed Adjustment
1. Start the engine, and then allow it to
idle 2–3 minutes until warm.
2. If the cutters move when the engine is
at idle, reduce idle speed by turning the
idle adjustment screw counterclock-
wise.
3. If a tachometer is available, the engine
idle speed should be final-adjusted to
3,000 ע250 rpm (min
-1
).
4. Carburetor fuel mixture adjustments
are preset at the factory and cannot be
adjusted or serviced in the field.
Figure 11
Figure 10
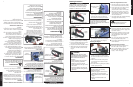
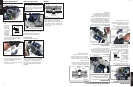
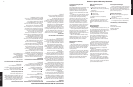
Starting a Flooded Engine
Spark
Plug
Spark Plug
Lead
5. Repeat the starting procedures for a
warm engine.
6. If the engine still fails to start or fire,
refer to the troubleshooting chart at the
end of this manual.
CAUTION!
Incorrect spark plug installation can
damage the engine!
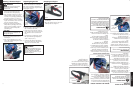
1. Disconnect the spark plug lead, and
then use the spark plug wrench to
loosen and remove the spark plug.
2. If the spark plug is fouled or is soaked
with fuel, clean or replace the plug as
necessary. For spark plug specifications
and gapping procedure, see page 10.
3. With the spark plug removed, crank the
engine several times to clear excess fuel
from the combustion chamber.
4. Replace the spark plug and tighten it
firmly with the spark plug wrench. If a
torque wrench is available, torque the
spark plug to 148-165 inch-pounds
(170-190 kg cm).
WARNING!
Burn danger from hot engine! Allow
engine to cool before removing
cylinder cover.
Figure 9
ENGLISH
La velocidad del motor debe de volver a
marcha mínima en todo momento que el
gatillo de aceleración se libera. La marcha
mínima es regulable y se ajusta, de
acuerdo a las especificaciones del motor,
para que el motor permita que el
embrague centrífugo se desacople de los
engranajes.
Ajuste de la marcha mínima
Parada normal del motor
Tornillo para ajustar la
marcha mínima
Interruptor
de marcha
Parada (O)
1. Permita que el opere en marcha mínima
por dos o tres minutos para que la
temperatura del motor se estabilice.
2. Mueva el botón del interruptor a la
posición O (apagado).
Consulte Figura 11.
¡ADVERTENCIA!
Las cuchillas NUNCA deben moverse
cuando el motor esta operando en
marcha mínima. Si la marcha mínima
no se puede ajustar de acuardo a las
instrucciones proveidas, consulte con
su distribuidor Shindaiwa o centro de
reparación autorizado.
Para ajustar la marcha mínima:
1. Arranque el motor y permita que opere
por dos o tres minutos para que alcance
la temperatura normal de operación.
2. Si las cuchillas se mueven con el motor
operando en marcha mínima, gire el
tornillo de ajuste de marcha mínima en
sentido contrario a la manecillas del
reloj hasta que las cuchillas de
detengan.
3. Si tiene disponible un medidor de
revoluciones para motores de dos
tiempos (tacómetro), ajuste la velocidad
de marcha mínima a 3000
±
250 rpm
(min
-1
).
4. Los tornillos de ajustar la mezcla del
carburador tienen calibración de fábrica
y no se pueden ajustar.
Figura 11
Figura 10
Arranque de un motor
ahogado
Cubierta
Bujia
Cable de la
bujía
¡PRECAUCIÓN!
La instalación incorrecta de la bujía
puede dañar el motor.
1. Deslice el botón del interruptor de
marcha hacia la posición “O” (parada).
2. Afloje el tornillo captivo de la cubierta
del cilindro y retire la cubierta.
3. Desconecte el cable de la bujía , y luego
use la llave de bujías para aflojar y
retirar la bujía.
4. Si la bujía esta atorada o impregnada
con combustible, límpiela o reemplácela
según sea necesario. Consulte la
página 21 para las especificaciones de la
bujía y el proceso de calibración.
5. Una vez retirada la bujía, arranque el
motor varias veces para eliminar el
exceso de combustible en la cámara de
combustión.
¡ADVERTENCIA!
¡Riesgo de quemadura por el motor
caliente. Permita que el motor enfrie
antes de retirar la cubierta del
cilindro.
Figura 9
6. Reinstale la bujía y apriétela firmemente
con la llave de bujías. Si tiene una llave
de torsión disponible , ajuste la bujía a
148-165 pulgadas-libras (170-190 kg-
cm).
7. Reinstale la cubierta del cilindro.
8. Repita el procedimiento de arranque
para un motor caliente.
9. Si aún el motor falla en encender o
arrancar, consulte el guía diagnóstico al
final de este manual.
8
ESPAÑOL