


10
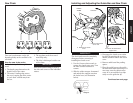
DESCRIPTION
WARNING!
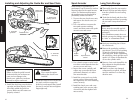
■ Install the appropriate guide-bar
scabbard before transporting the
saw.
■ Never operate a saw that is
damaged, improperly adjusted, or
not completely and securely
assembled.
■ Use only Shindaiwa-recommended
parts when repairing or servicing
this saw.
■ Do not use this saw if the saw
chain continues to move after the
throttle control trigger is released.
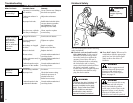
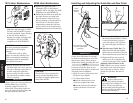
■ Use extra care when cutting a
limb that is under tension! A limb
under tension could spring back
suddenly, causing you to lose
control of the saw!
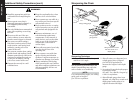
■ Use extreme caution when cutting
smaller brush and saplings! Small-
diameter material may catch in the
chain and be whipped toward you
or pull you off balance, causing
you to lose control of the saw!
■ Operate the saw only in a well
ventilated area.
■ Keep the saw handles dry, clean
and free of oil or fuel mixture.
■ Never operate any saw while in a
tree unless you have been specifi-
cally trained to do so!
■ Never perform service or repairs
to this saw unless you are specifi-
cally trained and equipped to do
so!
■ Improper maintenance, use of
nonconforming replacement
components, or the removal of
safety devices, such as the chain
brake or any of the chain brake
components, could result in
serious injury.
■ Never allow any part of your body
near the clutch cover of an
operating saw.
■ Never operate a saw with dam-
aged or missing anti-vibration
cushions. Long-term exposure to
vibration can damage your hands.
■ Always maintain a firm footing
while operating this saw! Ladders
and other temporary platforms can
shift unexpectedly, and are not
recommended!
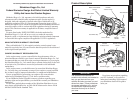
Additional Safety Precautions (cont.)
31
MAINTENANCE
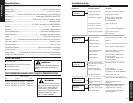
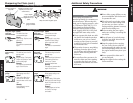
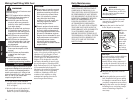
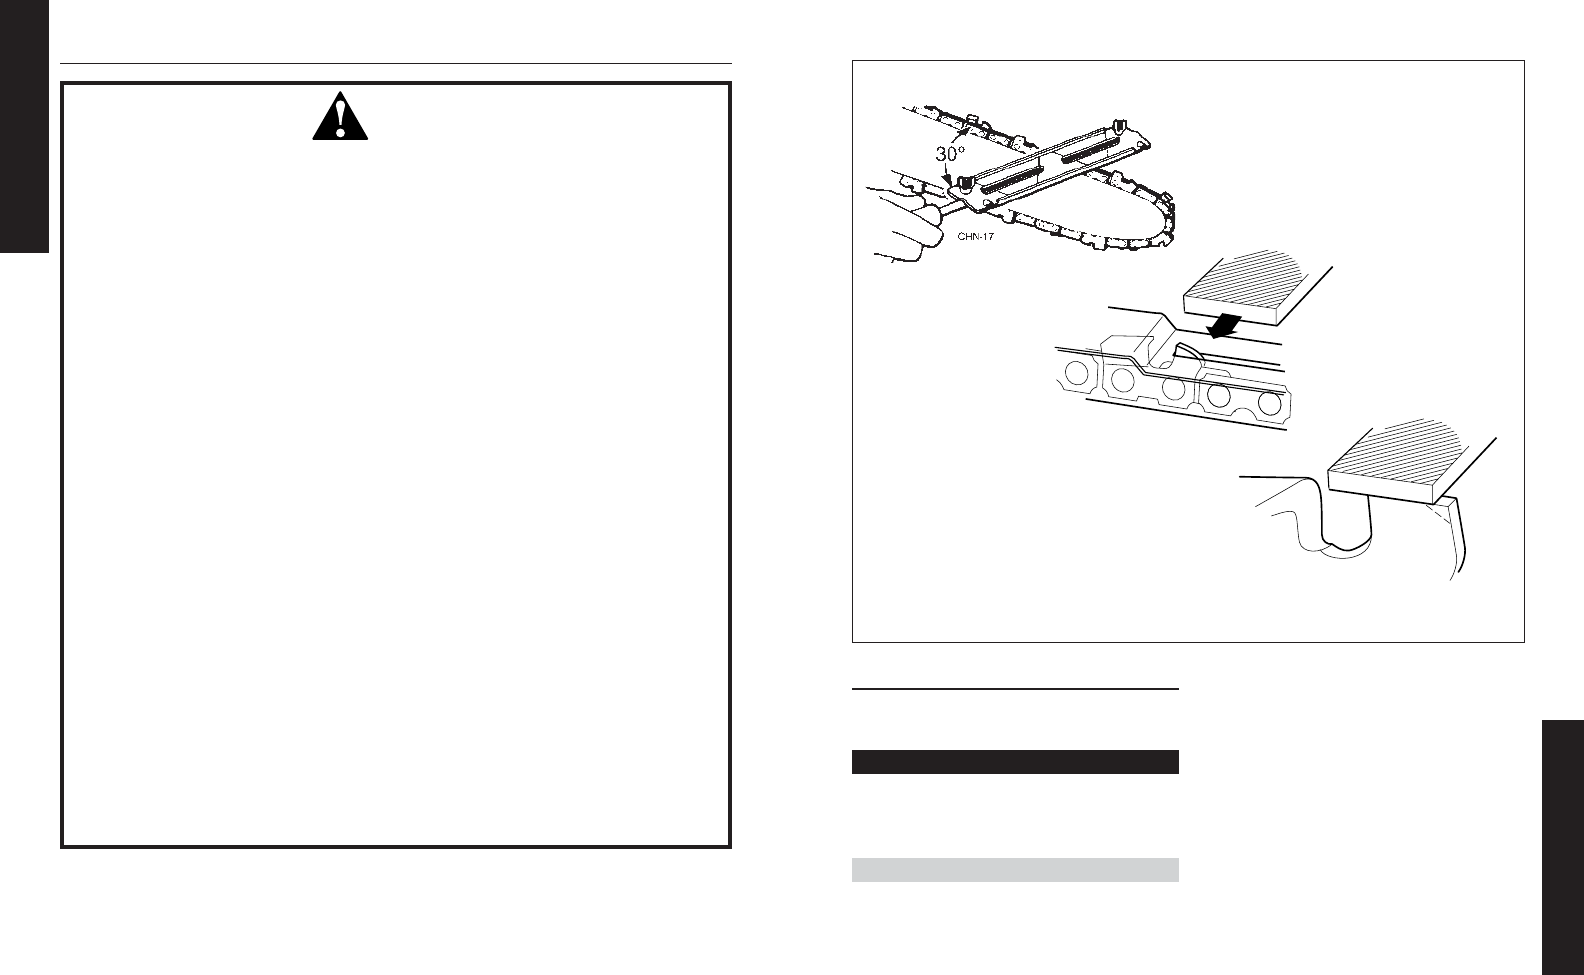
Sharpening the Chain
Using a filing gauge
CHN-19
Using a flat file to round
the front corner on a
depth gauge
CHN-18
Using a depth
gauge joiner
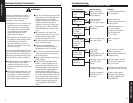
Sharpening Technique
1. Using a 5/32" round file, sharpen all
cutters to a 30° angle .
IMPORTANT!
File all cutters to the same angle and
depth! Unequal filing may cause the
saw to vibrate or cut erratically!
NOTE:
For consistent filing angles, use a filing
guide such as Oregonா
p/n 37534 or equivalent.
2. After all cutters are sharpened, use
a depth gauge joiner (Oregonா
p/n 106738 or equivalent) to
measure the height of each depth
gauge.
3. As required, lower the depth gauges
to a height of 0.020"
(0.5 mm). Use a flat file; Oregon p/
n 12211 or equivalent.
4. After all depth gauges have been
adjusted, use a flat file to round each
depth gauge leading edge to its
original curvature and angle.