


MAINTENANCE
SE10-4A/SE15-4A 03/09 Maintenance Section 5-11
© 2009 Alamo Group Inc.
MAINTENANCE
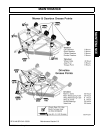
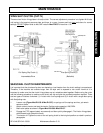
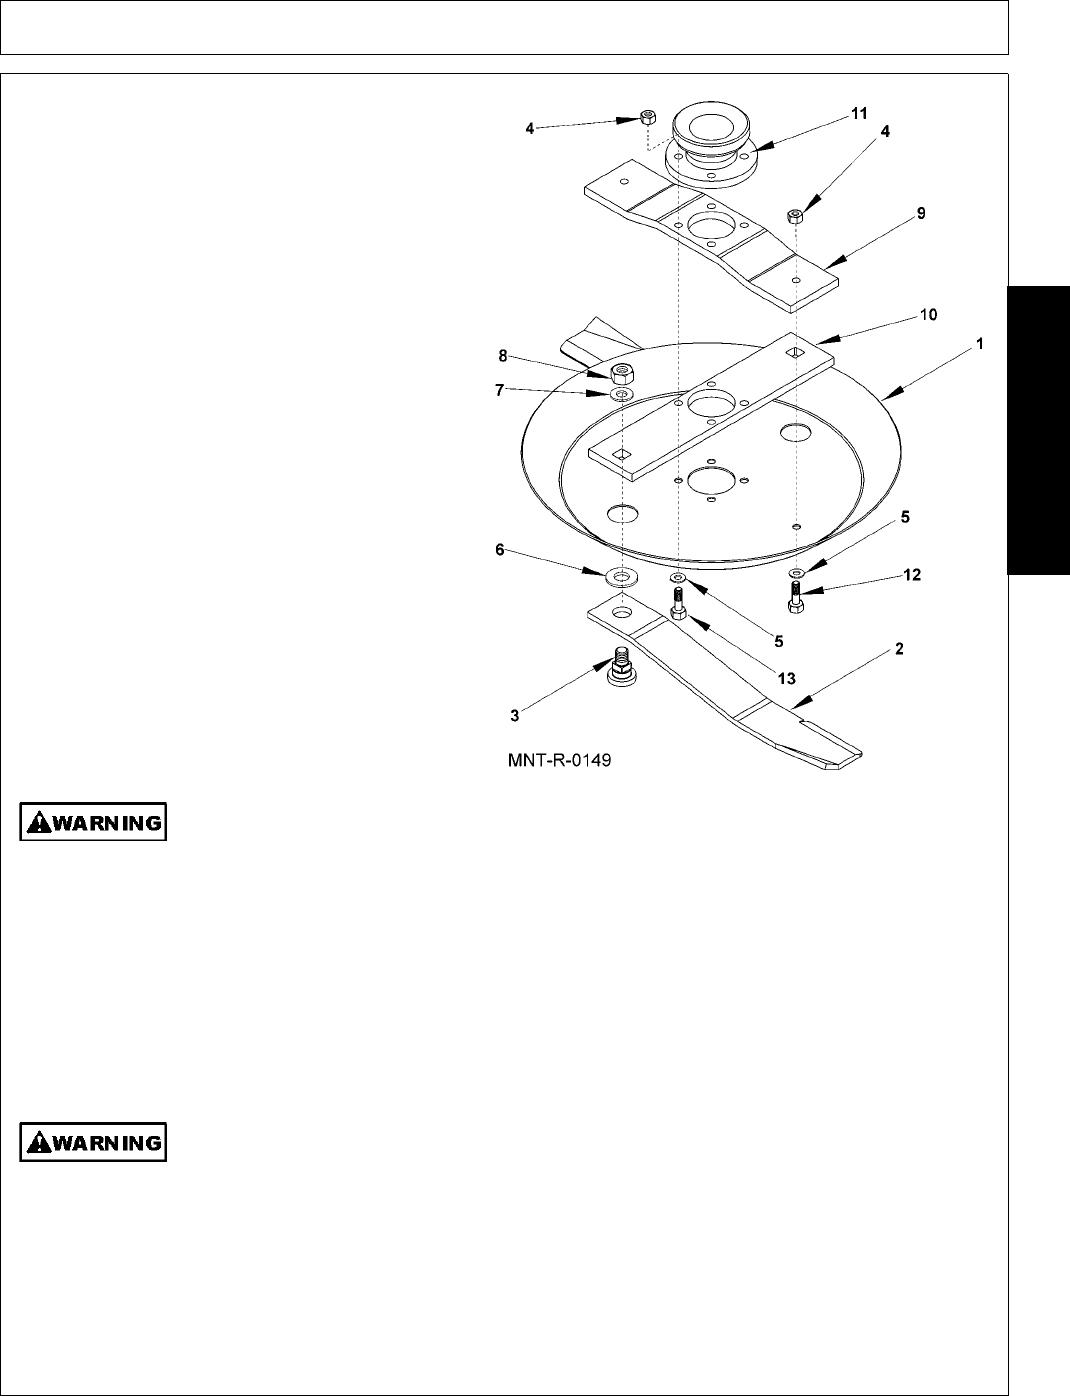
BLADE CARRIER REMOVAL LESS
HUB
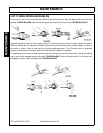
Remove 4 bolts (#13). Use Caution as these bolts
hold carrier assembly onto hub and when removed
will allow carrier assembly to fall. NOTE: Before any
further disassembly accurately mark position of
rotor bars (#9 & 10) in pan (#1) so that they can be
relocated in same position to maintain balance.
FIGURE Mnt-R-0149.
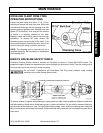
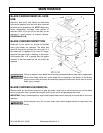
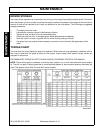
BLADE CARRIER INSPECTION
Blade bolt fit into carrier bar should be checked
every time blades are changed. The blade bolt
should fit into carrier bushings as a snug slip fit. If
the blade bolt fit appears to be loose or sloppy,
measure the square hole in bushing. If the bottom
of the square hole 1/16” or greater than the square
shoulder of the new blade bolt the bar should be
replaced.
Failure to replace a worn blade carrier bushing as described above may lead to catastrophic
failure of the blade, blade bolt, and/or blade bolt nut resulting in the ejection of the broken
parts out from under the mower at tremendous speed and force which could result in serious
bodily injury or death.
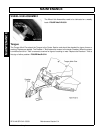
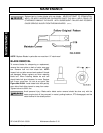
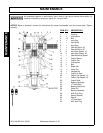
BLADE CARRIER HUB REMOVAL
Remove cotter pin and loosen slotted nut on gear box shaft. Loosen but do not remove the nut until the blade
carrier is loosened. Use a suitable two-jaw gear puller to pull carrier off tapered gear box shaft.
IMPORTANT: Always recheck gearbox output shaft slotted blade carrier retaining nut torque after a few hours
operation.
Avoid personal injury. Do not work under cutter without support blocks to keep frame from
falling.