


ASSEMBLY
CHECK BRAKE SYSTEM WINGNUTS
After you learn how to operate your tractor, check to see
that the brake is properly adjusted, See "TO ADJUST
BRAKE" in the Service and Adjustments section of this
manual,
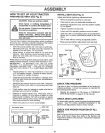
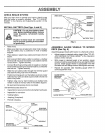
INSTALL BATTERY (See Figs. 4 and 5)
CAUTION: Do not short battery termi-
nals. Before installing battery, remove
metal bracelets, wristwatch bands,
rings, etc.
Positive terminal must be connected
first to prevent sparking from acciden-
tal grounding.
Raise hood.
o Make sure drain tube isfastened to drain hole in battery
tray and battery tray is positioned in hole of battery
support.
• Place battery in plastic tray, battery terminals to front of
tractor.
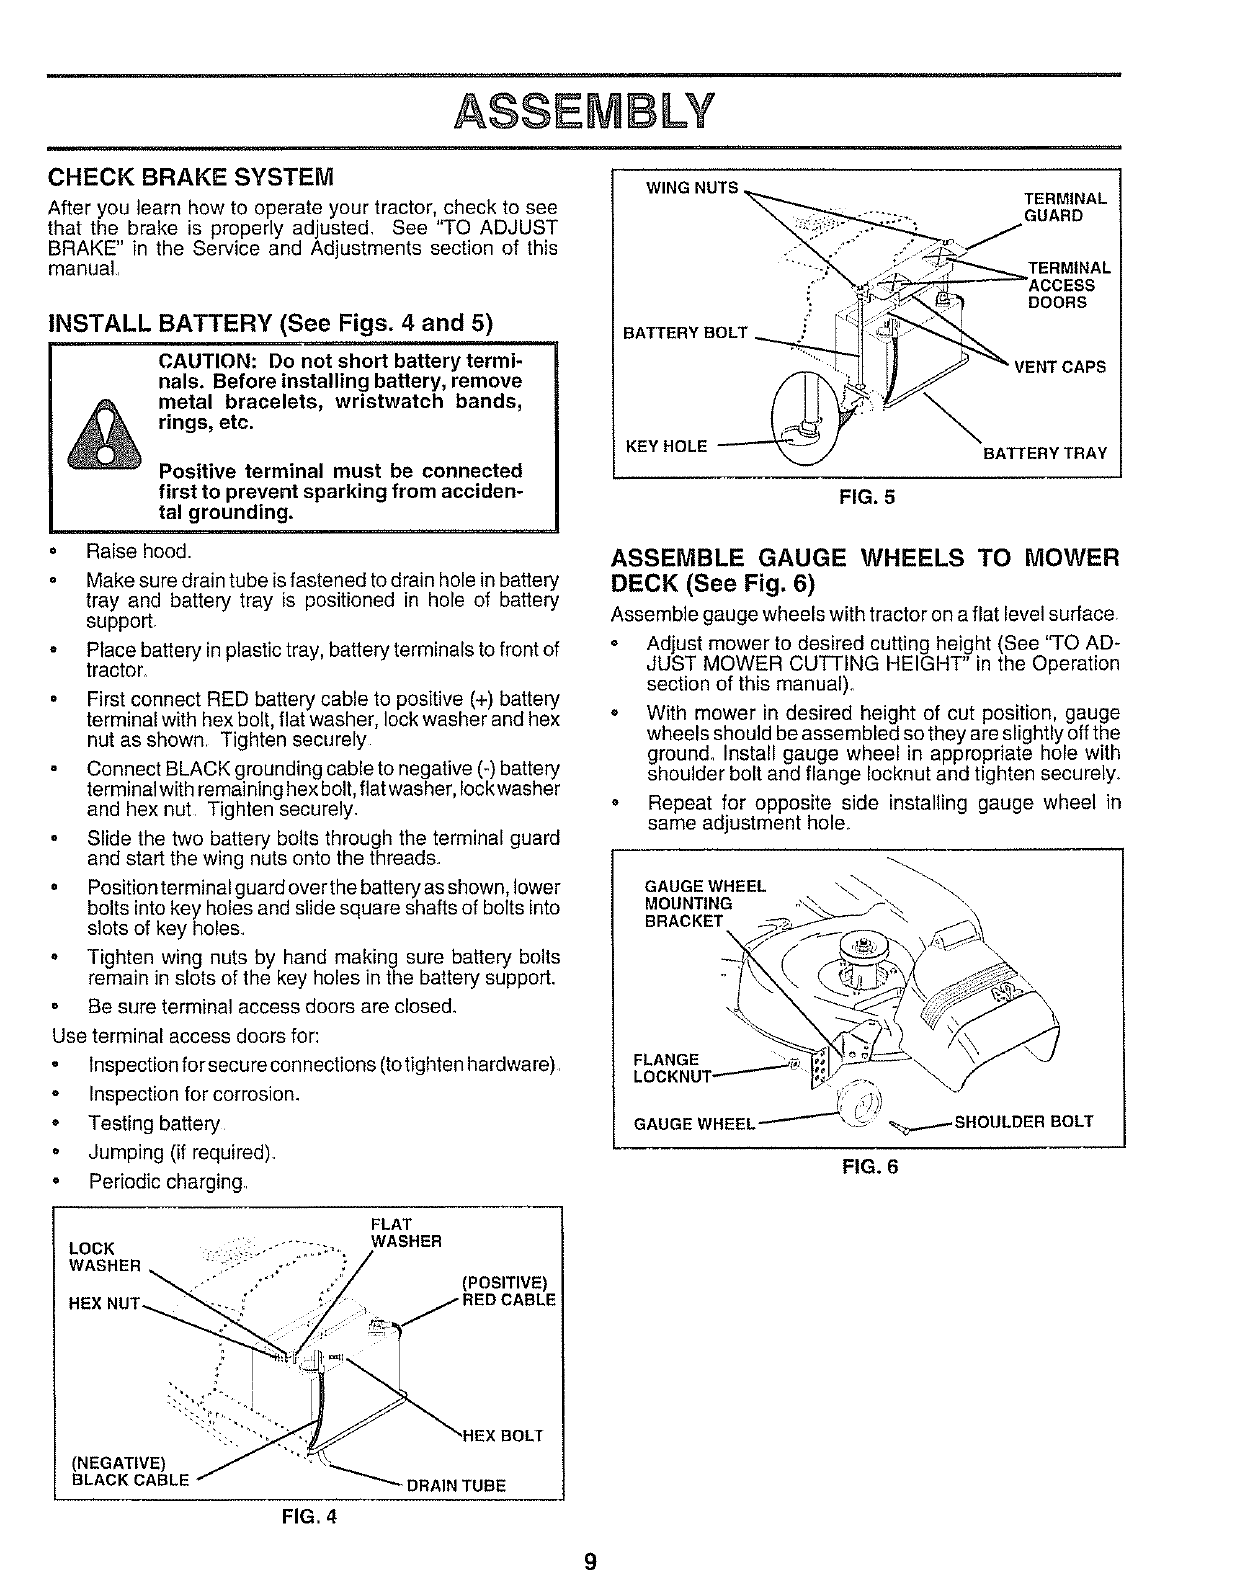
• First connect RED battery cable to positive (+) battery
terminal with hex bolt, flat washer, lock washer and hex
nut as shown. Tighten securely
Connect BLACK grounding cable to negative (-) battery
terminal with remaining hex bolt, flat washer, lock washer
and hex nut Tighten securely.
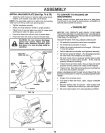
o Slide the two battery bolts through the terminal guard
and start the wing nuts onto the threads.
• Position terminal guard over the battery as shown, lower
bolts into key holes and slide square shafts of bolts into
slots of key holes
o Tighten wing nuts by hand making sure battery bolts
remain in slots of the key holes in the battery support.
, Be sure terminal access doors are close&
Use terminal access doors for:
° Inspection for secure connections (totighten hardware).
• Inspection for corrosion.
• Testing battery
° Jumping (if required).
° Periodic charging
LOCK
HEX NUT_
FLAT
WASHER
(POSITIVE)
(NEGATIVE)
BLACK CABLE
"_" BRAIN TUBE
FIG. 4
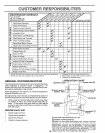
TERMINAL
GUARD
BATTERY BOLT
KEY HOLE
TERMINAL
DOORS
VENT CAPS
\
BATTERY TRAY
FIG. 5
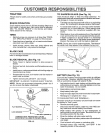
ASSEMBLE GAUGE WHEELS TO MOWER
DECK (See Fig, 6)
Assemble gauge wheels with tractor on a flat level surtace.
Adjust mower to desired cutting height (See 'q-O AD-
JUST MOWER CUTTING HEIGHT" in the Operation
section of this manual).
o With mower in desired height of cut position, gauge
wheels should be assembled so they are slightly off the
groun& Install gauge wheel in appropriate hole with
shoulder bolt and flange Iocknut and tighten securely.
o Repeat for opposite side installing gauge wheel in
same adjustment hole
GAUGE WHEEL
MOUNTING
BRACKET
FLANGE
LOCKNUT /
GAUGE WHEEL/'_ %o...--._SHOULDER BOLT
FIG. 6
9