


SERVmCE
,i i,
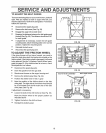
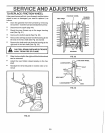
TO ADJUST CARBURETOR
AND A
TO ADJUST:
Q
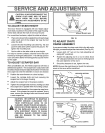
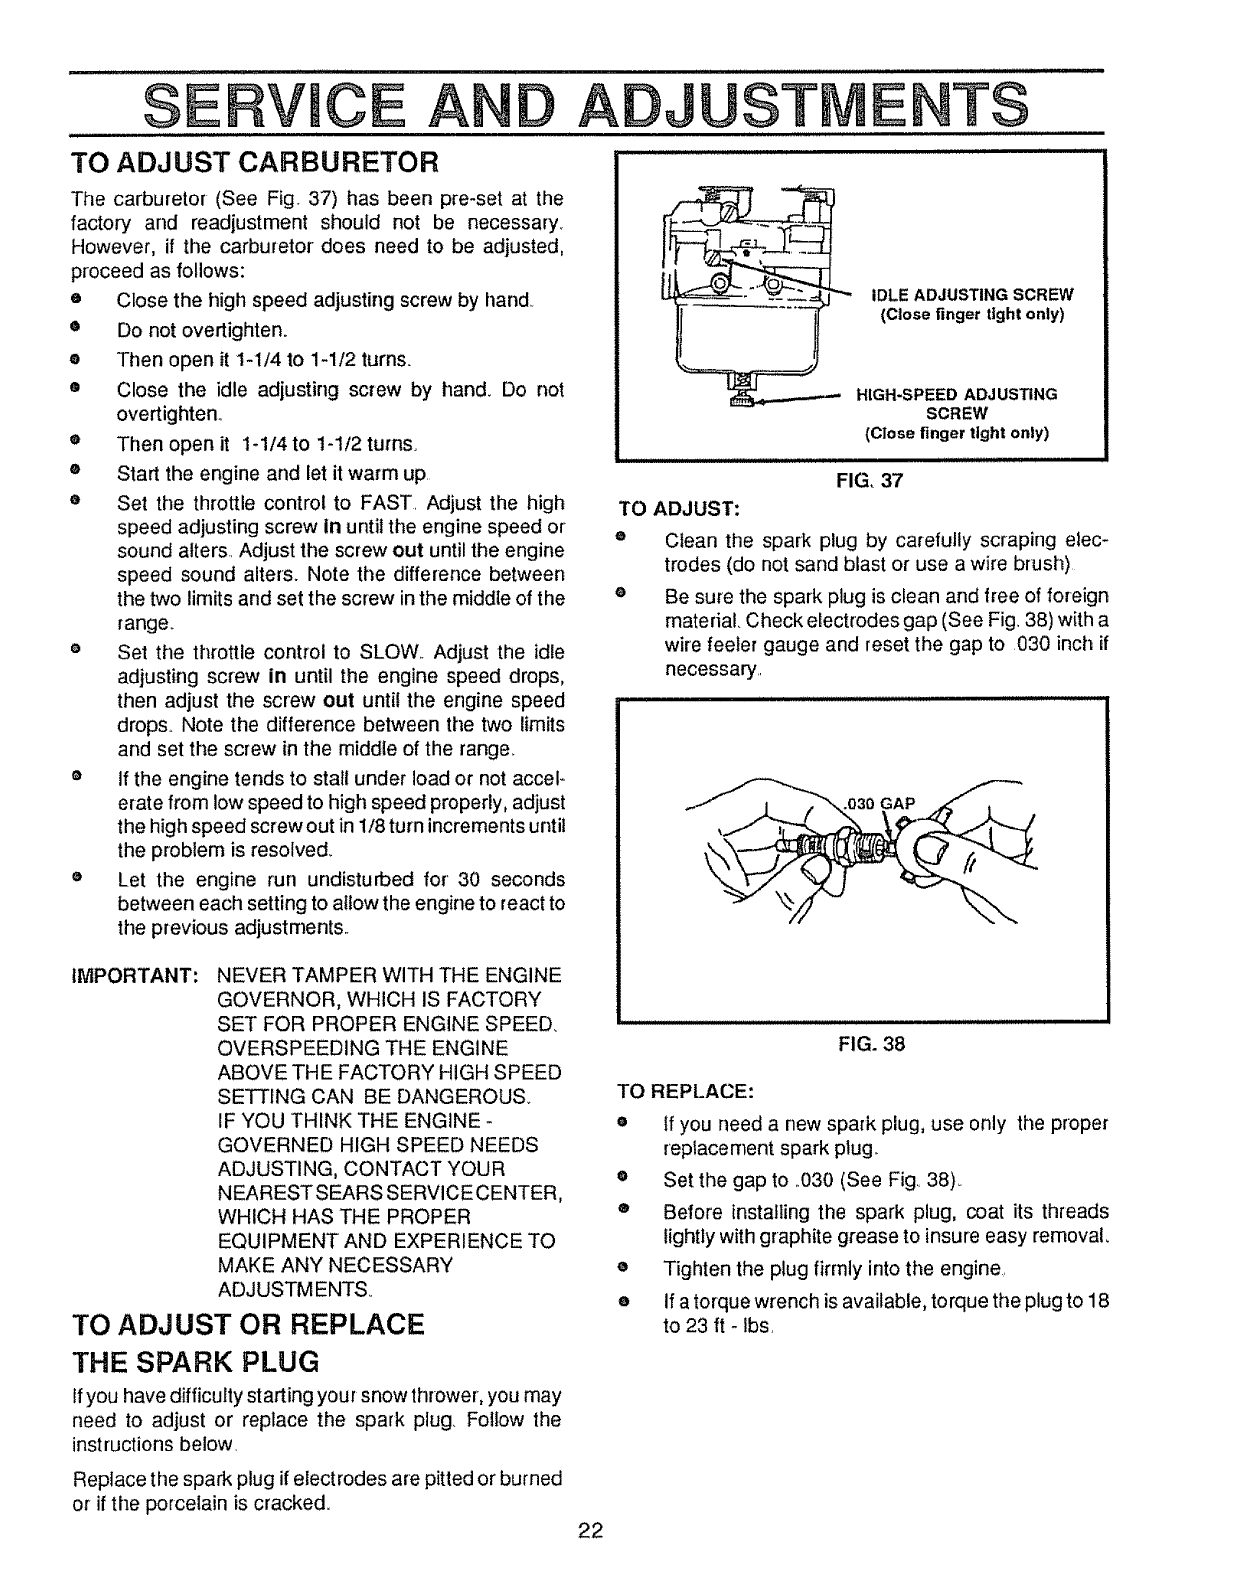
The carburetor (See Fig. 37) has been pre-set at the
factory and readjustment should not be necessary.
However, if the carburetor does need to be adjusted,
proceed as follows:
e Close the high speed adjusting screw by hand
• Do not overtighten.
® Then open it 1-!/4 to 1-1/2 turns.
• Close the idle adjusting screw by hand. Do not
overtighten.
e Then open it 1-114 to 1-112 turns.
® Start the engine and let it warm up.
e Set the throttle control to FAST. Adjust the high
speed adjusting screw in until the engine speed or
sound alter& Adjust the screw out until the engine
speed sound alters. Note the difference between
the two limits and set the screw in the middle of the
range_
e Set the throttle control to SLOW. Adjust the idle
adjusting screw in until the engine speed drops,
then adjust the screw out until the engine speed
drop& Note the difference between the two limits
and set the screw in the middle of the range.
® If the engine tends to stall under load or not acceF
erate from low speed to high speed properly, adjust
the high speed screw out in 1/8 turn increments until
the problem is resolved_
o Let the engine run undisturbed for 30 seconds
between each setting to aitow the engine to react to
the previous adjustments..
TO REPLACE:
JUST E
22
IMPORTANT: NEVER TAMPER WITH THE ENGINE
GOVERNOR, WHICH IS FACTORY
SET FOR PROPER ENGINE SPEED.
OVERSPEED1NG THE ENGINE
ABOVE THE FACTORY HIGH SPEED
SETTING CAN BE DANGEROUS.
IF YOU THINK THE ENGINE -
GOVERNED HIGH SPEED NEEDS
ADJUSTING, CONTACT YOUR
NEAREST SEARS SERVICE CENTER,
WHICH HAS THE PROPER
EQUIPMENT AND EXPERIENCE TO
MAKE ANY NECESSARY
ADJUSTMENTS
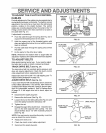
TO ADJUST OR REPLACE
THE SPARK PLUG
If you have difficulty starting your snow thrower, you may
need to adjust or replace the spark plug. Fotlow the
instructions below.
Replace the spark plug if electrodes are pitted or burned
or if the porcelain is cracked.
TS
IDLE ADJUSTING SCREW
(Close finger tight only)
HIGH-SPEED ADJUSTING
SCREW
(Close finger tight only)
FIG, 37
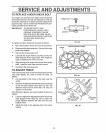
Clean the spark plug by carefully scraping elec-
trodes (do not sand blast or use a wire brush)
Be sure the spark plug is clean and free of foreign
material. Check electrodes gap (See Fig. 38) with a
wire feeler gauge and reset the gap to 030 inch if
necessary.
.030 GAP
FIG. 38
• ff you need a new spark plug, use only the proper
replacement spark plug
o Set the gap to .,030 (See Fig 38),.
® Before installing the spark plug, coat its threads
lightly with graphite grease to insure easy removal,
• Tighten the plug firmly into the engine,.
o If a torque wrench is available, torque the plug to 18
to 23 ft - ibs,