


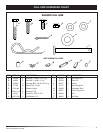
6
Call 1-866-576-8388 for missing parts or assembly help
DO NOT RETURN TO STORE
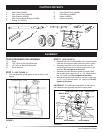
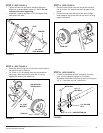
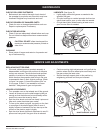
STEP 7: (SEE FIGURE 7)
• Assembletheowcontrollink(endwithsmallhole)to
theowcontrolarmusinga1/4"x1"hexbolt,anylon
washer and a 1/4" nylock nut. Tighten carefully. The
owcontrollinkshouldnotbeloosebutshouldpivot
with no more than slight resistance.
FIGURE 7
FLOW CONTROL
LINK
FLOW
CONTROL
ARM
1/4" NYLOCK
NUT
1/4" x 1"
HEX BOLT
SMALLEST
HOLE
NYLON
WASHER
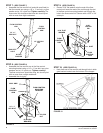
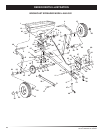
STEP 8: (SEE FIGURE 8)
• Assembletheowcontrolarmtotheowcontrol
mounting bracket using a 1/4" x 1" hex bolt, two nylon
washers and a 1/4" nylock nut. Tighten carefully.
Theowcontrolarmshouldbesnug,butshouldpivot
with no more than a slight resistance.
• Assemble the vinyl grip.
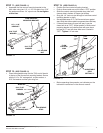
STEP 9: (SEE FIGURE 9)
• Placea5/16"atwasherontotheendoftheow
control rod. Insert the end of the rod through the slot
intheowcontrolmountingbracketandthroughthe
holeintheowcontrollink.Securewitha3/32"x3/4"
cotter pin.
1/4" x 1"
HEX BOLT
1/4" NYLOCK
NUT
FLOW CONTROL
MOUNTING
BRACKET
FLOW
CONTROL
ARM
(2) NYLON
WASHERS
VINYL GRIP
FIGURE 8
FIGURE 9
FLOW
CONTROL
ROD
FLOW
CONTROL
LINK
3/32"
COTTER
PIN
5/16" FLAT
WASHER
SLOT
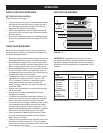
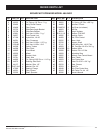
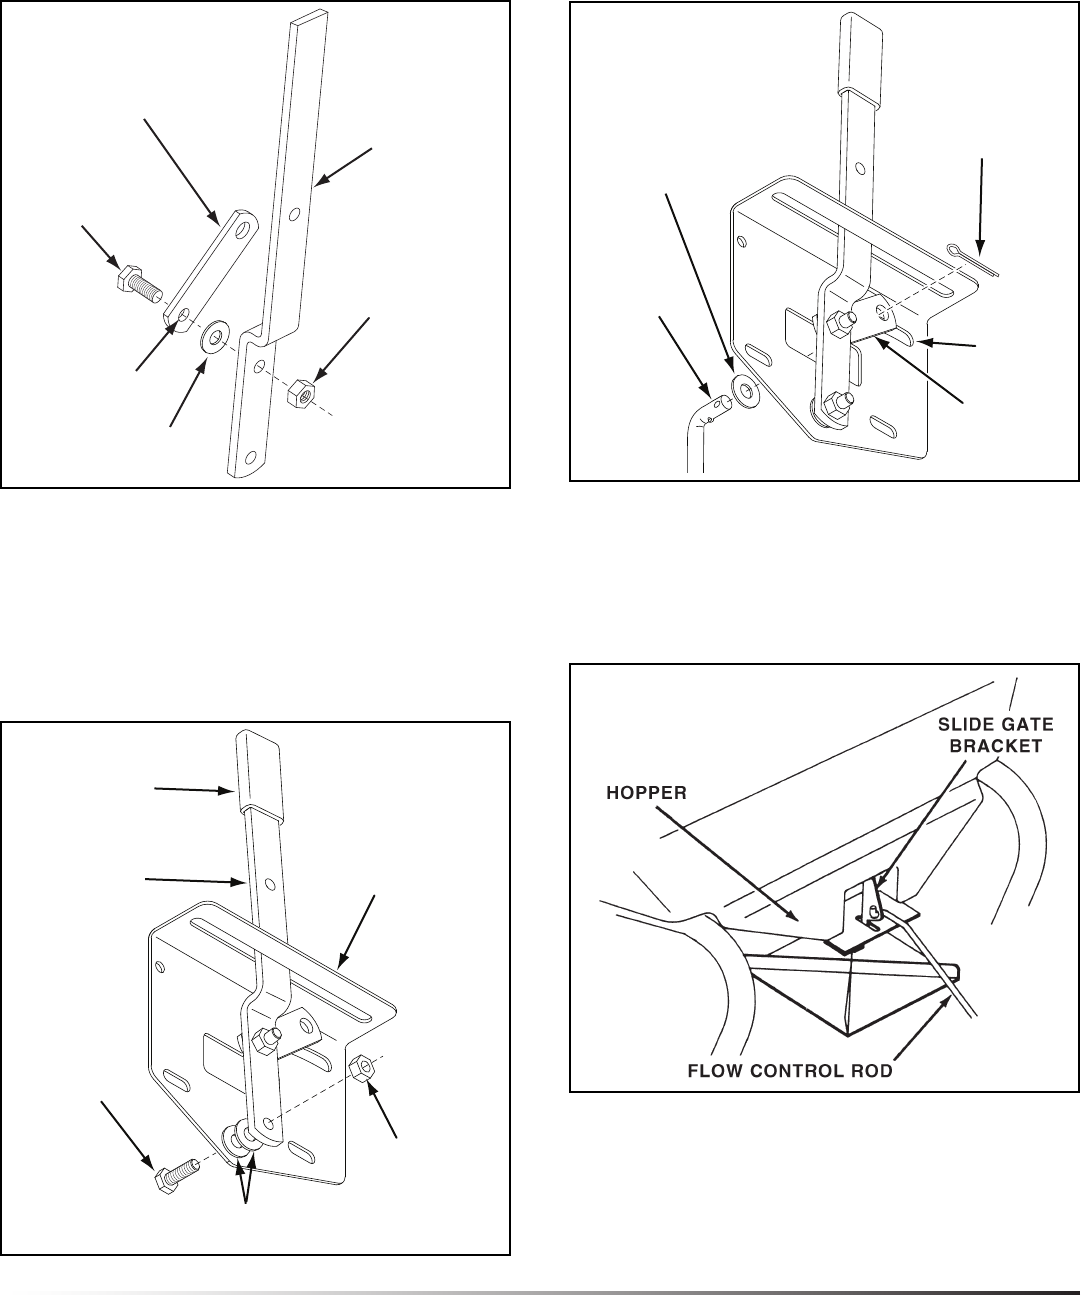
STEP 10: (SEE FIGURE 10)
• Hookfreeendofowcontrolrodthroughholeinslide
gate bracket located near the bottom of the hopper.
FIGURE 10