


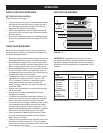
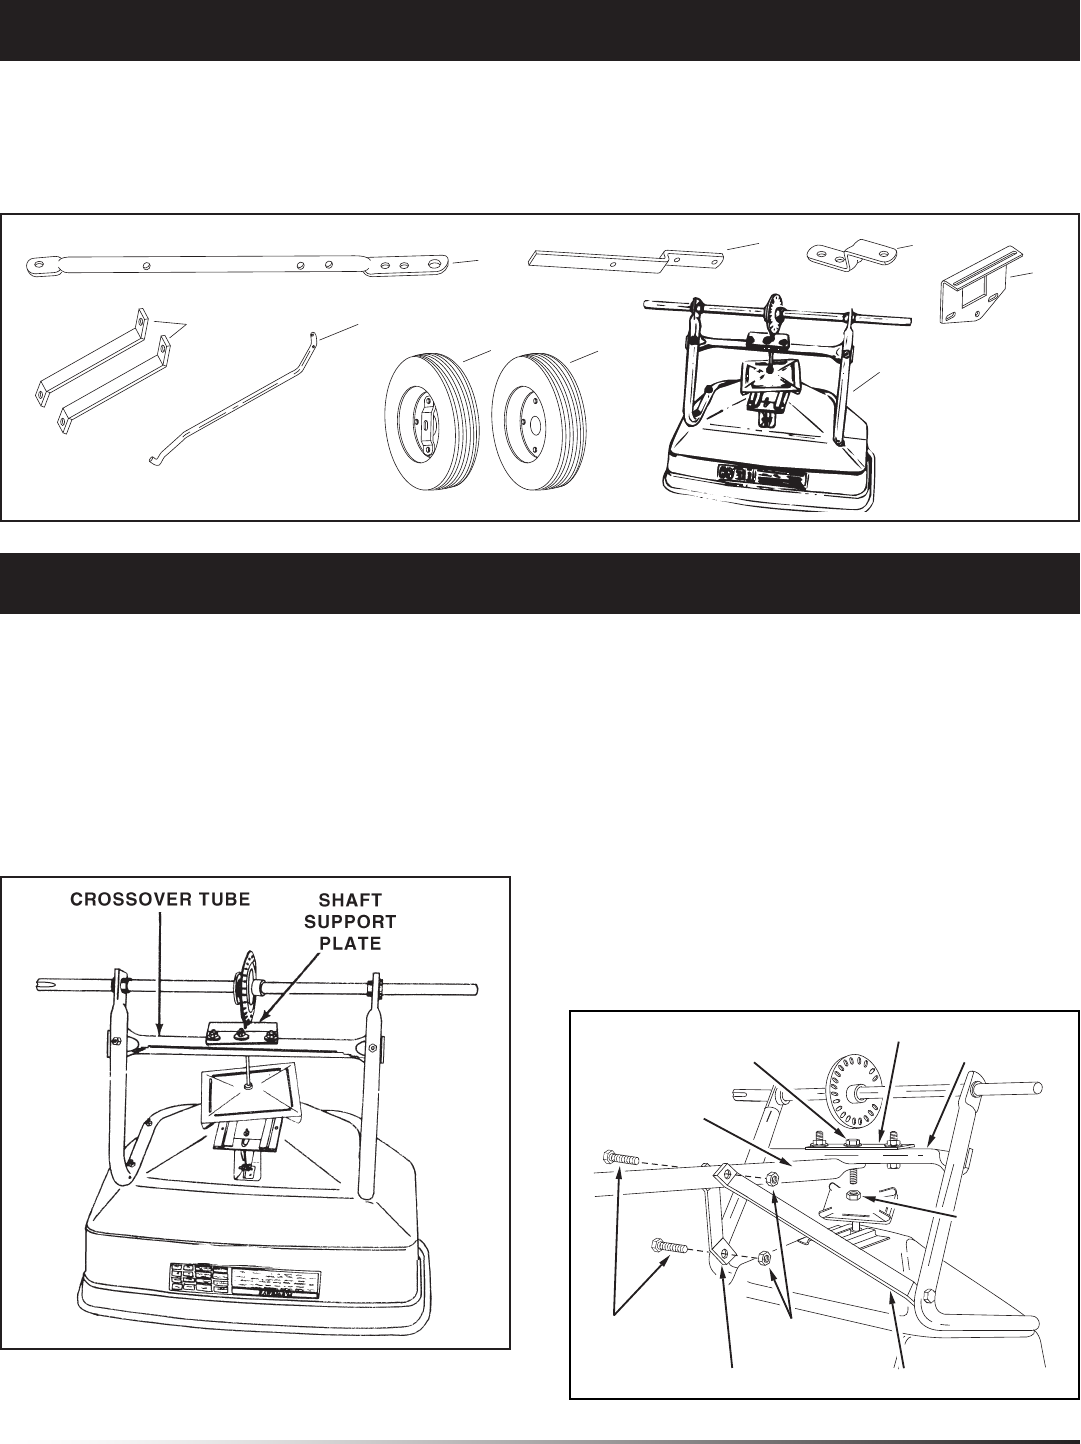
4
Call 1-866-576-8388 for missing parts or assembly help
DO NOT RETURN TO STORE
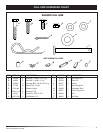
CARTON CONTENTS
5
6
7
8
1
4
9
2
3
ASSEMBLY
TOOLS REQUIRED FOR ASSEMBLY
(1) Pliers
(2) 7/16" Open or Box End Wrenches
(2) 1/2" Open or Box End Wrenches
(1) Small Hammer
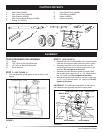
FIGURE 2
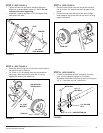
STEP 1: (SEE FIGURE 1)
• Turn the spreader upside down so that it rests on the
hopper.
FIGURE 1
STEP 2: (SEE FIGURE 2)
• Remove lock nut from the middle bolt in the crossover
tube and shaft support plate. Leave the bolt in place.
• Assemble the short end of the hitch tube onto the
middle bolt and secure it with the same lock nut you
removed. Do not tighten at this time.
• Assemble two hitch braces to inside of hopper frame,
one on each side, using two 1/4" x 1-1/2" hex bolts and
two 1/4" nylock nuts. Do not tighten at this time.
• Assemble the two hitch braces to the hitch tube using
a 1/4" x 1-1/2" hex bolt and a 1/4" nylock nut. Do not
tighten at this time.
IMPORTANT: The hitch tube must attach to the side of
the crossover tube opposite the shaft support plate.
1/4" x 1-1/2"
HEX BOLT
CROSSOVER
TUBE
HITCH BRACE
HITCH
TUBE
SHAFT SUPPORT PLATE
MIDDLE
LOCK NUT
MIDDLE BOLT
HITCH BRACE
1/4" NYLOCK
NUT
1. Hitch Tube (#44586)
2. Flow Control Arm (#24859)
3. Hitch Bracket (#23687)
4. Flow Control Mount Bracket (#24855)
5. Braces (2) (#23525)
6. Flow Control Rod (#44469)
7. Drive Wheel (#48865)
8. Wheel (#46503)
9. Hopper Assembly