


6
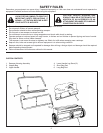
CAUTION: EYE PROTECTION SHOULD BE
WORN WHILE OPERATING SWEEPER
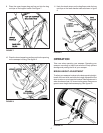
DUMPING OF SWEEPER
To dump sweeper hopper bag, simply tip the sweeper forward
or lift off the complete hopper bag frame.
Always dump hopper after each use. Damp or wet grass
and leaves will cause damage to hopper if stored for long
periods of time.
CAUTION: DO NOT DUMP THE SWEEPER
TOO CLOSE TO A FIRE AS THE BRUSHES
AND BAG CAN BE DESTROYED BY
EXCESSIVE HEAT OR FLAME.
STORAGE
The entire unit may be hung on a wall or the hopper bag
frame can be removed for storage.
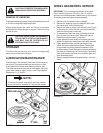
LUBRICATION/MAINTENANCE
The bearings in the sweeper have been prelubricated at
the factory. It is recommended that a few drops of light
oil be added to the brush shaft bearings twice a year.
The wheels should be removed to clean gears every two
years. After cleaning, apply an even coat of light grease.
Seegures11,12and13.
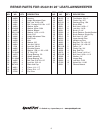
NOTE:
To remove the wheel, pop off hub cap with a screw
driverandremoveretaining"E"ringandatwasher.
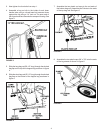
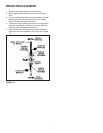
FIGURE 12
WHEEL GEARS/PAWL SERVICE
IMPORTANT: Do not remove both wheels at the same
time to avoid mixing parts. (The R.H. and L.H. ratchet
gears are not interchangeable.) Make notes on the position
of washers and snap rings during disassembly.
1. Remove only one wheel from the sweeper.
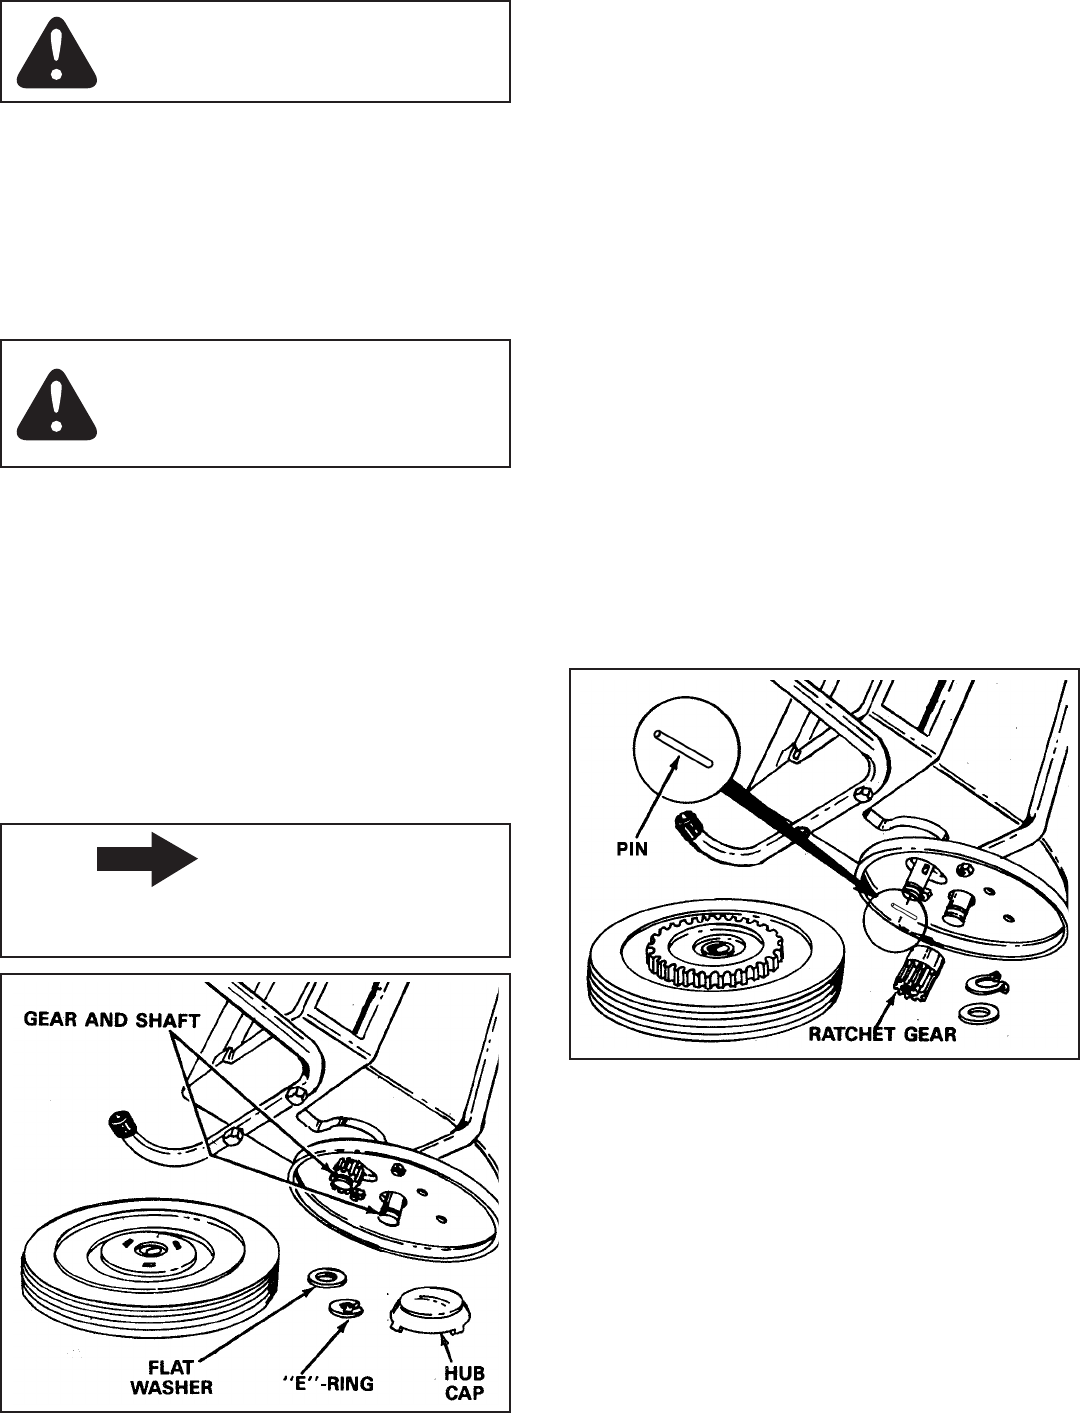
2. Remove the retaining rings and washers which hold
the ratchet gear onto the brush shaft.
3. Remove the gear by sliding it off the brush shaft. (Look
for the drive pin, which may fall out of the brush shaft
when the ratchet gear is removed.
4. To reassemble, insert the drive pin through the hole
near the end of the brush shaft. Make sure the pin
slides back and forth easily in the shaft.
5. Lightlygreasetheshaftandlltheratchetgearwith
grease. Assemble the ratchet gear back onto the shaft.
6. Lightly grease the axle and the gear teeth on the
wheel and then reassemble the wheel. The brushes
should rotate only during forward movement. If the
brushes rotate by both forward and reverse movement,
the drive pin is jamming in the ratchet gear. Dissamble,
clean and lubricate the drive pin and ratchet gear and
then reassmble wheel.
7. Remove opposite wheel and repeat steps 1-6 for that
wheel.
FIGURE 11