


REV 10855
2-12-08
21
OPERATION cont.
TO HELP MAINTAIN CONTROL cont.:
10. Squeeze the trigger switch to start the saw. ALWAYS let the blade reach full speed
before you begin the cut into the workpiece.
11. When making a cut, ALWAYS use steady, even pressure. Forcing the saw causes
rough cuts and could shorten the life of the saw or cause Kickback.
12. After completing your cut, release the trigger switch and allow the blade to come to a
complete stop. DO NOT remove the saw from the workpiece while the blade is moving.
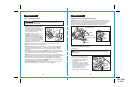
When sawing through a workpiece, the lower blade guard DOES
NOT cover the blade on the underside of the workpiece (see Fig. 4, page 17).
ALWAYS keep your hands and fingers away from the cutting area. Any part of
your body coming in contact with the moving blade will result in serious injury.
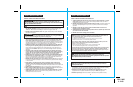
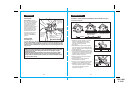
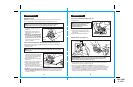
MAKING CROSS CUTS AND RIP CUTS (Fig. 12 and 12a)
WARNING: ALWAYS clamp and support workpiece securely. ALWAYS
maintain proper control of saw. Failure to clamp and support workpiece and loss
of control of saw could result in serious injury.
!
Fig. 12
Line of Cut
0
o
Indicator
2. When making cross or rip cuts with the 10855, align your line of cut with the right side of
the notch by the 0
o
indicator (see Fig. 12).
1. ALWAYS use your saw with your hands positioned correctly (see Fig. 12).
WARNING: ALWAYS maintain proper control of the saw to make sawing
safer and easier. Loss of control of the saw could cause an accident resulting in
possible serious injury.
!
20
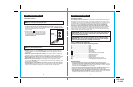
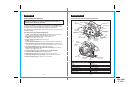
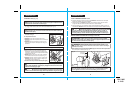
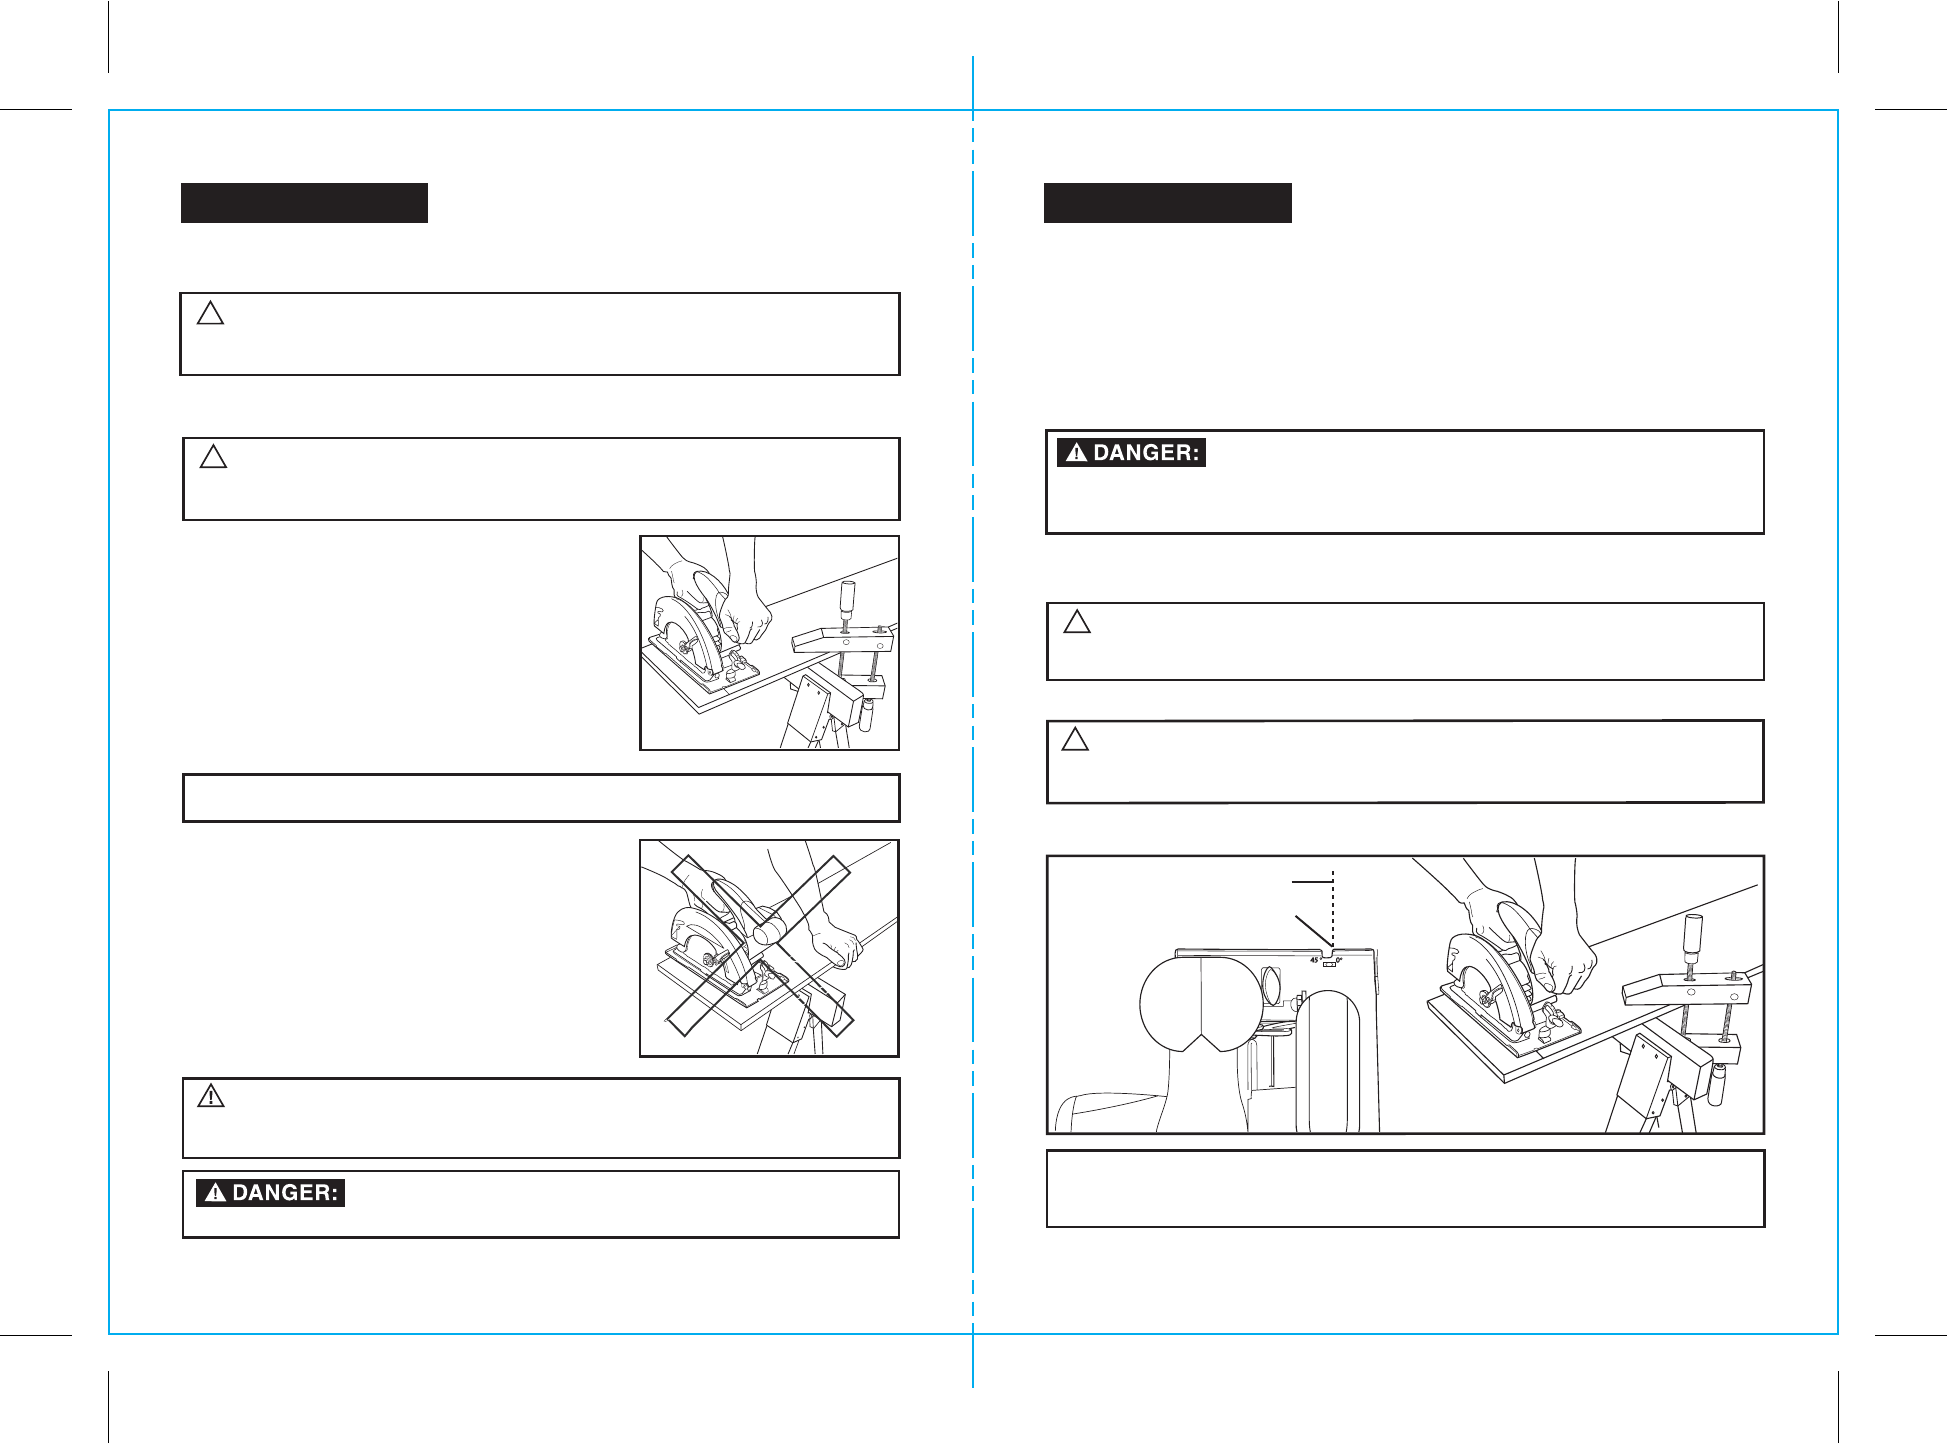
STARTING A CUT (Fig. 10)
OPERATION cont.
WARNING: ALWAYS clamp and support workpiece securely. ALWAYS
maintain proper control of saw. Failure to clamp and support workpiece and loss
of control of saw could result in serious injury.
!
1. ALWAYS use your saw with your hands positioned correctly, with one hand operating
the trigger switch and the other on the front assist handle (see Fig. 10).
WARNING: ALWAYS maintain proper control of the saw to make sawing
safer and easier. Loss of control of the saw could cause an accident resulting in
possible serious injury.
2. NEVER use the saw with your hands positioned
as shown in Fig. 11
To Help Maintain Control:
3. ALWAYS support the workpiece near the cut.
4. ALWAYS support the workpiece so the cut will be on
your right.
5. ALWAYS clamp the workpiece so it will not move
during the cut. Place the workpiece with the good
side down.
NOTE: The good side of the workpiece is the side where appearance is important.
6. Before starting a cut, draw a guideline along the
desired line of cut, then place the front edge of the
saw base on that part of the workpiece that is solidly
supported (see Fig.10).
7. NEVER place the saw on the part of the workpiece
that will fall off when the cut is made (see Fig. 11).
8. ALWAYS keep the cord away from the cutting area.
ALWAYS place the cord so it does not hang up on
the workpiece when making a cut.
9. Hold the saw firmly with both hands (see Fig 10).
Using the saw with a damaged cord could result in serious injury
or death. If the cord has been damaged, have it replaced before using the saw again.
!
WARNING: If the cord hangs up on the workpiece during a cut, release the
trigger switch immediately. To avoid injury, unplug the saw and move the cord to
prevent it from hanging up again.
Fig. 11
Fig. 10
Right
Wrong
NOTE: Since the thickness of blades varies, MAKE A TRIAL CUT in scrap material
along the guideline to determine how much, if any, you should offset the blade
from the guideline to allow for the kerf of the blade to get an accurate cut.