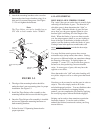
5
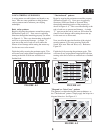
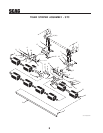
FIGURE 4-1
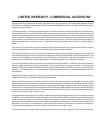
FIGURE 4-2
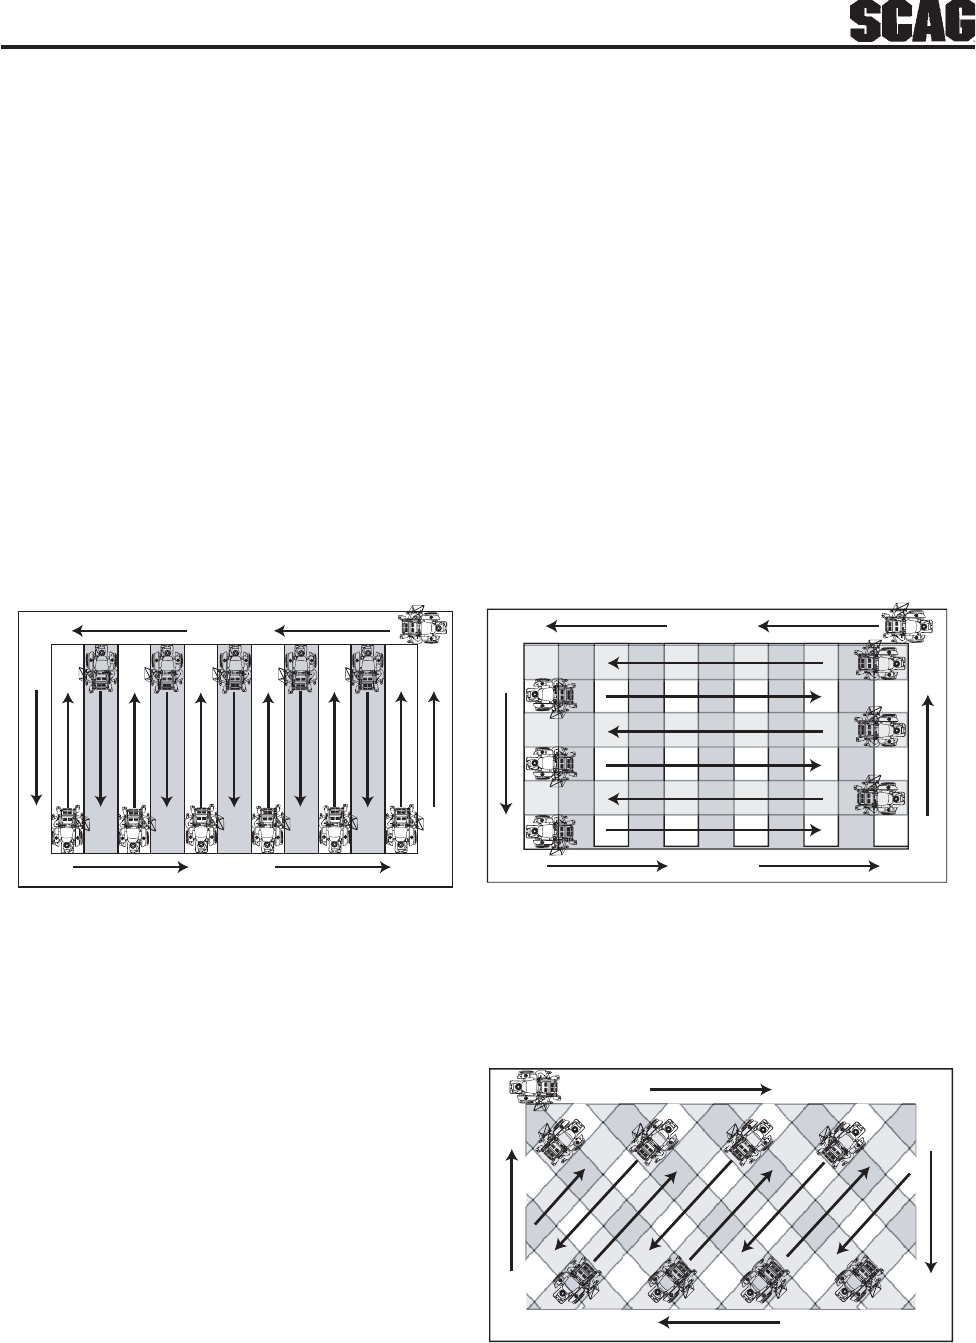
FIGURE 4-3
LAWN STRIPING GUIDELINES
A stripe pattern can add richness and depth to any
lawn. Here are some guidelines to help produce
various patterns and to enhance your striping
techniques.
Basic stripe pattern:
Begin by mowing the perimeter around the property
(Reference Figure 4-1). Next, mow in opposing
directions through the remaining property (as shown
in Figure 4-1). Take care when turning at the end of
each row to prevent turf damage. A simple "Y"
type turn at the end of each row will reduce the
chance of turf damage while setting the mower up
for the next row to be mowed.
Finish the job by mowing the perimeter again. This
will remove any stripe pattern irregularities left from
turning at the end of each row and delivers a
finished look.
"Checkerboard" pattern:
Begin by mowing the perimeter around the property
(Reference Figure 4-1). Next, mow in opposing
directions (North and South or East and West)
through the remaining portion of the property (as
shown in Figure 4-1). Take care when turning at the
end of each row to prevent turf damage. A simple
"Y" type turn at the end of each row will reduce the
chance of turf damage while setting the mower up
for the next row to be mowed.
Now, travel in the opposite direction of the original
mowing pattern (if you were mowing North and
South, now mow East and West, etc). Reference
Figure 4-2.
Finish the job by mowing the perimeter again. This
will remove any stripe pattern irregularities left from
turning at the end of each row and delivers a finished
look.
"Diagonal or Criss-Cross" pattern:
This pattern is acheived using the same techniques as
the "Checkerboard" pattern. Simply apply the stripes in a
diagonal direction. See Figure 4-3.


