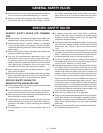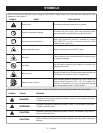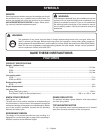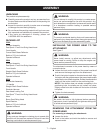
8 — English
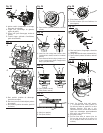
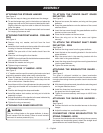
ATTACHING THE STORAGE HANGER
See Figure 3.
There are two ways to hang your attachment for storage.
To use the hanger cap, push in the button and place the
hanger cap over end of the lower end attachment shaft.
Slightly rotate the cap from side to side until the button
locks into place.
The secondary hole in the attachment shaft can be used
for hanging purposes as well.
ATTACHING THE FRONT HANDLE - CS26 AND
SS26
See Figure 4.
Remove wing nut, washer, and bolt from the front
handle.
Install the front handle onto the top side of the drive shaft
housing in the area indicated by the label.
NOTE: The open side of the handle should face the
operator.
Place the bolt through the front handle.
NOTE: The hex bolt head fits inside the hex recess molded
into one side of the handle.
Reinstall the washer and wing nut.
Tighten wing nut securely.
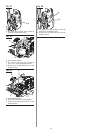
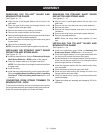
ATTACHING THE “J” HANDLE - BC26
See Figure 5.
A “J” handle must be used for ensuring the best control and
maximizing operator safety when using a brushcutter.
Place the bottom J-handle clamp on the drive shaft as
shown. Insert the tab on the top J-handle clamp into the
slot on the bottom J-handle clamp.
Insert the end of the J-handle between the clamps so that
holes align and handle will be located to the operator’s
left.
Push the bolt through the clamp and handle.
Install flat washer, lock washer, and wing nut to hold the
assembly in place.
Adjust the position of the handle to the area indicated by
the label on the drive shaft housing.
Tighten the wing nut securely.
ATTACHING THE GRASS DEFLECTOR
WARNING:
The line cutting blade on the grass deflector is sharp.
Avoid contact with the blade. Failure to avoid contact
can result in serious personal injury.
ASSEMBLY
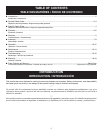
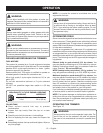
TO ATTACH THE CURVED SHAFT GRASS
DEFLECTOR - CS26
See Figure 6.
Remove hex screw, flat washer, and wing nut from grass
deflector.
Press the grass deflector onto the bottom of the curved
shaft as shown.
Insert the hex screw through the grass deflector and the
bracket on the curved shaft.
Place the flat washer on the hex screw.
Place the wing nut on the hex screw and tighten
securely.
TO ATTACH THE STRAIGHT SHAFT GRASS
DEFLECTOR - SS26
See Figure 7.
Remove the wing screw from the grass deflector.
Insert the tab on the mounting bracket in the slot on the
grass deflector.
Align the screw hole in the mounting bracket with the
screw hole in the grass deflector.
Insert the wing screw through the mounting bracket and
into the grass deflector.
Tighten the screw securely.
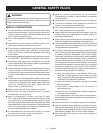
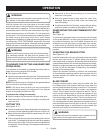
ATTACHING THE BRUSHCUTTER GUARD -
BC26
See Figure 8.
The guard is shipped installed on these brushcutter
models. Instructions have been included for reference when
changing from string trimmer operation back to brushcutter
operation.
With the string head removed, place the brushcutter guard
on the gear head as shown.
Install the three hex head screws from bottom through
the guard and into the gear head.
Tighten the screws securely and torque to 40-50 in.lb.
minimum.
ATTACHING THE SHOULDER HARNESS -
BC26
See Figure 9.
Connect the latch on the shoulder harness to the strap
hanger.
Adjust the strap to a comfortable position.
CONVERTING FROM BRUSHCUTTER TO
STRING TRIMMER - BC26
To convert from the brushcutter to the string trimmer, remove
the blade and brushcutter guard, attach the straight shaft
grass deflector and install the string head.


