


9
ASSEMBLY
UNPACKING
This product requires assembly.
Carefully remove the product and any accessories from
the box. Make sure that all items listed in the packing list
are included.
Inspect the product carefully to make sure no breakage
or damage occurred during shipping.
Do not discard the packing material until you have care-
fully inspected and satisfactorily operated the product.
If any parts are damaged or missing, please call
1-800-860-4050 for assistance.
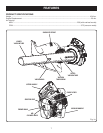
PACKING LIST
Blower
Upper Blower Tube
Sweeper Nozzle
High Velocity Nozzle
Vacuum Handle
Vacuum Handle Knobs (2)
Upper and Lower Vacuum Tubes
Vacuum Tube Screws (2)
Vacuum Bag Assembly
Vacuum Bag Adaptor
2-Cycle Engine Oil
Operator’s Manual
NOTE: Read and remove all hang tags and store with your
operator’s manual.
WARNING:
If any parts are damaged or missing do not operate
this product until the parts are replaced. Failure to heed
this warning could result in serious personal injury.
WARNING:
Do not attempt to modify this product or create
accessories not recommended for use with this product.
Any such alteration or modification is misuse and could
result in a hazardous condition leading to possible serious
personal injury.
WARNING:
To prevent accidental starting that could cause serious
personal injury, always disconnect the engine spark plug
wire from the spark plug when assembling parts.
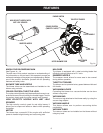
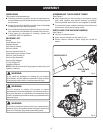
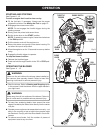
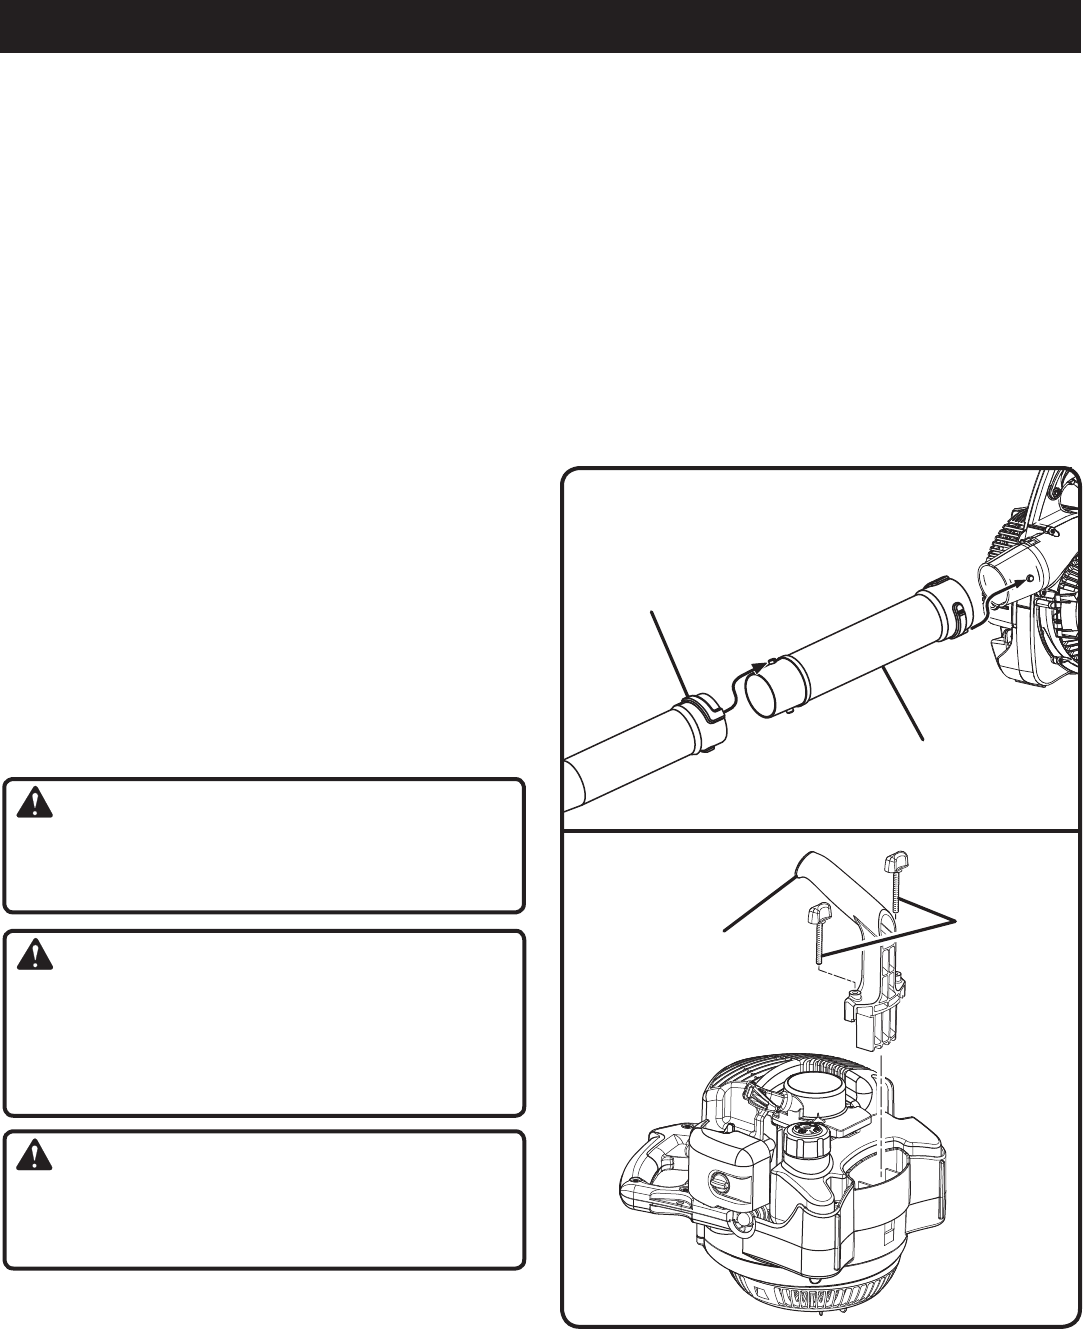
ASSEMBLING THE BLOWER TUBES
See Figure 2.
Align raised tabs on main housing to the slots on upper
tube; slide together and tighten securely by twisting.
Check tightness after initial run and retighten if needed.
To remove the tubes, rotate the tubes to unlock them and
remove from the blower housing outlet.
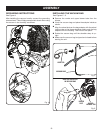
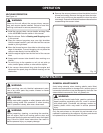
INSTALLING THE VACUUM HANDLE
See Figure 3.
Lay unit on side as shown.
Insert vacuum handle into the base of unit.
Secure vacuum handle in place using two knobs as
shown.
Fig. 2
Fig. 3
SWEEPER NOZZLE
UPPER BLOWER
TUBE
VACUUM
HANDLE
VACUUM
HANDLE
KNOBS