


8
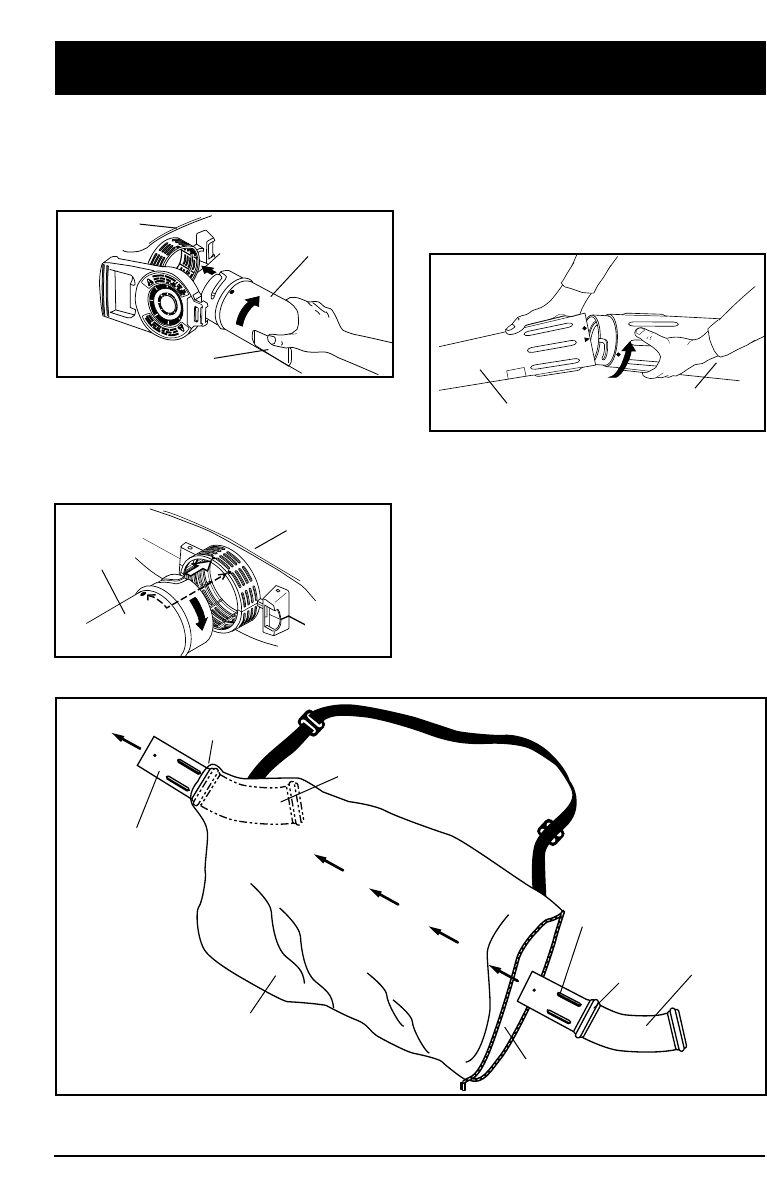
ASSEMBLY INSTRUCTIONS
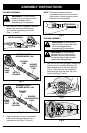
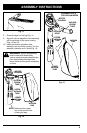
Fig. 9
4. Slide the lower vacuum tube into the upper
vacuum tube. The arrow on the lower
vacuum tube should align with the arrow
on the upper vacuum tube (Fig. 9).
5. Turn the tube clockwise until the dot on the
lower vacuum tube aligns with the dot on
the upper vacuum tube (Fig. 9).
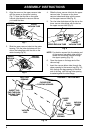
NOTE: For electric vacuum kits, the shorter end
of the vacuum bag elbow tube with the
raised ribs should be inserted through
the zipper opening (Fig. 10).
6. Open the zipper on the large end of the
vacuum bag.
7. Insert the vacuum elbow tube through the
zipper opening in the vacuum bag (Fig. 10),
then through the bag opening in the other
end of the bag, until the bag tube opening
is seated against the tube flange.
Fig. 10
Fig. 8
3. Slide the upper vacuum tube into the motor
housing. Turn the tube clockwise until the
dot on the tube aligns with the dot on the
motor housing (Fig. 8).
2. Align the arrow on the upper vacuum tube
with the arrow on the motor housing
(Fig. 7). Note that the flat on the upper
vacuum tube faces the vacuum door as
you install the tube.
Fig. 7
ASSEMBLY - VACUUM BAG
VACUUM
BAG
VACUUM
ELBOW
TUBE
ZIPPER
OPENING
TUBE
FLANGE
RAISED
RIBS
BAG TUBE
OPENING
INSERT THIS
END THROUGH
THE BAG TUBE
OPENING
CURVED END
POINTING UPWARD
LOWER
VACUUM TUBE
UPPER VACUUM TUBE
UPPER
VACUUM TUBE
UPPER
VACUUM
TUBE
FLAT
MOTOR
HOUSING
MOTOR
HOUSING