


7
MAINTENANCE - All mowers
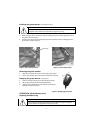
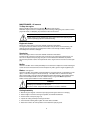
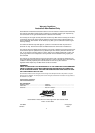
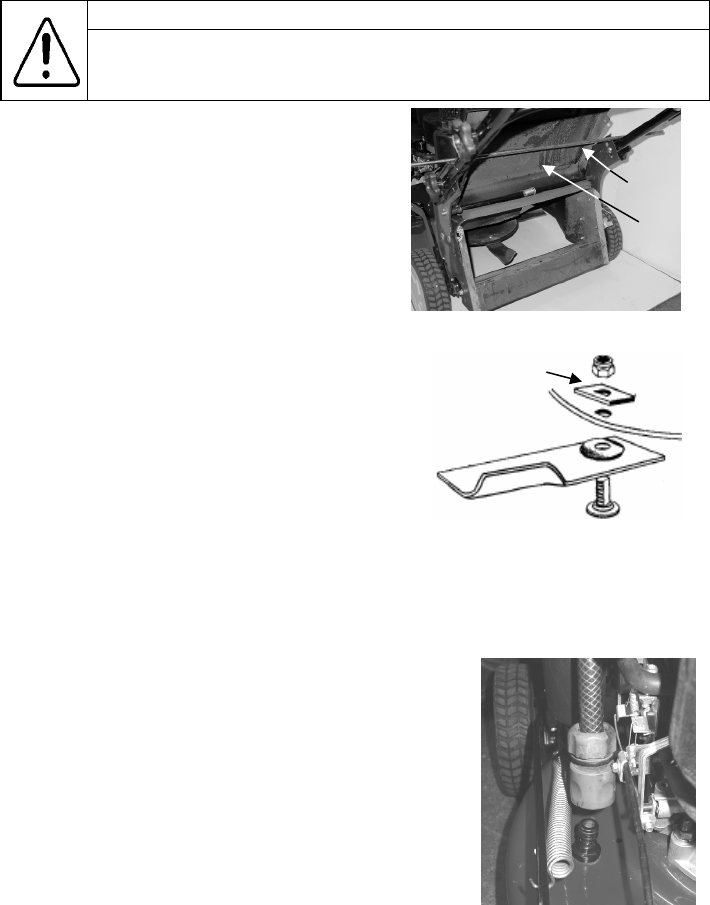
Blade Change- refer figures 9 and 10.
• With the engine stopped, spark plug lead and grass
catcher or mulch plug removed, open the discharge
flap and prop in the open position. Refer to figure 9.
• Set the mower to the high cut position and fold the
handle bar down.
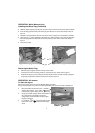
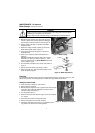
• Rotate the cutting assembly carefully to access the
blade retaining bolts. Refer to figure 10.
• Using gloves and a suitable spanner, remove the
blade assembly.
• Retain the “D” plates and discard the blades and
fasteners.
NB. Mowers fitted with a circular cutting disc must be
fitted with a “D” Plate (as shown in figure 10). These
parts are available from any Rover Mowers authorized
service dealer or agent.
• Fit new blades and fasten in the correct order. Refer to
figure 10.
• Tighten the blade retaining nuts firmly to 16Nm.
• Remove the flap prop, close the discharge flap and re-
attach the spark plug lead.
Cleaning
To ensure safe operation and long life it is recommended to clean the mower after every use. This
will prevent corrosion, overheating and fire risk while ensuring ultimate performance.
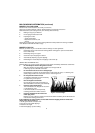
Washport (where fitted)
• Place the mower outdoors on a flat surface.
• Set the height to maximum.
• With the engine stopped connect a garden hose with a snap on
connection, to the washport fitted to the inside face of the
cutting chamber. Refer figure 11.
• Turn the garden hose on.
• Return to the mower and start the engine and run at full speed
for 1 minute.
• Stop the engine and turn off the garden hose.
• Remove the garden hose from the washport.
• Inspect the underside of the mower, if not completely clean
use garden hose to flush out remaining debris.
Always ensure the engine is stopped and the spark plug lead is removed before
attempting any maintenance on the mower.
Always replace blades and blade fixings in complete sets to maintain balance.
WARNING
Figure 10. Blade Attachments
“D” plate
Figure 11. Washport Connection
Figure 9. Blade change
Prop
Flap