


9
MAINTENANCE - All mowers
Cutting Assembly - refer to figure 16
WARNING
Always ensure the engine is stopped and the spark plug lead is removed
before attempting any maintenance on the mower.
Secure the mower safely when tilted upwards to access the underside
With the engine stopped, remove the spark plug
lead and grass catcher or mulch plug.
Set the height of cut lever to the high cut position,
and fold the handle bars.
Tilt the mower so the spark plug is up.
Inspect the cutting assembly for damage and wear.
Check the disc retaining bolts. Tighten the centre
bolt to 57-62Nm and the three concentric bolts to 8-
11Nm.
Return the mower to its normal position and replace the
spark plug lead.
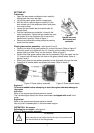
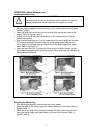
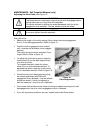
Figure 16. Blade change
Blade Change- refer figure 16 and 17
WARNING
Always ensure the engine is stopped and the spark plug lead is removed
before attempting any maintenance on the mower.
Always replace blades and blade fixings in complete sets to maintain
balance.
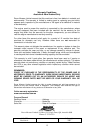
With the engine stopped, spark plug lead and grass
catcher or mulch plug removed, open the discharge
flap and prop in the open position. Refer to figure
16.
Set the mower to the high cut position and fold the
handle bar down.
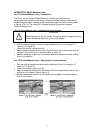
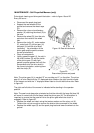
Rotate the cutting assembly carefully to access the
blade retaining bolts. Refer to figure 17.
Using gloves and a suitable spanner, remove the
blade assembly.
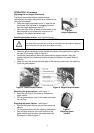
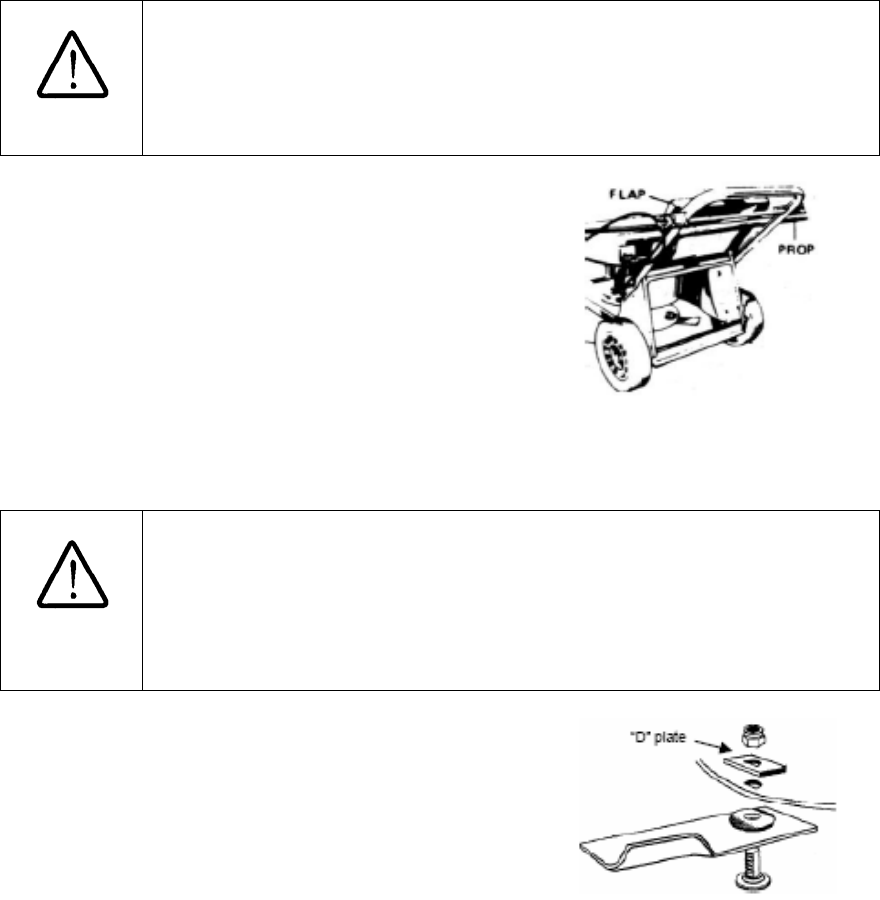
Figure 17.
Blade attachments
Retain the “D” plates or the large round washer and discard the blades and
fasteners.
NB. Mowers fitted with a circular cutting disc must be fitted with a “D” Plate (as
shown in figure 17) while mowers fitted with an oblong disc must be fitted with a
large flat circular washer in place of the “D” Plate. These parts are available
separately from any Rover Mowers authorized service dealer or agent.
Fit new blades and fasten in the correct order. Refer to figure 17
Tighten the blade retaining nuts firmly to 16Nm.
Remove the flap prop, close the discharge flap and replace the spark plug lead.