6
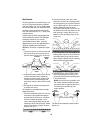
Accessory Caddy/Caster Assembly
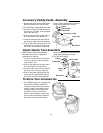
1.Remove the power head and lid assem-
bly from the dust drum and set aside.
2. Turn the dust drum upside down on the floor.
3.Insert the accessory caddy into the bot-
tom of drum, as shown, on the opposite
side of the drain cap.
4.Push on the accessory caddy until it is
flush with bottom of the dust drum.
5. Insert the caster stem into the socket of
the accesory caddy as shown (2 places).
6.Push on the caster until the ball on the
caster stem is inserted all the way into
the socket. You will hear the ball snap
into the socket and the caster will swivel
easily when positioning is correct.
Caster/Caster Foot Assembly
With the power head and lid assembly
removed from the drum, and the drum
upside down on the floor:
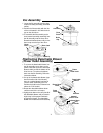
1.Insert the 2 caster feet into the bottom
of drum, as shown on the 2 locations
near the drain cap.
2.Push on the caster foot until the foot is
flush with bottom of the dust drum.
3.Insert the caster stem into the socket of
the caster foot, as shown (2 places).
4. Push on the caster until the ball on the
caster stem is inserted all the way into
the socket. You will hear the ball snap
into the socket and the caster will swivel
easily when positioning is correct.
5.Turn the drum upright.
To Store Your Accessories
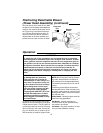
1.Your RIDGID wet/dry vac is designed to
provide better stability, mobility and
accessory storage with the accessory
caddy. Located on the caddy are five
storage pockets. Conveniently store
accessory nozzles and extension
wands on these locations and use the
front 2 caster feet storage pockets for
the hose or any of the accessories.
Caster
Caster Stem
Caster Ball
Drain Cap
Dust Drum
Accessory Caddy
Caster
Caster Stem
Caster Ball
Caster
Dust Drum
Foot


