


ASSEMBLY
TW144 01/11 Assembly Section 3-4
© 2011 Alamo Group Inc.
ASSEMBLY
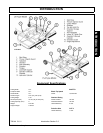
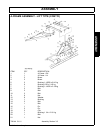
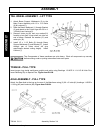
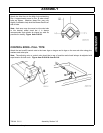
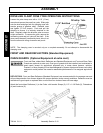
TAIL WHEEL ASSEMBLY - LIFT TYPE
.
1. Attach Beam Support Weldments (2) to the
Main Frame Assembly with 1/2 x 1-1/2 Bolts
(6) & Locknuts(7).
2. Slide the Beam Weldment (1) through Bracket
(3) and attach to the Cutter Lugs with 5/8 x 4-
1/2 Bolt(4) and Locknut(5).
3. Remove cotter pin(18) and one washer(21)
fromfork pivot shaft. Insert shaft into tube on
end of beam. Reinstall flat washer (21) and
cotter pin (18).
4. Install 1/2 x 1-1/2 Bolts (6) through Beam
Support Weldment (2) and Bracket (3). (Install
through pair of holes which will give
approximate desired cutting height). Install
Locknut (7).
The Components of these machines are quite heavy. Block all components up securely
before working under or putting extremities under such parts.
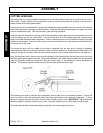
TONGUE - PULL TYPE
Insert tongue lugs inside mainframe uprights and retain using Bushings 1-3/4OD X 1-1/4 LG & Hitch Pins.
Insert Retaining Clip to Special Pins. Figure Asm-R-0106
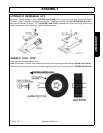
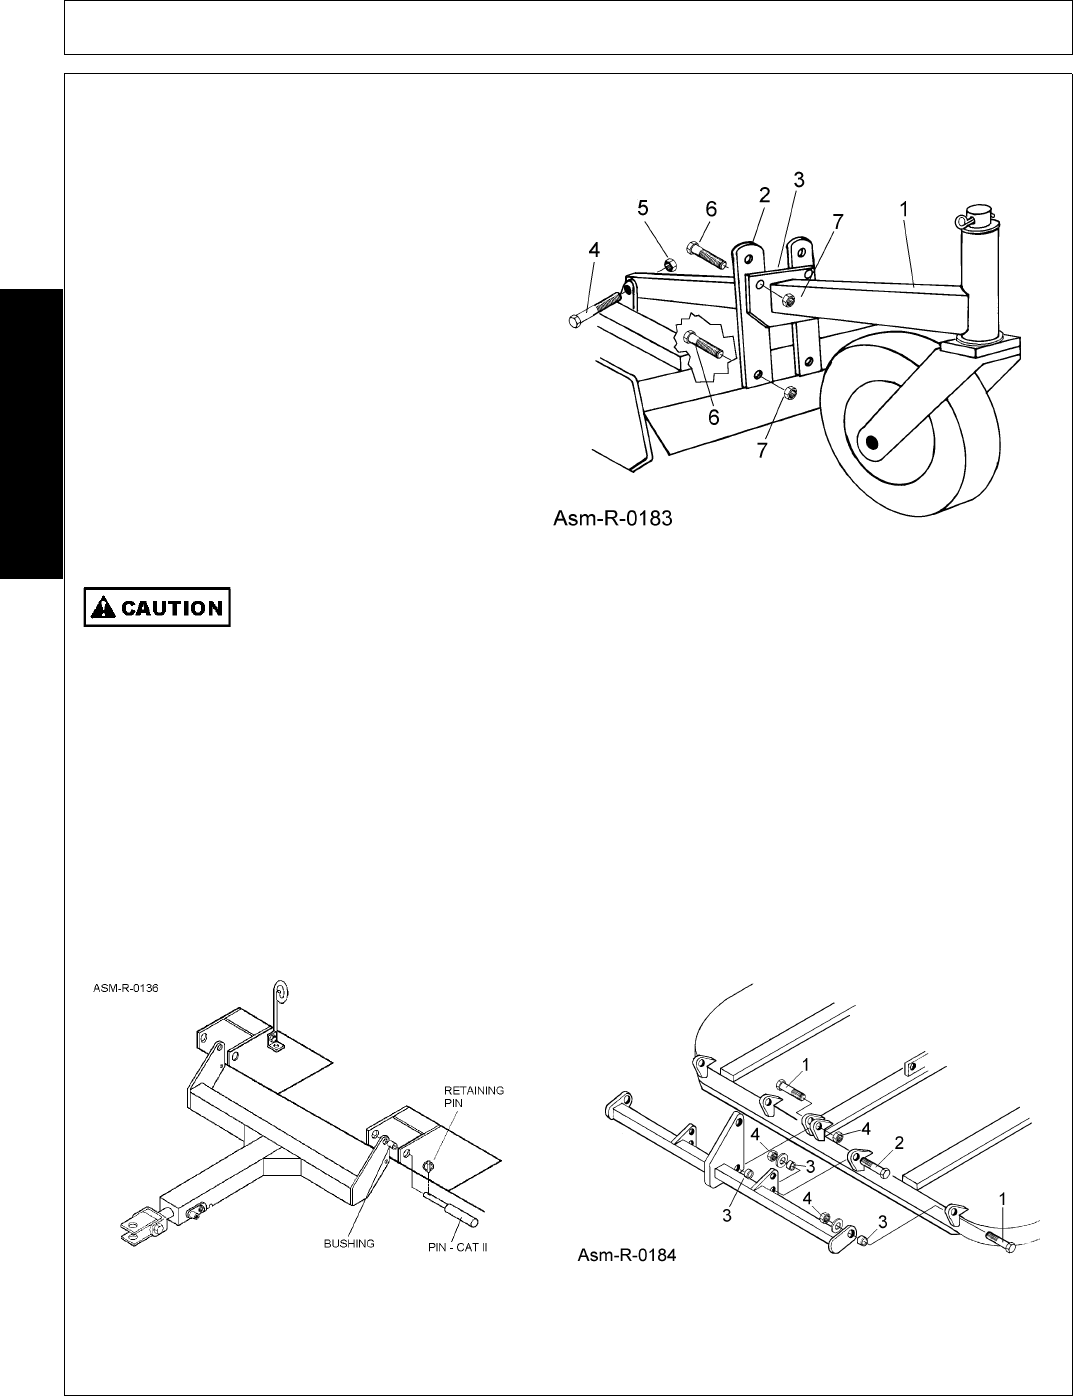
AXLE ASSEMBLY - PULL TYPE
Attach the Rear Axle to the lugs on the rear of the Mainframe using (3) 3/4 x 3 bolts (#1) bushings 1-1/8OD x
1-1/16Lg (#3) and Locknuts (#4). Figure Asm-R-0184.