


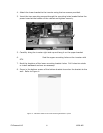


3.0 OPERATION
3.1 Start Up Procedures for the StarInverter
WARNING: Before turning on the StarInverter ensure that the front panel
is closed properly.
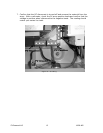
WARNING: The heat sink can reach temperatures in excess of 158º (70ºC).
Care must be taken to not touch the heat sink when in use. Nothing should be
placed on top of the heat sink.
Starting up the StarInverter requires the following steps in the order indicated below:
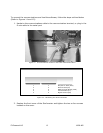
1. Turn the AC breaker ON.
2. Verify that a red LED light is illuminated.
3. Verify that communication is established with the PVP Command Center
(software on PC). This is an optional step.
4. Remove the dark cover from the PV panels.
5. Check the polarity to make sure the + and – are wired correctly and confirm
that the PV panel open circuit voltage is at or below the level specified in Figure
9.
6. Turn the DC breaker ON.
7. IT IS RECOMMENDED THAT YOU ATTACH A PADLOCK AT THIS TIME TO
PREVENT UNAUTHORIZED ACCESS OR DAMAGE TO THE INVERTER.
8. After 5 minutes, the StarInverter will start to produce power into the AC grid if
all necessary operating conditions are met.
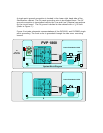
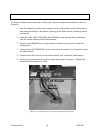
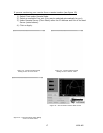
3.2 LED Indicator Lights/Vacuum Fluorescent Display
LED INDICATOR LIGHTS
The StarInverter PVP1800 and PVP2800 display 2 LED indicator lights visible through the
upper left corner of the front panel. These lights will indicate the StarInverter’s status.
If the StarInverter’s operating environment is safe to produce power into the AC grid, the
“OK” (Green) LED is illuminated.
If at any moment the operating environment moves outside the safe operating limits,
governed by UL 1741, IEEE 519, and NEC 690, the “STAND BY” (Red) LED indicator will
be illuminated.
PV Powered LLC 14 18-28-405