


118336
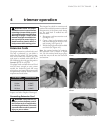
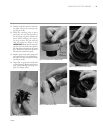
Figure 4-5: Holding trimmer rear handle
Figure 4-6: Pressing trigger switch safety button
Figure 4-7: Squeezing trigger switch
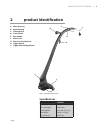
1. Hold trimmer using both front and
rear handles. Keep your thumb and
fingers off the button and switch on
the rear handle (see Figure 4-5).
2. When ready to start the trimmer, press
in the trigger switch safety button with
your thumb (see Figure 4-6).
3. Squeeze the trigger switch with your
fingers (see Figure 4-7). e trimmer
will start.
4. To stop the trimmer, release the trig-
ger switch.
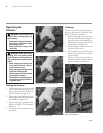
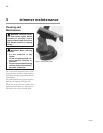
Figure 4-8: Holding trimmer
To reduce excessive line wear and improve
trimming performance, follow the steps
below to trim grass and weeds.
1. Remove any string, wire, or other ma-
terials that could become entangled in
the trimmer from the trimming area.
2. Hold trimmer using both front and
rear handles (see Figure 4-8).
3. Slowly sweep the trimmer from side
to side or front to back.
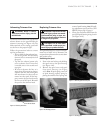
4. Do not force the trimmer. Allow only
the tip of the trimmer line to cut the
grass or weeds.
5. If grass or weeds are tall, cut them in
several increments, starting from the
top and working to the bottom.
Trigger Switch
Safety Button