


76
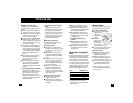
How to Use
Charging (BKT-2000 only)
Before using the BKT-2000 for the first
time,put it on charge for 14-16 hours.
■ Use only the charging adapter supplied
with the unit.
■ Charging should be done at tempera-
tures between 40° and 95°F,or it could
decrease the battery’s life.
■ Make sure the unit is turned off.
■ Connect the cord to the unit,then plug
the charging adapter into the electrical
outlet.A charging indicator will light up.
■ Your unit cannot be overcharged,so you
can leave it plugged in and charging
between uses.But if the unit is not
going to be used for an extended period
of time (2-3 months) unplug it and fully
recharge when you want to use it again.
■ To preserve the life of the batteries,let
them run out every 6 months,then
recharge them for 24 hours.
■ The BKT-2000 cannot be turned on
while it is charging.Do not attempt to
operate trimmer when it is plugged into
the charging adapter.
? If the BKT-2000 doesn’t turn on:
It may simply need charging.The trimmer
needs to be charged for 14-16 hours
before first use.If charging doesn’t solve
the problem,contact an authorized
Remington Service Center about battery
replacement.
? If the BKT-2000 does not hold a
charge:
Fully discharge the trimmer by running it
until it stops.Then follow the recharging
instructions above.If the time between
recharging cycles does not increase, the
battery may need replacing.Contact an
authorized Remington Service Center.
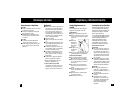
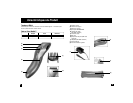
Batteries (BKT-1000 only)
Your BKT-1000 runs on 2 AAA ALKALINE
batteries.
Inserting the batteries
■ Be sure the trimmer is off.
■ You can find the battery compartment
on the opposite side of the trimmer from
the Thumb Wheel.
■ Open the battery compartment by
pressing its tab in toward the door and
lifting the door up.
■ Insert the batteries so that the (+) and
(-) marks on the batteries face the same
marks inside the battery compartment.
Trimmer will not operate if batteries are
inserted incorrectly.
■ Replace the battery cover by inserting
the end opposite the tab and then
pressing the tab until it clicks into place.
The battery cover only fits one way. If it
does not go on correctly, turn it around.
Battery cautions
■ Use of non-alkaline batteries will hurt
the unit’s operating performance.
■ Batteries should not be left in the unit if
the unit is not in use for long periods.
■ To prevent battery corrosion,the unit
should be kept in a dry environment.
■ Dead batteries should be removed
immediately and disposed of properly.
■ Do not use recharged batteries with
this appliance.The lower voltage in
recharged batteries impairs the
performance of the cutting unit.
? If the BKT-1000 doesn’t turn on:
■ The batteries may be improperly installed.
The trimmer will not operate
unless the
batteries are positioned correctly.
■ The batteries may be depleted.Replace
them with 2 new AAA alkaline batteries.
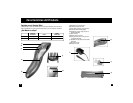
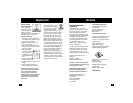
Adjusting the Trim Length
The trimmer comb can be adjusted to give
you 5 different trim lengths,simply by turn-
ing the Thumb Wheel to the desired setting.
Turn the Thumb Wheel clockwise for shorter
length,counter-clockwise for longer length.
The wheel will click into place as it reaches
each setting,and the setting number will
appear on the Length Position Indicator.
Here’s what the length settings mean:
Setting Hair Length
1 1/8"
2 3/16"
3 1/4"
4 5/16"
5 1/2 "
! Trimmer comb must be attached to the
trimmer in order to use the hair length
selector.
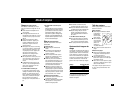
Edging and shaping
Remove the adjustable trimmer comb
attachment if you are defining hairline
edges for shaping.
Removing the trimmer comb
■ Be sure trimmer
is off.The
trimmer comb
may be on any
setting.
■ Hold the trimmer
in one hand with
your thumb
firmly on the
Thumb Wheel to keep it from turning.
■ With your other hand,gently pull the
trimmer comb attachment off the trimmer.
Replacing the trimmer comb
■ Be sure trimmer is off.The trimmer
comb may be on any setting.
■ Hold the trimmer in one hand with your
thumb firmly on the Thumb Wheel to
keep it from turning.
■ With your other hand,slide the comb
over the top of the trimmer until it clicks
into place.
!The trimmer comb attachment only fits
one way. If it does not go on correctly, turn
it around and try again.