Pro-8a 2400 Air – Pro-8a 1200 Air
12
www.profoto.com
Pro-8a 2400 Air – Pro-8a 1200 Air
13
www.profoto.com
Additional information
Color Temperature
The color temperature of Pro-8a is calibrated to correspond to daylight and, because of
the PiPE (patent pending) technology, it remains perfectly constant and reliable from flash
to flash and over the entire power range, regardless of the chosen power output and the
number of flash heads used. This makes the Pro-8a generators perfectly suited for all
kinds of critical assignments, even with high-resolution digital cameras and backs. In
combination with all actual Pro flash heads and light shaping tools the Pro-8a generators
give neutral and extremely stable color. Please note that other factors, like reflections
from surrounding objects and ambient lights with non neutral color characteristic, may
influence the light color temperature and spectra.
Combining flash tubes and/or glass covers with different coatings can make distinctive
color temperature adjustments if needed.
f-stop Stability & Range
The unique PiPE (patent pending) technology ensures extreme light power stability
from flash to flash as well as over the whole power range. The unique wide power range
offers maximal flexibility for all situation from light power consuming large objects at
large distances to really close ups ex. ProRing2 without overexposure with one and the
same flash generator. Please note that influence from ambient and modeling light makes
measurement of small power levels difficult.
WARNING
Do not use the light meter’s built-in slave trigger at smaller power levels. Please use a cord and check the shutter
speed to avoid ambient light influence.
Flash Duration
The full power short flash duration has more advantages except from freezing a moving
object. It will also make it possible to use a very short camera shutter speed to cut out
exposure influence from indoor ambient light as well as direct sunlight.
The flash duration can be shortened by reducing the power output with Flash Light Energy
Control A [8] and/or B [19]. The shortest flash duration using a ProHead and a Pro-8a
generator at lowest energy is 1/12000 sec. To shorten the flash duration even more at a
given light setting, use a ProTwin head.
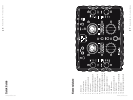
I.e. if you connect the two plugs of a ProTwin to the Lamp Head Connector A [4] and B [15]
of a Pro-8a 2400 Air generator and use both outlets at 1200Ws, the flash duration is just
1/2200s instead of 1/1600s at maximum power with one ProHead.
Petrol-Electric Generators
All petrol-electric generators can produce voltage peaks that may damage electronic
devices. Pro-8a is however designed to comply with sufficient power rated petrol-electric
generators supplying AC-power equal to the voltage and frequency specified and without
use of ProGas.
One dedicated 6000 Watt petrol-electric generator is required to power supply one Pro-8a
at MAX speed.
To supply one Pro-8a generator at 50% recharge speed setting requires one dedicated
3000W petrol-electric generator.
To supply one Pro-8a generator at 25% recharge speed setting requires one dedicated
2000W petrol-electric generator which is the smallest recommended for use with Pro-8a.
To supply two Pro-8a generators at 50% recharge speed setting requires one 6000W
petrol-electric generator etc.
WARNING
Only use Pro-8a on the same petrol-electric generator, use of any other flash model simultaneously will cause
high voltage and may damage the Pro-8a. Pro-8a itself does not cause gas generators to produce high voltages.
Underrated power of a petrol-electric generator will cause various bad results.
Operating instructions
Lamp head connection
1. If only one lamp head is used, connect the lamp to Lamp Head Connector A [4].
2. When connecting the lamp head plug, align the white dot on the plug with the white
dot to the upper left of the Lamp Head Connector. Secure by turning the ring on the plug
clockwise.
Power connection
1. Use the included power cable to connect the generator to the Power Supply (AC)
Connector [11].
2. The Power Supply Indicator [12] will be red, indicating that the generator is receiving
power but is in standby mode.
3. Press the On switch [13].
4. The Power Sypply Indicator [12] will now be green and the Test Button [10] will be
illuminated.


