4 PRESTO P4 LEVEL LOADER OWNER’S MANUAL
INSTALLATION INSTRUCTIONS
Preparation
1. Before you start to install the unit, check for
local codes and ordinances which may
apply. It is your responsibility to obtain any
necessary permits.
2. Read all of these installation instructions
carefully. Be sure to read and understand
all of the warnings.
3. The unit should be placed indoors, or
protected from the weather.
WARNING!
Protect the unit from rain or
moisture. If the electrical parts in the
power unit get wet, workers may be
hurt by electrical shock. The
electrical parts may fail if they are
wet.
WARNING!
The electric motor can create
sparks. Don’t install the unit in an
DANGER: Immediate hazard which will result in severe personal injury or death.
WARNING: Hazard or unsafe practice which could result in severe personal injury or death.
CAUTION: Hazard or unsafe practice which could result in minor personal injury or
property damage.
SAFETY
The safety of all persons installing, using, servicing, or working near the P4 Level Loader unit is of
paramount concern to Presto. The P4 Level Loader unit is a powerful machine with moving parts,
and is CAPABLE OF CAUSING PERSONAL INJURY IF PROPER PRECAUTIONS ARE NOT
TAKEN.
Therefore, throughout this manual, Presto has identified certain hazards which may occur in the
use of the P4 Level Loader unit, and provided appropriate INSTRUCTIONS or PRECAUTIONS
which should be taken to avoid these hazards. In some cases, Presto has also pointed out the
CONSEQUENCES which may occur if Presto’s instructions or precautions are not followed. Presto
uses the following system of identifying the severity of the hazards associated with its products:
PLEASE READ AND FOLLOW THIS INSTRUCTION MANUAL, INCLUDING ALL SAFETY
INSTRUCTIONS AND PRECAUTIONS, CAREFULLY AND COMPLETELY.
area where flammable gases may be
present.
4. You will need these tools to install the unit:
• A crane or lift truck that can lift the unit safely.
If you plan to lag the unit in place, you will
need these tools:
• Shims and lag bolts.
• A masonry drill and bit to drill the holes for the
lag bolts.
• Wrenches to fit the lag bolts
• Grouting material to fill any spaces under the
frame of the machine.
Positioning the Unit
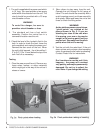
1. Remove the shipping material. Unbolt the
lag screws at the lag angles on the corners.
(If you plan to bolt the unit in place, leave the
lag angles attached to the frame of the unit.
Otherwise, unbolt and remove the lag
angles.)
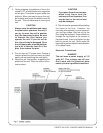
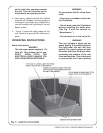
2. On the front of this manual, write down the
model number, serial number, and date the
unit is placed in service. You can find the
model number and serial number on the
name plate.


