


12
fences, metal, etc., or clusters of hard,
woody brush having a diameter greater
than 1/2 inch (1 cm).
S Keep the blade sharp. A dull blade is more
likely to snag and thrust.
S Cut only a t full throttle. The blade will have
maximumcutting powerand is less likely to
bind or stall.
S “Feed” the blade deliberately and not too
rapidly.Thebladecan thrust a way ifit isfed
too rapidly.
S Cutonly from yourleft toyour right.Cuttingon
right side of the shield will throw debris away
from th e ope rator.
S Use the shoulder strap and keep a firm g rip
on the unit with both hands. A properly
adjusted shoulder strap will support the
weight of the unit, freeing your arms and
hands to control and guide t he cutting motion.
S Keep feet comfortably spread apart and
braced for a possible sudden, rapid thrust of
unit. Do not overreach. Keep firm footing and
balance.
S Keep blade below waist level; it will be
easier to maintain control of unit.
S Donot raisetheengineaboveyour waistas
the blade can come dangerously close to
your body .
S Do not swing unit with such force that you
are in danger of losing your balance.
Bring the engine to cutting speed before enter-
ing the material to be cut.If the blade does not
turn whenyousqueeze thethrottle trigger,make
sure shaft is fully inserted into the engine.
Always release the throttle trigger and allow
engine to return to idle speed when not cut-
ting. The blade should not turn while the en-
gineis runningatidle. Ifthebladeturns atidle,
do notuse your unit. Referto theCARBURE-
TOR ADJUSTMENT section or contact your
authorized service dealer.
S Maintain good firm footing while using the
unit. Do this by planting feet firmly in a
comfortable apart position.
S Cut while swinging the upper part of your
body from left to right.
S Asyoumoveforwardtothenextareatocut,
be sure to maintain your balance and footing.
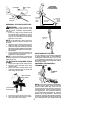
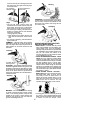
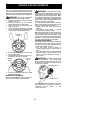
Cut using the 2
o’clock to 4 o’clock
position of the
blade
2 o’clock
4 o’clock
RECOMMENDED CUTTING POSITION
WARNING: The operator or others
mustnottrytoclearaway cutmaterialwiththe
engine running or the blade turning to avoid
serious injury. Stop engine and blade before
removing materials wrapped around blade or
shaft.
ADDITIONAL SAFETY RULES
FOR OPTIONAL ATTACHMENTS
WARNING: For each optional at-
tachment used, readentire instruction manu-
al before use and follow all warnings and in-
structions in manual and on attachment.
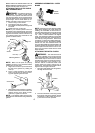
WARNING: Ensure handlebar re-
mains installed on upper shaft (engine end of
unit) at all times.
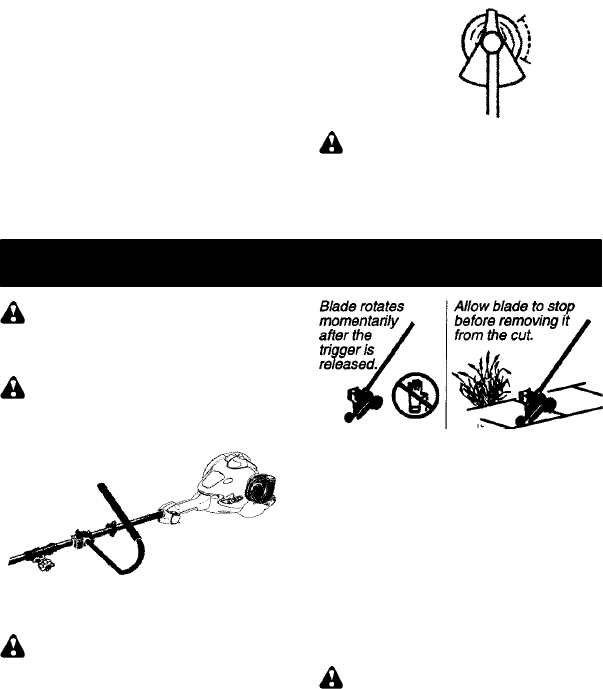
Handlebar
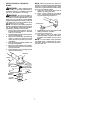
EDGER SAFETY
WARNING: Inspect the area to be
edged before each use. Remove objects
(rocks, broken glass, nails, wire, etc.) which
can be thrown by the blade or can wrap
around the shaft.
S Blade rotates momentarily after the trigger
is released. The blade can seriously cut
you or others.
S Allow blade to stop before removing it from
the cut.
S Throw away blades that are bent, warped,
cracked, broken or damaged in any other
way. Replace parts that are cracked,
chipped, or damaged before using the unit.
S Do not attempt to remove cut material nor
hold material to be cut when the engine is
running or when cutting blade is moving.
S Always keep the wheel and depth adjusting
skid in contact with the ground.
S Always push the unit slowly over the
ground. Stay alert for uneven sidewalks,
holes in the terrain, large roots, etc.
S Always use the handlebar when using
edger attachment.
BLOWER/VACUUM SAFETY
WARNING: I nspect area before
starting unit. Remove a ll debris and hard ob-
jects such as rocks, glass, wire, etc. that can
ricochet, bethrown, orotherwisecause injury
or damage during operation.
S Do not set unit onany surface except aclean,
hard area while engine is running. Debris
such as gravel, sand, dust, grass, etc., could