


12
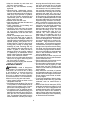
MAINTENANCE
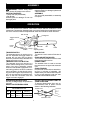
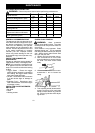
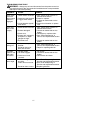
CUSTOMER RESPONSIBILITIES
Fillindatesasyoucomplete
regular service
Check for damaged/worn parts
Check for loose fasteners/parts
Check chain tension
Check chain sharpness
Check guide bar
Inspect and clean unit & labels
Before
Use
After
Use
Every
15 mi n.
Service
Dates
n
n
n
n
n
nCheck bar and chain oil level
Clean guide bar groove
n
n
n
WARNING: Disconnect power s ource before performing maintenance.
GENERAL RECOMMENDATI ONS
The warranty on this unitdoes notcover
items that have been subjected to oper-
ator abuse or negligence.To receive full
value from the warranty, the operator
must maintain unit as instructed in this
manual. Various adjustments will need
to be made periodically to properly
maintain y our unit. Improper mainte-
nance may c ause d amage to the unit
and possibleinjury tothe operatororby-
standers.
CHECK F OR DAMAGED OR
WORN PARTS
Contact an authori zed service dealer for
replacement of worn or damaged parts.
NOTE: It is normalfor a small amountof
oil to appear under the saw after motor
stops.Do not confuse this with a leaking
oil tank.
S Tr i gger Switch -- Ensure the t r i gger
switch f uncti ons proper l y by squeezing
and holding t he trigger switch. Make
sure motor starts and stops.
S Oil Ta nk -- D i sco nti nue use of chain saw
if oil tank shows signs of damag e o r
lea ks.
S Extension Cord -- Discontinue use if
chai n saw extensi on cord shows signs
of damage or wear.
CHECK FOR LOOSE FASTENERS
AND PARTS
S Bar knob
S Chain
S Housing scr ews
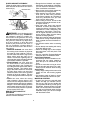
CHECK CHAIN TENS ION
WARNING: Wear protective
gloves when handling chain. The chain
issharpandcancutyouevenwhenitis
not moving.
Chain tension is ver y important . Chai n
stretches during u se. This i s especially
tr ue dur ingthe fir stfew times you use your
saw. Always check chai n t e nsi o n each
time you use your saw.
1. Unplug unit from the power source.
2. Use a screwdriver to move c hain
around guide bar to ensure kinks do
not exist. The chain should rotate
freely.
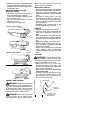
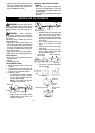
3. Lift lever on bar knob and turn coun-
terclockwise 1 turn to loosen bar
clamp.
LOOSEN
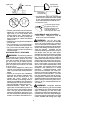
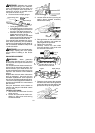
4. Turn adjusting wheel (downward di-
rection) to tension chain until c hain
solidly contacts bottom of guide bar
rail. Lift tip of guide bar while adjust-
ing tension.