


7
ASSEMBLY
WARNING:
A void a ccidental start-
ing. Always unplug saw from power
source before ins talling a bar and/or
chain.
The assembly tool provided with your saw
is the only tool needed for assem bly. Pro-
tective gloves (not provided) should be
wo rn du ring as s embly.
ATTACHING THE BAR AND CHAIN
(if not already attached)
WARNING:
If received as-
sembled, repeatall steps to ensure your
saw is properly assembled and all fas-
teners are secure. Always wear gloves
when handling the chain. The chain is
sharp and can cut you even when it is
not moving!
S
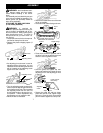
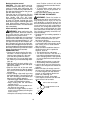
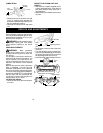
Loosen and remove the bar clamp nuts
and the bar clamp from the saw.
S
Remove the plastic shipping spacer ( if
present).
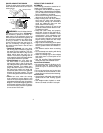
Bar Nuts
Adjusting Screw
Bar
Clamp
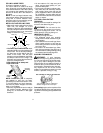
S
An adjusting pin and screw is used to
adjust the tension o f the chain. It is very
important when assem bling the bar that
the pin located on the adjusting screw
aligns into a hole in the bar.
Adjusting Screw
S
T urn the adjusting screw counterclock-
wise to move theadjustingpin almost a s
far as it will go to the rear . Do not remove
the adjusting screw from the unit.This
should allow the pin to be near the cor-
rect position. Further adjustment may
be necessary as you mount the bar.
S
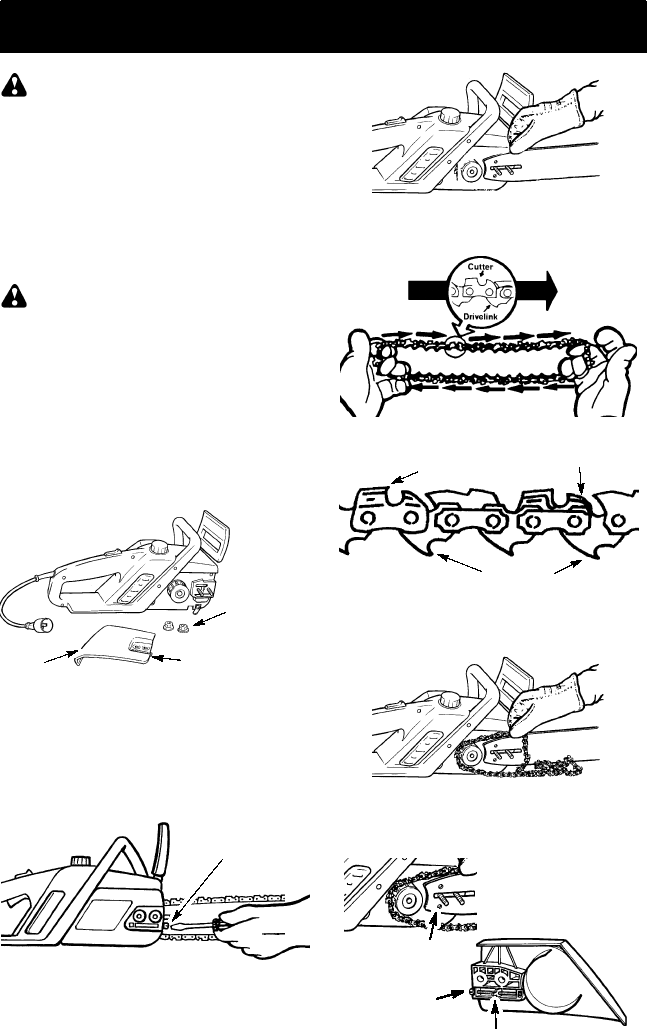
Mount the bar as illus trated.
S
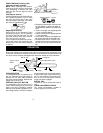
Slide the bar toward the rear of the saw
as far as possible.
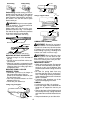
S
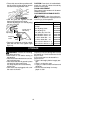
Hold chain with c utters facing as shown.
CUTTERS MUST FACE IN
DIRECTION OF ROTATION
Tip of
Bar
Cutters
Depth Gauge
Drive Links
S
Place chain around the sprocket and fit
the drive links into the guide bar groove
and then around guide bar nose.
S
Hold t he guide bar against the saw
frame and install the bar clamp. Be sure
adjusting pin is in the adjusting pin hole
in the bar.
Inside view of
Bar Clamp
Adjusting
screw
Adjusting p in
Adjusting pin hole
S
Secure the guide bar and bar clamp
plate w ith the bar nuts; tighten finger
tight
only
. Once the chain is tensioned
you will need to tighten bar clamp nuts.