


8 U.S. Customer Care Center 1-888-632-4453
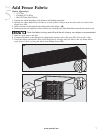
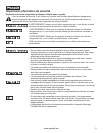
Cut the Fabric
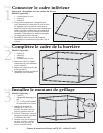
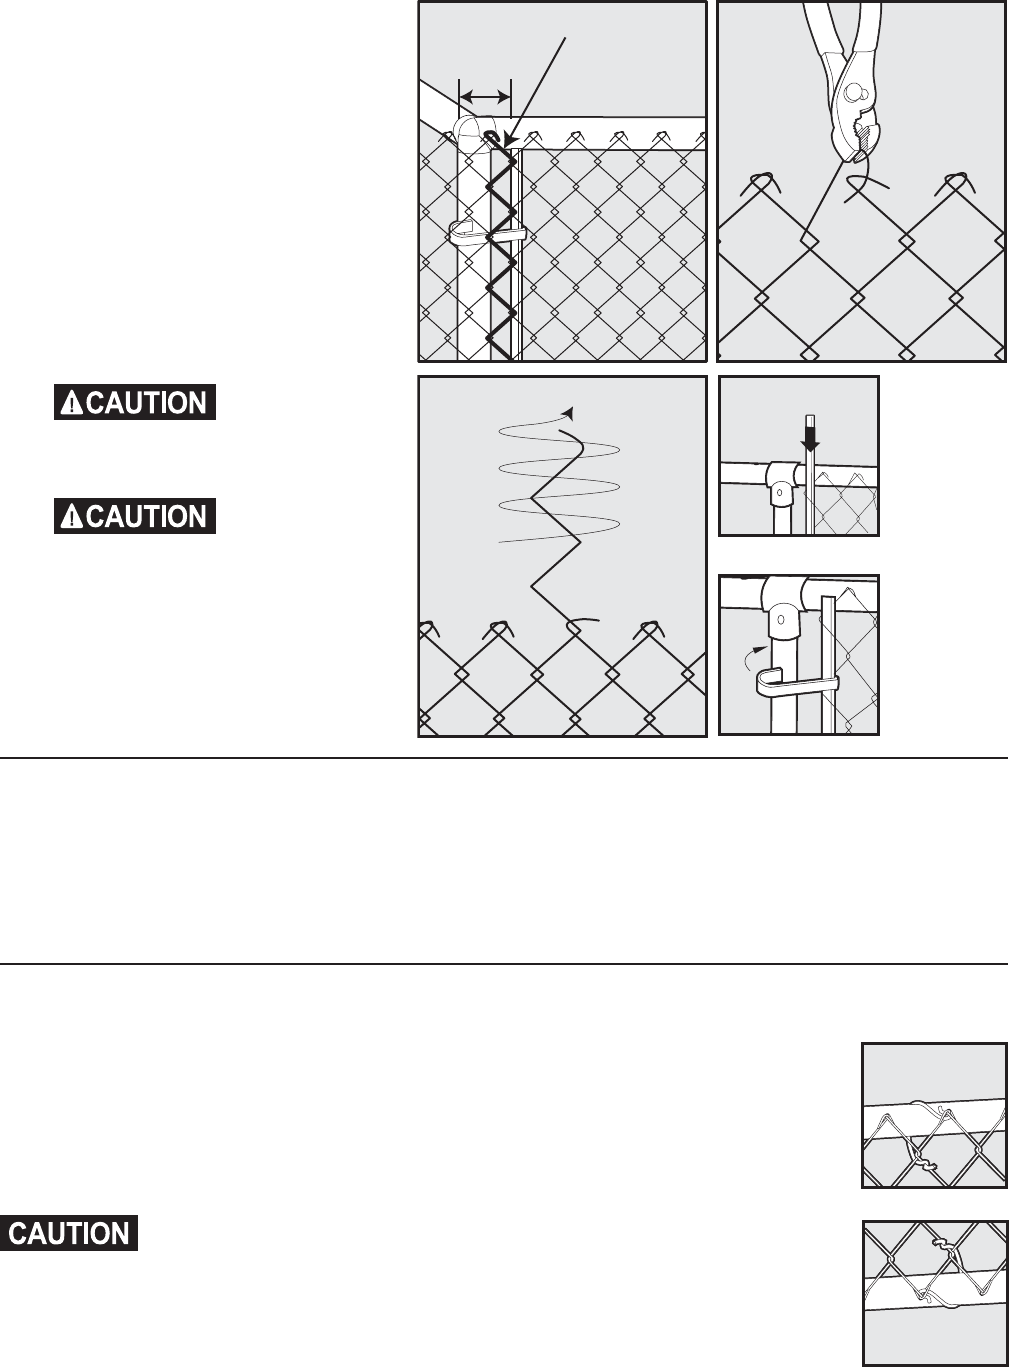
Gather (Quantity):
• (5) Clips
• (1) Tension rod
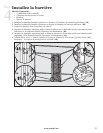
1. Stretch the fabric as tightly as possible
to the corner post and select a fabric
wire to cut, allowing 4 inches (10 cm)
for the tension rod and clips (6A).
2. Cut the fabric by holding the fabric
loosely while you spin one of the
pickets out.
a. Undo the knuckle at the top and
the knuckle at the bottom of the
same picket (6B).
b. Unweave that picket by spinning
it out (6C).
Wire ends may
be sharp.
c. Install the tension rod (6D) and
5 clips (6E).
Pinching may
occur during
fabric installation.
Work gloves are
recommended.
6C 6D
6E
6B
4 inches
(10 cm)
Remove this picket
6A
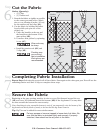
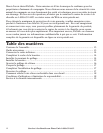
Completing Fabric Installation
Repeat Steps 5-6 using the second roll of fence fabric. Start again at the other gate post. You will use the
remaining tension rods and 10 clips to complete these steps.
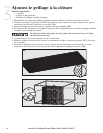
Secure the Fabric
Beginning at the gate opening, attach a tie wire to every 5th diamond around the top
(8A) and every 3rd diamond around the bottom (8B) of the dog kennel. Use any extra
tie wires around the bottom for extra security.
Note: Attaching tie wires around the bottom is easier if you temporarily raise the bottom of the
dog kennel onto bricks, blocks of wood, or the box that the dog kennel came in.
Tip: Zip Ties can be added for extra reinforcement.
Pet may escape or become trapped in loose chain link fabric. Be
sure that the fabric is stretched tightly and securely. If properly
stretched, there should not be any slack in the fabric.
8A
8B
Step
6
Step
7
Step
8