


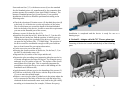
• Remove the rubber eyepiece guard from the scope.
• Set the eyepiece in the medium position.
• Screw the adapter ring with the camera in an internal groove of an
eyepiece.
• Switch on the device and focus the assembled system with the
help of the objectives of the device and camera. If the image
cannot be focused the camera with the ring should be removed
and the coupling of the eyepiece of the device should be rotated a
little. Assemble the system again and check its focusing. At some
position of the eyepiece and objective of the camera the system
will be focused exactly.
• Fasten the adapter ring with the camera to the body of the
eyepiece of the device with the help of three locking screws.
During further photo shooting sharpness of the system is obtained
with the help of the objective of the DN482/483 only;
• Set diaphragm on the objective of the camera equal 2.8 or 4
(shooting is possible even at lower diaphragm settings, for
example 2, but the obtained pictures will have worse resolution).
Taking photos with a completely opened diaphragm of the
objective is justified for the shooting of quickly moving objects
only.
The TTL system, which is installed at most SLR cameras, easily
estimates exposure during the shooting with the device. If your
camera is not equipped with the TTL system, the table can
approximately estimate the shutter speed at the diaphragm number
of the camera equal 2.0:
ISO 50 100 200 400 800 1600 3200
Shutter speed, sec. 1 1/2 1/4 1/8 1/15 1/30 1/60
NOTES.
Use an ISO 400 film or higher. Usage of a tripod is strongly
recommended to achieve higher quality photos.
16
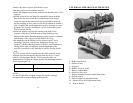
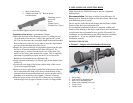
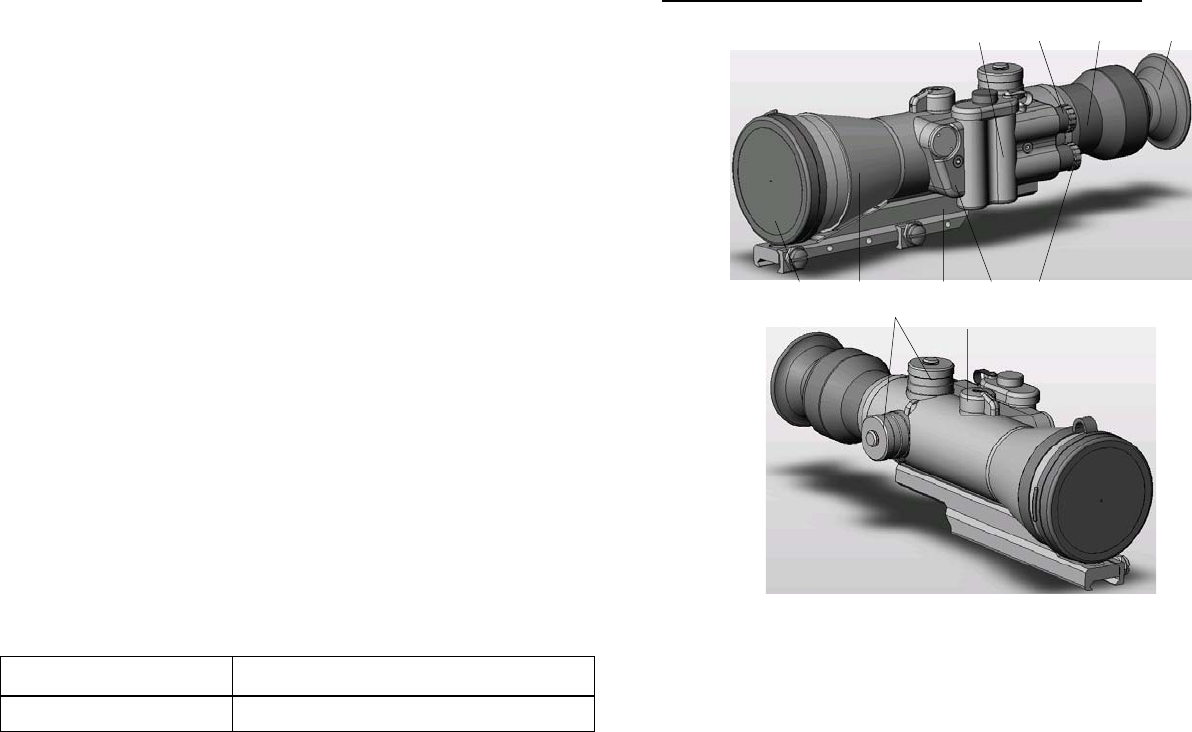
2. EXTERNAL APPEARANCE OF THE DEVICE
5 9 3 4
6 2 11 1 8
7 10
1 – Body of the device;
2 – Objective lens;
3 – Eyepiece;
4 – Rubber eyepiece guard;
5 – Battery compartment;
6 – Objective lens cover;
7 – Internal windage/elevation adjustment knobs;
8 – On/Off switch;
9 – Reticle brightness adjustment knob;
10 – Objective lens focus adjustment knob;
11 – Weaver mount;
5