


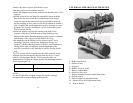

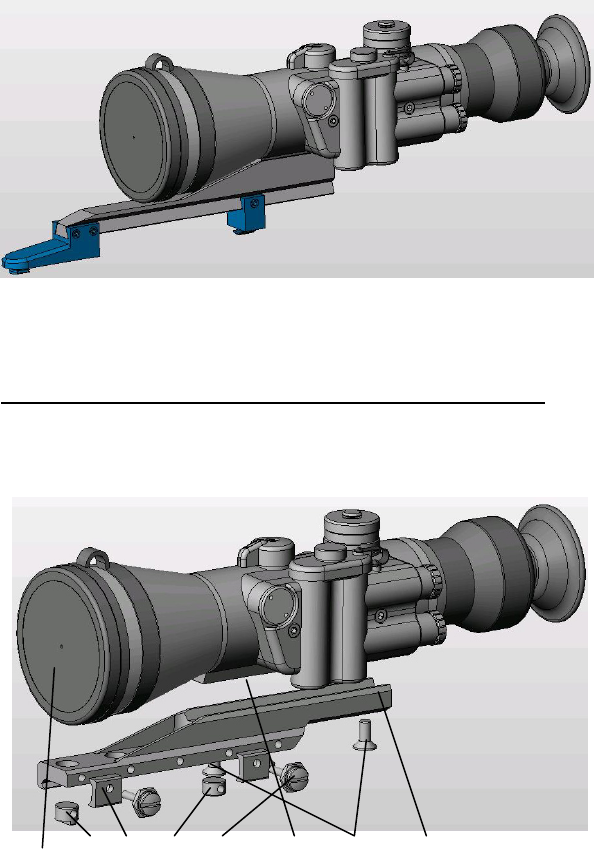
Front and rear feet (2, 3) with thwart screws (6) are the standard
feet for Standard prisms (4), manufactured by the companies that
produce mounts (for example, Ernst Apel GmbH Germany). The
mount of Standard prism type (4) and screws (5) are optional.
Installation of the device should be performed according to the
following rules:
• Check the elevation of fixation screws (5) that bind the prism (4)
to the body (1) of the device over the top surface of the prism.
The elevation must not exceed the depth of the dead threaded
holes in the body of the device. In order to meet this requirement
you can cut the threaded part of the screws;
• Remove screws (6) from the feet (2,3);
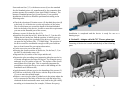
• Install the feet onto the rail (4). Insert the feet (2, 3) in the rifle.
Sliding the rail in the feet, find the position, in which your eye
will meet the edge of the eyeshade of the device or will be 2-5
cm apart for big calibres (like .375 H&H Mag). The position of
the device must be comfortable enough so that you would not
have to lean forward for convenient observation;
• Cut the excessive part of the rail (4);
• Keeping the chosen position of the device, fix the feet (2, 3) to
the rail (4) with thwart screws (6);
• Degrease the (A) surface of the scope and the rail;
• Prepare the glue according to an instruction (the glue need to be
of certain strength not less than 200 kg/cm
2
, for example epoxy)
and apply it to (A) surface of the rail. The surface of the screws
must remain free of the glue. This is especially important for
possibility to repair the device or to remove the binding rail for
installation on a different rifle;
• Apply hermetic (silicone type) to the threading of the screws (5).
• Fix the bar to the body of the device with the help of the screws
(5), cut to meet the needed length;
• Remove excessive glue (that is pushed out in the points where the
rail is connected to the body of the device) with the help of dry
cloth and alcohol-moistened cotton wool, and let the glue calcify
according to its instruction (for example, 24 hours for epoxy).
10
Installation is completed and the device is ready for use as a
hunting scope.
b. Variant II – Adapter rail with 7/8’’ Weaver prism type.
Fastening of the device is made with the help of the following
parts:
1 4 6 5 7 A 3 2
11