


MAINTENANCE
22
F-040733L
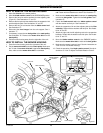
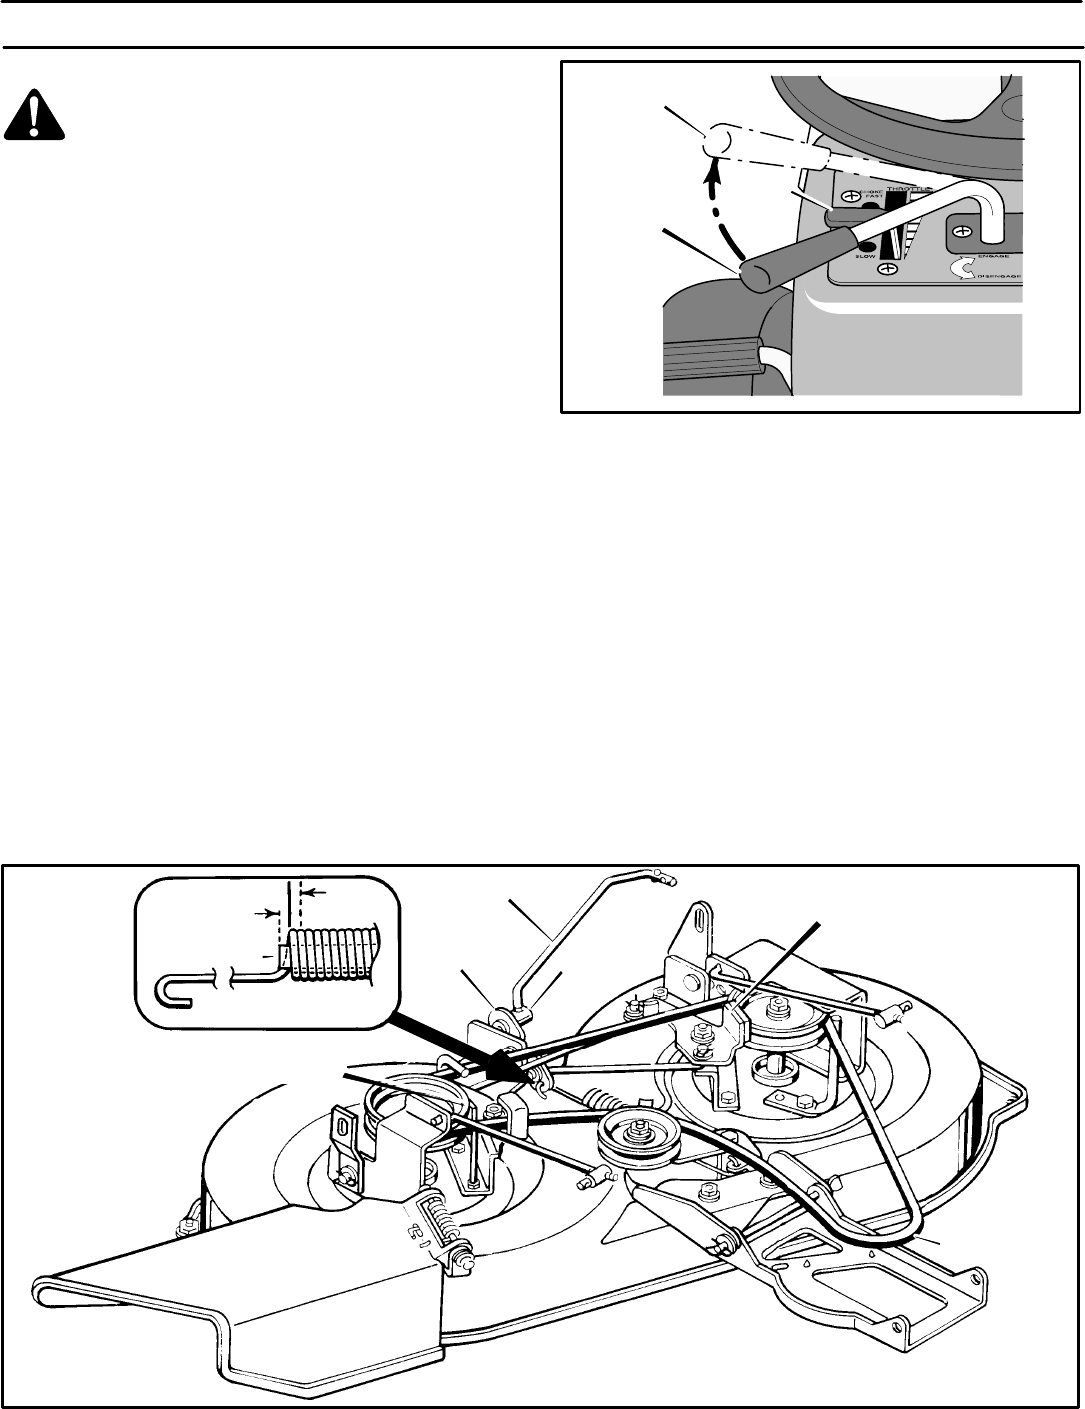
HOW TO ADJUST THE BLADE ROTATION CONTROL
WARNING: To prevent an injury, the blade rotation
control must operate correctly.
1. Stop the engine. Disconnect the wire from the spark plug.
2. Before you adjust the blade rotation control, check and level
the mower housing. See “How To Level The Mower Housing.”
Make sure the mower housing is level before go to the next
step.
3. Set the height of the mower housing in the lowest position.
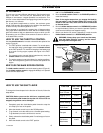
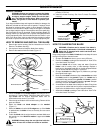
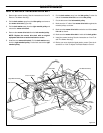
4. Move the blade rotation control to the ENGAGE position
(Figure 14). Check the plastic indicator inside the blade drive
spring (Figure 15). The end of the plastic indicator must be
aligned ( + or - 1/8 inch / 3 mm) with the last coil of the blade
drive spring.
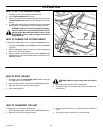
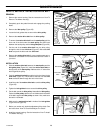
5. If the plastic indicator is more than 1/8 inch (3 mm) from the
last spring coil, an adjustment is needed. Move the blade rota-
tion control to the DISENGAGE position. Disconnect the
blade control rod from the pivot bracket. Turn the adjustable
nut clockwise to increase the length of the coils. Turn the ad-
justable nut counterclockwise to decrease the length of the
coils.
6. Connect the blade control rod to the pivot bracket. Move the
blade rotation control to the ENGAGE position. Check the
adjustment of the blade drive spring.
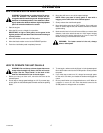
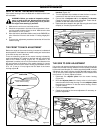
7. Move the blade rotation control to the DISENGAGE posi-
tion. Check the operation of the blade brake. Rotate the pulley
with your hand. Make sure the pads for the blade brake are
pressed tightly against the pulleys.
IMPORTANT: If the brake pads do not press tightly against
the pulleys, replace the mower drive belt and repeat steps
1-7. Then, complete the remaining steps. Correct
replacement parts and assistance are available from an
authorized service center.
8. Move the blade rotation control to the ENGAGE position.
Check the pads for the blade brake. If the pads are excessively
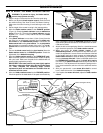
Blade Rotation Control
Engage Position
Disengage
Position
Throttle
Control
Figure 14
worn or damaged, replace the brake pad assemblies. Correct
replacement parts and assistance are available from an autho-
rized service center.
9. Attach the wire to the spark plug. Mow for a short distance and
again check the operation of the blade rotation control.
10. When you move the blade rotation control to the
DISENGAGE position, all movement will stop within five sec-
onds if the adjustment is correct. If there is movement of the belt
or the blades continue to rotate, engage and disengage the
blade rotation control five times to remove any excess rubber
from a new mower drive belt. If there is still blade rotation from
the DISENGAGED position, adjust the blade drive spring
until more of the plastic indicator extends beyond the end of
the last coil. This adjustment will decrease the spring tension.
If you need assistance, take the unit to an authorized service
center.
11. After you operate with a new mower drive belt for several
hours, check the tension of the blade drive spring.
12. If you replace the mower drive belt, adjust the blade rotation
control.
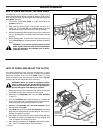
Figure 15
Pivot Bracket
Adjustable
Nut
Blade Control Rod
Brake Pad Against Pulley
Mower Drive Belt
Blade Drive Spring
Plastic Indicator
-1/8”
(3mm)
+1/8”
(3mm)
Blade Brake
(Brake Pad Against Pulley)