


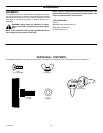
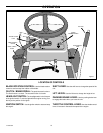
OPERATION
18
F-040733L
BEFORE STARTING THE ENGINE
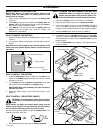
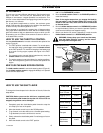
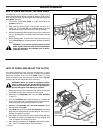
CHECK THE OIL
NOTE: The engine was shipped from the factory filled with SAE
30 weight oil. Check the level of the oil. Add oil as needed.
1. Make sure the unit is level.
NOTE: Do not check the level of the oil while the engine
runs.
2. Clean the area around the dipstick. Remove the dipstick. Wipe
the oil from the dipstick.
3. Insert the dipstick into the oil fill tube. Turn the dipstick clock-
wise until it is tight. Remove the dipstick. Check the oil level on
the dipstick. The oil level must reach the FULL mark on the
dipstick.
4. If necessary, add oil until the oil reaches the FULL mark on the
dipstick. The quantity of oil needed from ADD to FULL is shown
on the dipstick. Do not add too much oil.
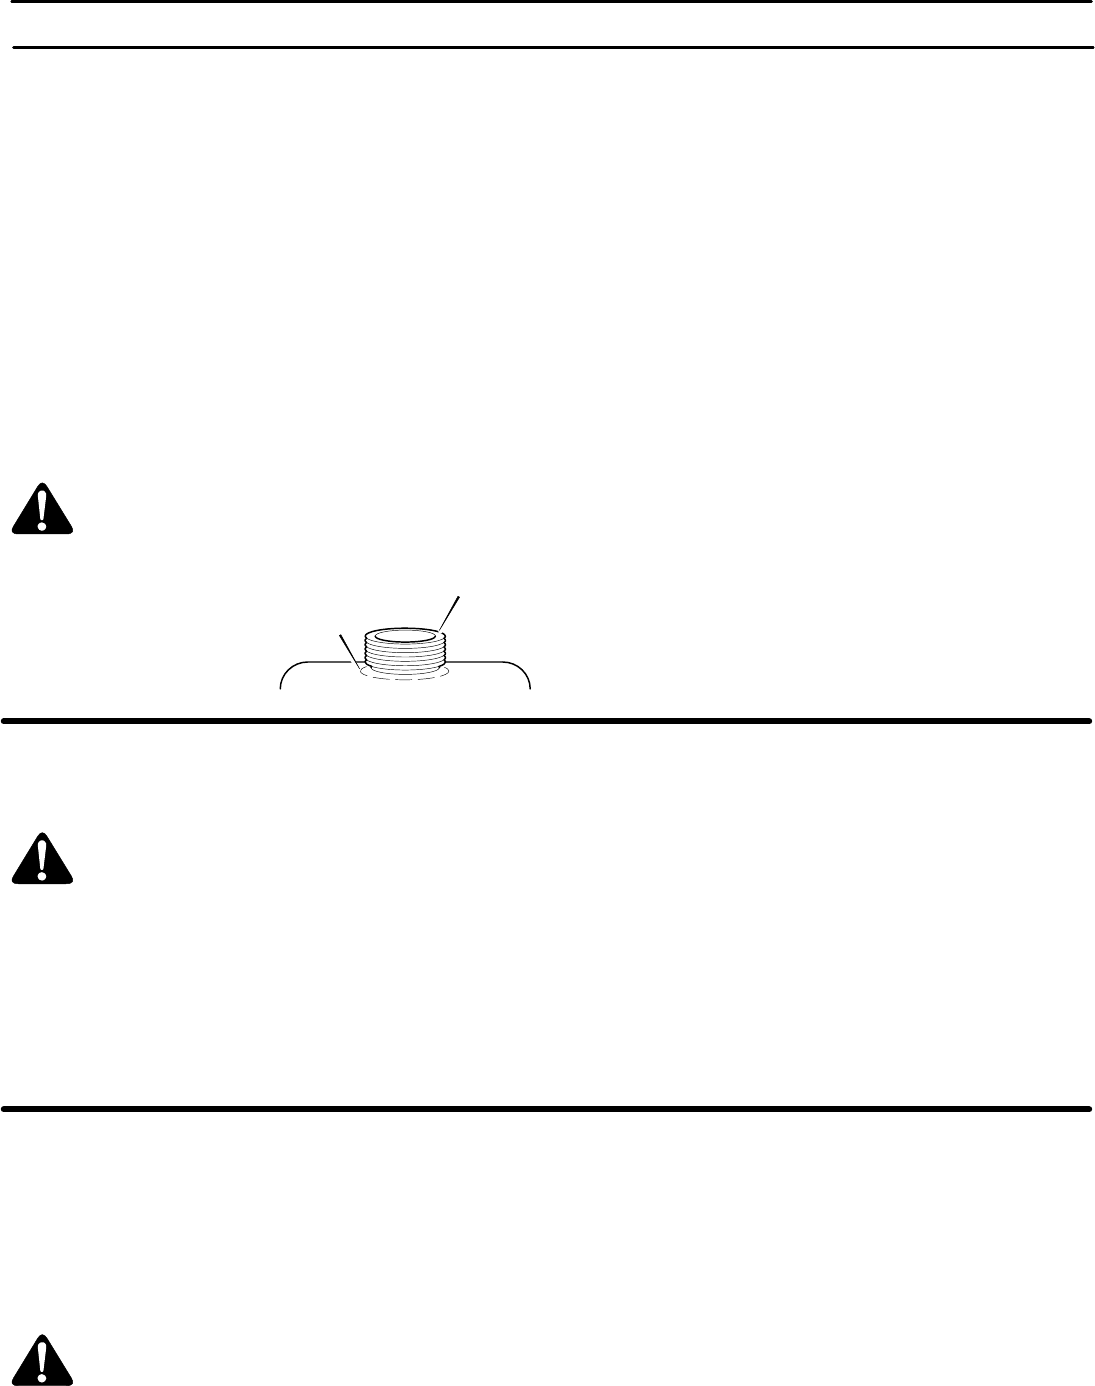
ADD GASOLINE
WARNING: Always use a safety gasoline container.
Do not smoke when adding gasoline to the fuel tank.
Do not add gasoline when you are inside an enclo-
sure. Before you add gasoline, stop the engine and
let the engine cool for several minutes.
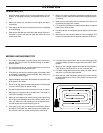
Fill the fuel tank with regular
unleaded gasoline. Do not use
premium unleaded gasoline.
Make sure the gasoline is fresh
and clean. Leaded gasoline will
increase deposits and shorten
the life of the valves.
CAUTION: A mixture of alcohol (ethanol or methanol) and
gasoline (called gasohol), will attract moisture and cause acid
deposits during storage. While the unit is in storage, the acids
in the fuel can damage the fuel system.
To prevent engine problems with the fuel system, empty the fuel
system before storage of 30 days or longer as follows.
1. Drain the fuel tank.
2. Start the engine. Let the engine run until the fuel lines and the
carburetor are empty.
3. After storage, make sure you use fresh fuel. See the storage
instructions for additional information.
4. Never use engine cleaner or carburetor cleaner in the fuel tank
or permanent damage can occur.
CARBURETOR
The factory settings for the carburetor are for most conditions. If the
engine is operated under the following conditions, you can adjust
the carburetor mixture. To adjust the carburetor, see the engine
manufacturer’s instructions.
1. The engine has a loss of power or does not run smooth.
2. A change from summer to winter operation.
3. A 40 degree change in the operation temperature. The carbure-
tor was adjusted at 80 degrees at the factory.
4. The engine is operated above 4,000 feet.
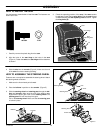
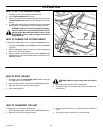
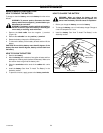
HOW TO START THE ENGINE
WARNING: The electrical system has an operator
presence system that includes a sensor switch
mounted in the seat. These components tell the elec-
trical system if the operator is sitting on the seat. This
system will stop the engine when the operator leaves
the seat. For your protection, always make sure this
system operates correctly.
NOTE: The engine will not start unless you depress the
clutch/brake pedal, move the shift lever to the neutral (N)
position, and move the blade rotation control to the
DISENGAGE position.
1. Sit in the middle of the seat. Push the clutch/brake pedal com-
pletely forward. Keep your foot on the pedal.
2. Move the shift lever to the neutral (N) position.
3. Make sure the blade rotation control is in the DISENGAGE po-
sition.
4. Move the throttle control completely forward to the CHOKE or
FAST position. Some models have a separate choke knob. Pull
the choke knob to the full CHOKE position.
5. Turn the ignition key to the START position. Release the key
when the engine starts.
NOTE: If the engine does not start after four or five tries,
move the throttle control to the FAST position. Again try to
start the engine. If the engine will not start, see the
TROUBLE SHOOTING CHART.
6. Slowly move the throttle control to the SLOW position. If model
has a separate choke knob, push in the choke knob.
7. Let a cold engine run for several minutes. Begin work when the
engine is warm. To start a hot engine, move the throttle control
to a position between FAST and SLOW.
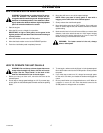
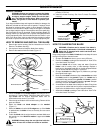
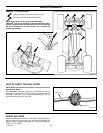
HOW TO START WITH A WEAK BATTERY
If the battery is too weak to start the engine, the battery needs to be
charged. If “Jumper Cables” are used to start the engine in an
emergency, follow the procedure below.
NOTE: The unit is equipped with a 12 volt negative to ground
system. Also, the other vehicle must have a 12 volt negative to
ground system.
WARNING: Do not smoke. The fumes from the battery
acid can cause an explosion. Keep the battery away
from any flames or sparks. To prevent sparks, fasten
the red “Jumper cable” to the positive (+) terminal be-
fore connecting the black “Jumper cable”.
NOTE: If the seat is raised when starting the engine, move the
blade rotation control to the DISENGAGED position and
engage the parking brake.
1. Connect each end of the RED “Jumper Cable” to the positive
(+) terminals of each battery. Make sure you do not touch the
chassis with the cables.
2. Connect one end of the BLACK “Jumper Cable” to the negative
(-) terminal of the charged battery.
3. Connect the other end of the BLACK “Jumper Cable” to the
mower’s engine block.
4. Start the engine that has the weak battery last. Allow the engine
to run.
5. To disconnect the “Jumper Cables”, reverse the above steps.
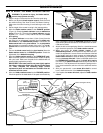
Fuel Tank
Full