


11
MAINTENANCE AND REPAIR INSTRUCTIONS
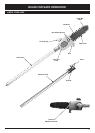
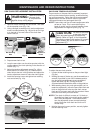
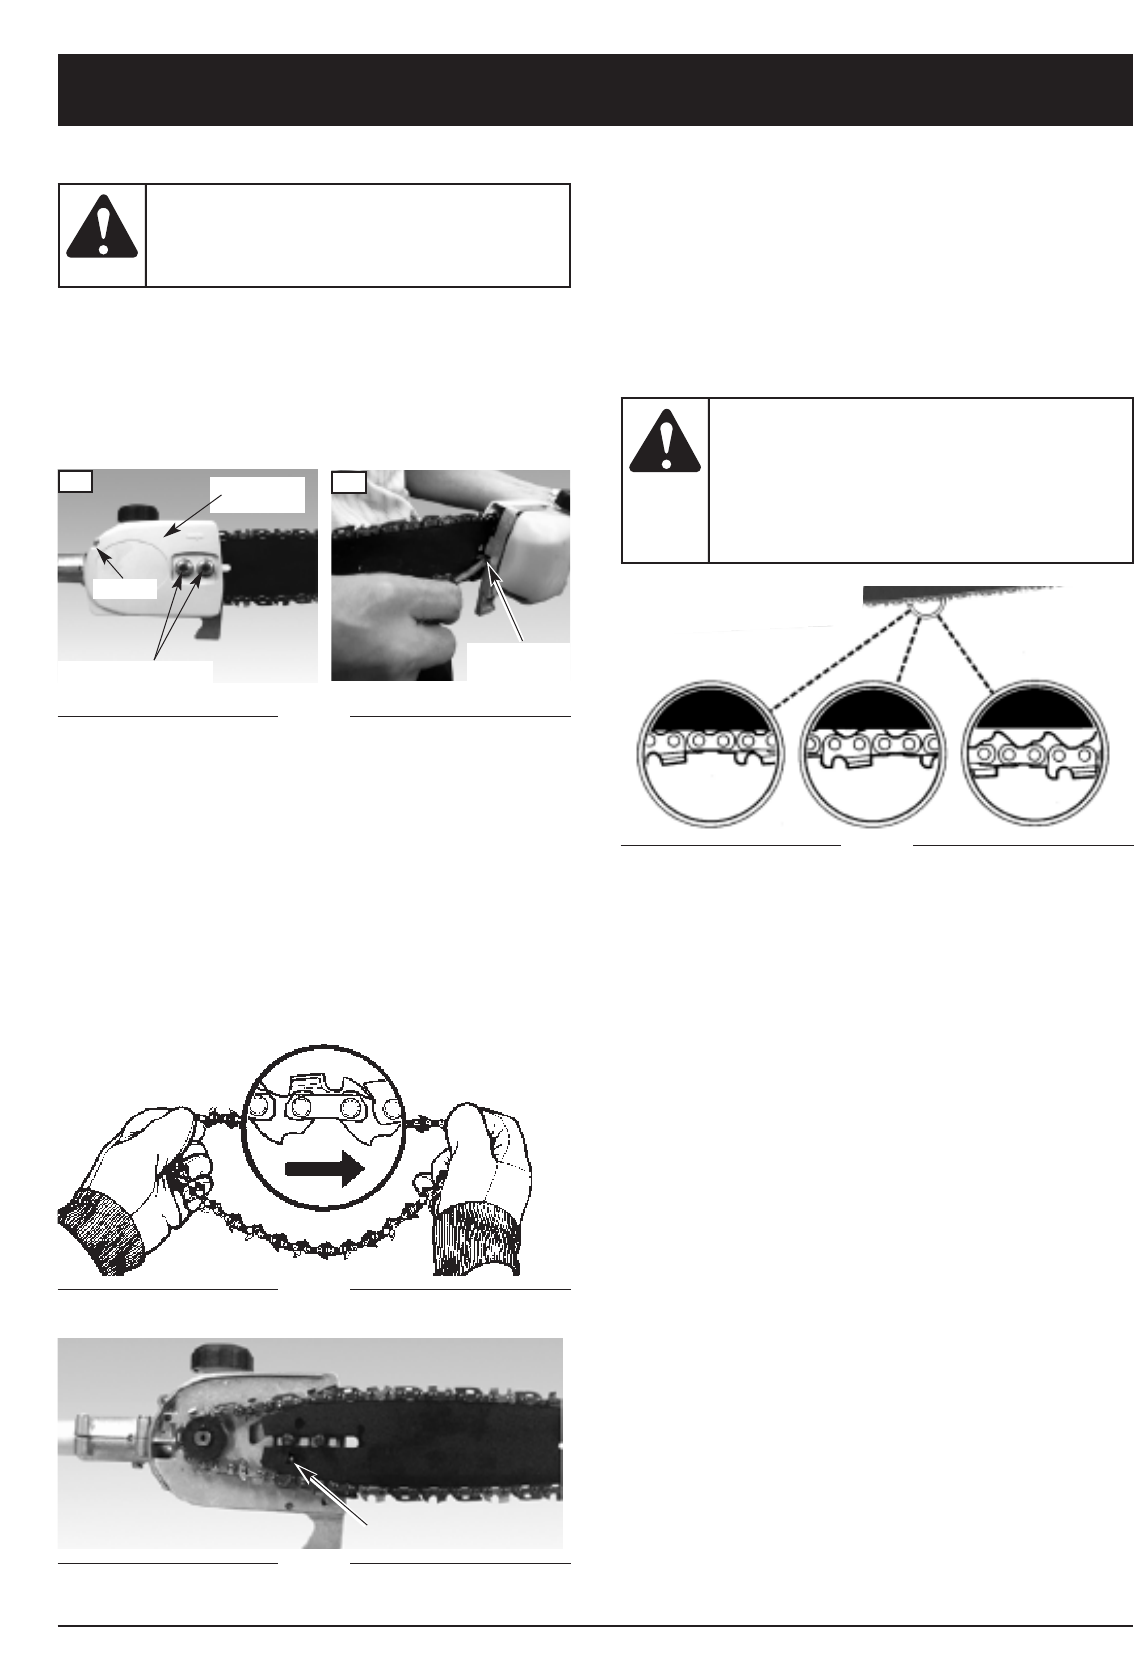
SAW CHAIN REPLACEMENT/INSTALLATION
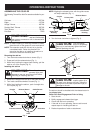
1. Remove the bar retaining nuts and screw. Then take
off the sprocket cover (Fig. 10a).
2. Using a straight screwdriver turn tension adjustment
screw counterclockwise (Fig. 10b) as far as it will go
or to the end of its travel, take off the chain then
remove the bar.
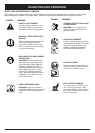
Whenever handling
the saw chain,
always wear work gloves for protection
against sharp cutting edges.
WARNING:
Fig. 10
A
B
Bar Retaining
Nuts
Spr
ocket
Cover
Screw
Tension
Adjustment
Screw
Fig. 10
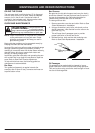
3. Prepare new chain or bar.
4. Loop the saw chain over the drive sprocket with the
cutting edges of the chain pointing in the direction of
rotation (Fig. 11).
5. Adjust the tension adjustment screw (Fig. 10b) to
allow insertion of the bar (Fig. 12). Make sure the
chain follows the slot in the guide bar and adjust the
tension adjustment screw to make the chain tighten.
6. Install the sprocket cover and tighten bar retaining
nuts and screw (Fig. 10a).
Fig. 11
Fig. 13
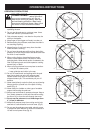
SAW CHAIN TENSION ADJUSTMENT
Pr
oper tension of the saw chain is extremely important
and must be checked before starting, as well as during,
any cutting operation. Taking the time to make needed
adjustments to the saw chain will result in improved
cutting performance and prolonged chain life.
NOTE: A new chain and bar will need r
eadjustment after
as few as 5 cuts. This is normal during the
break-in period, and the interval between future
adjustments will lengthen quickly (Fig. 13).
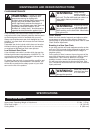
If a chain is too loose
or too tight, the bar,
chain and saw bearings will wear more
rapidly. Refer to Figure 14 for information
concerning correct cold tension (A), correct
war
m tension (B), and a chain in need of
adjustment (C).
CAUTION:
A
C
B
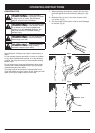
To adjust the saw chain tension:
1. Loosen the bar retaining nuts so they are hand tight
(Fig. 8a).
2. Holding the nose of the bar up, use the screwdriver or
scr
ench (if pr
ovided in your unit’
s har
dwar
e pack) to
turn the guide bar adjustment screw clockwise to
tighten the chain (Fig. 8b). Turning the screw
counterclockwise loosens the chain on the guide bar.
3.
While wearing heavy duty work gloves (after you’ve
made the adjustment), move the saw chain back and
forth on the guide bar to be sure the chain moves
fr
eely and is in pr
oper mesh with the sprocket. Never
move the chain with your bare hands.
NOTE: IF the chain is difficult to rotate or if it binds on
the guide bar
, ther
e is too much tension applied
and it must be adjusted. T
o decr
ease tension,
turn the adjustment screw counterclockwise,
slowly
. Move the chain back and for
th until it
moves fr
eely
.
4.
Holding the nose in upper position, secur
ely tighten
the bar retaining nuts.