


17
16
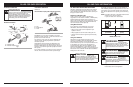
MAINTENANCE AND REPAIR INSTRUCTIONS
A
A
B
C
D
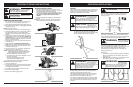
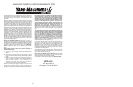
Fig. 29
Fig. 28
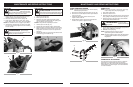
SPARK ARRESTER SCREEN
NOTE: A clogged spark arrester screen will dramatically
reduce engine performance.
1.
Remove the 3 bolts (A) and pull muffler out. (Fig. 28).
2. Remove the 2 screws (B) that hold the spark arrester
cover (C) (Fig. 29).
3. Discard the used spark arrester screen (D) and
replace it with a new one.
4. Reasemble the muffler components and install the
muffler to the cylinder. Tighten securely.
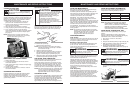
SPARK PLUG
NOTE: For efficient operation of saw engine, spark plug
must be kept clean and properly gapped.
1.
Push STOP switch down.
2. Remove air cleaner cover.
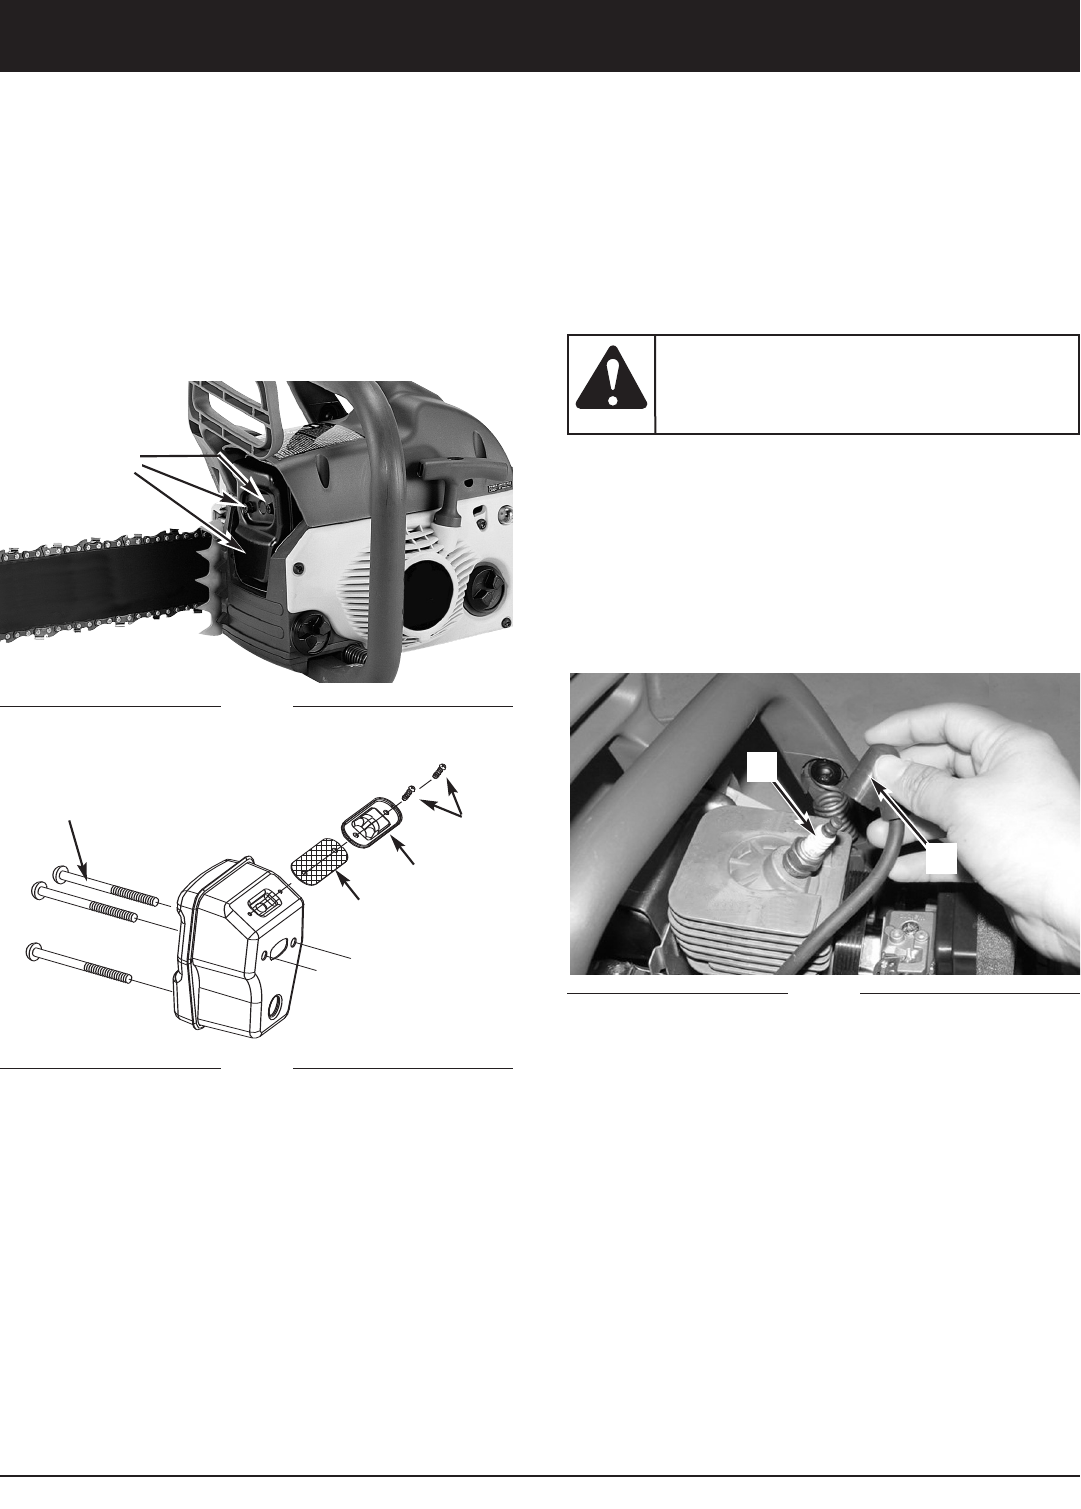
3. Disconnect the wire connector (G) from the spark plug
(H) by pulling and twisting at the same time (Fig. 30).
4. Remove spark plug with spark plug socket wrench.
DO NOT USE ANY OTHER TOOL.
5. Check electtrode gaps with wire feeler gauge and set
gaps to .025” (.635mm) if necessary.
6. Reinstall a new spark plug.
NOTE: A resistor spark plug must be used for
replacement (part no. 9295-310502).
NOTE: This spark ignition system meets all requirements
of the Canadian Interferen-Causing Equipment
Regulations.
G
H
Do not sand blast,
scrape or clean
electrodes. Grit in the engine could damage
the cylinder.
WARNING:
Fig. 30
CARBURETOR ADJUSTMENT
The carburetor was pre-set at the factory for optimum
performance. If further adjustments are necessary,
please take your unit to the nearest Authorized Service
Center listed in the Yellow Pages. Call 1-800-345-8746
for more information.
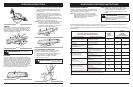
FUEL FILTER
1. Remove the fuel tank cap.
2. Bend a piece of soft wire.
3. Reach into fuel tank opening and hook fuel line.
Carefully pull the fuel line toward the opening until
you can reach it with your fingers.
NOTE: Do not pull hose completely out of tank.
4. Lift filter (A) out of tank (Fig. 27).
5. Pull filter off with a twisting motion. Discard filter.
6. Install new filter. Insert end of filter into tank opening.
Make sure filter sits in bottom corner of tank. Use a
long handle screwdriver to aid in filter placement if
necessary.
7. Fill tank with fresh fuel / oil mixture. See Oil and Fuel
Information page 9. Install fuel cap.
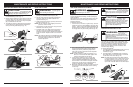
MAINTENANCE AND REPAIR INSTRUCTIONS
A
B
C
Fig. 26
Fig. 25
AIR FILTER
1. Remove the top cover (A) by loosening the cover
retaining screws. Cover will lift off (Fig. 25).
2. Lift the air filter (B) out of air-box (C) (Fig. 26).
3. Clean air filter. Wash filter in clean, warm, soapy
water. Rinse in clear, cool water. Air dry completely.
NOTE: It is advisable to have a supply of spare filters.
4. Install air filter. Install engine / air filter cover. Make
sure cover fits properly. Tighten the cover retaining
screws securely.
Never operate saw
without the air filter.
Dust and dirt wil be drawn into engine and
damage it. Keep the air filter clean.
CAUTION:
T
o avoid serious
personal injury,
always turn your unit off and allow it to cool
before you clean or service it.
WARNING:
A
Fig. 27
Never operate saw
without the fuel filter.
The fuel filter should be replaced after each 20
hours of use. Drain fuel tank before changing.
CAUTION: