


16
Changing Friction Wheel Rubber
The rubber on the friction wheel is subject to wear and
should be checked after 25 hours of operation, and
periodically thereafter. Replace the friction wheel
rubber if any signs of wear or cracking are found as
follows:
• Drain the gasoline from the snow thrower, or place
a piece of plastic under the gas cap.
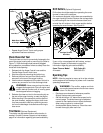
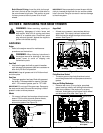
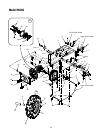
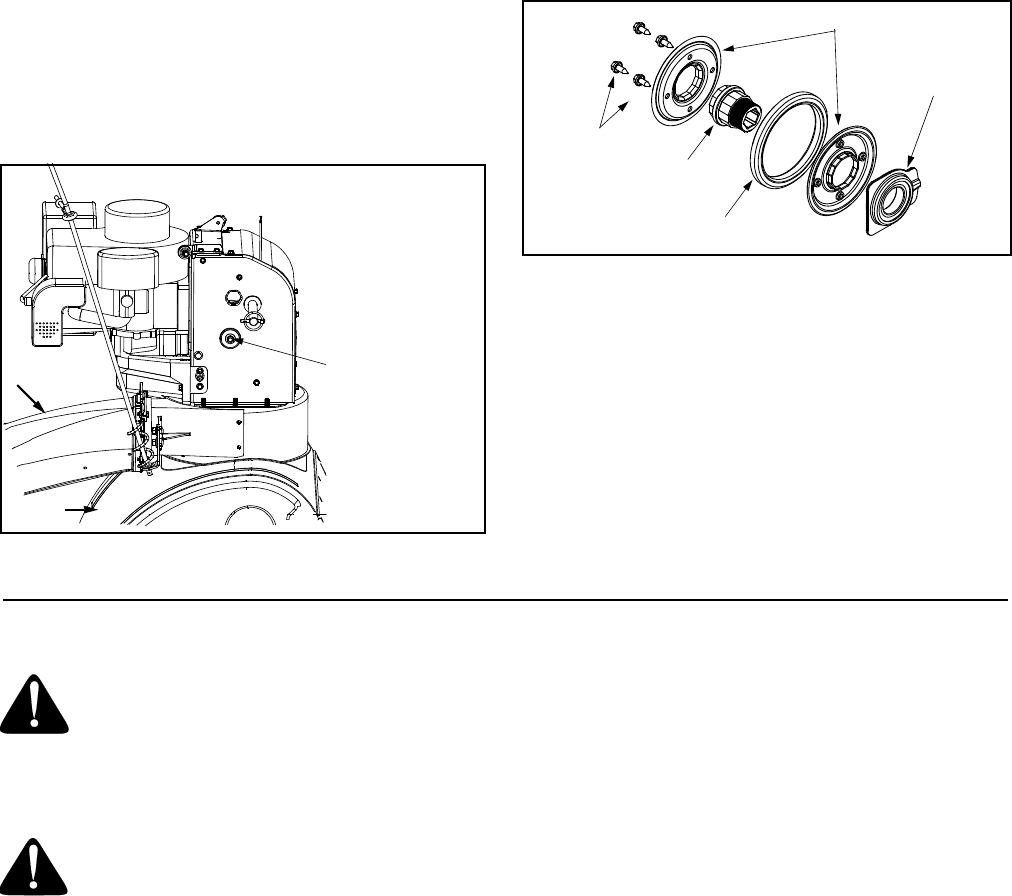
• Tip the snow thrower up and forward, so that it rests
on the housing. See Figure 11.
• Remove the six self-tapping screws from the frame
cover underneath the snow thrower.
• Remove the klick pins which secure the wheels,
and remove the wheels from the axle.
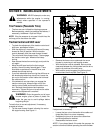
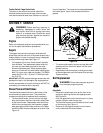
• Using a wrench to hold the shaft, loosen, but do not
completely remove, the hex nut and bell washer on
left end of gear shaft. See Figure 24.
Figure 24
• Lightly tap the hex nut to dislodge the ball bearing
from the right side of frame. Remove the hex nut
and bell washer from left end of shaft.
• Slide the gear shaft to the right and slide the friction
wheel assembly from the shaft.
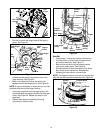
• Remove the four screws from the friction wheel
assembly. Remove the friction wheel rubber from
between the plates. See Figure 25.
• Reassemble new friction wheel rubber to the
friction wheel assembly, tightening the four screws
in rotation and with equal force.
Figure 25
• Slide friction wheel assembly back onto the gear
shaft. Be sure to align the pin on the shift rod with
hole in the friction wheel assembly. See Figure 22.
• Reassemble gear shaft and the wheels. Reattach
the frame cover.
SECTION 8: OFF-SEASON STORAGE
WARNING: Never store engine with fuel in
tank indoors or in enclosed, poorly ventilated
areas where fuel fumes may reach an open
flame, spark or pilot light as on a furnace,
water heater, clothes dryer, or other gas
appliance.
WARNING: Drain fuel into an approved
container outdoors, away from an open flame.
Allow engine to cool. Extinguish cigarettes,
cigars, pipes, and other sources of ignition
prior to draining fuel. Fuel left in engine for
extended periods deteriorates and will cause
starting problems.
If unit is to be stored over 30 days, prepare for storage
as follows:
• Remove gasoline from carburetor and fuel tank to
prevent gum deposits from forming on these parts
and causing possible malfunction of engine.
• Run engine until fuel tank is empty and engine
stops due to lack of fuel.
• Drain carburetor by pressing upward on bowl drain,
located below the carburetor cover.
Hex Nut and
Bell Washer
Chute
Auger
shown resting on
its auger housing
Note:
The unit is
Plates
Screws
Friction Wheel Rubber
Hub
Bearing