


10
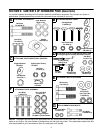
Attaching The Chute Directional Control
(Hardware C)
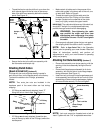
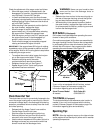
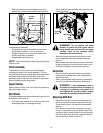
• Thread one hex nut about halfway onto eye bolt on
the chute directional control.
• Insert eye bolt through the hole provided in the left
handle. See Figure 13.
• Secure with cupped washer (cupped side against
the handle) and other hex nut. Do not tighten until
after attaching the other end of the chute directional
control.
Figure 13
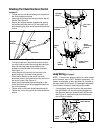
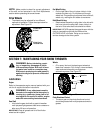
• To align the spiral on the chute directional control,
you may have to loosen the carriage bolts and hex
lock nuts securing lower chute bracket to the
extension on the left side of the chute assembly.
See Figure 14.
• Insert the end of the control into the hole in the
plastic bushing in the lower chute bracket.
• Place the flat washer on the end of the chute
directional control, and insert hairpin clip into hole in
the end of control. See Figure 14.
• Adjust the chute bracket so that the spiral on the
chute directional control fully engages the teeth on
the chute assembly.
• Tighten nuts on the lower chute bracket securely.
• Tighten hex nut on the eye bolt on chute directional
control.
Figure 14
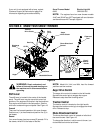
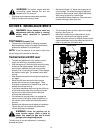
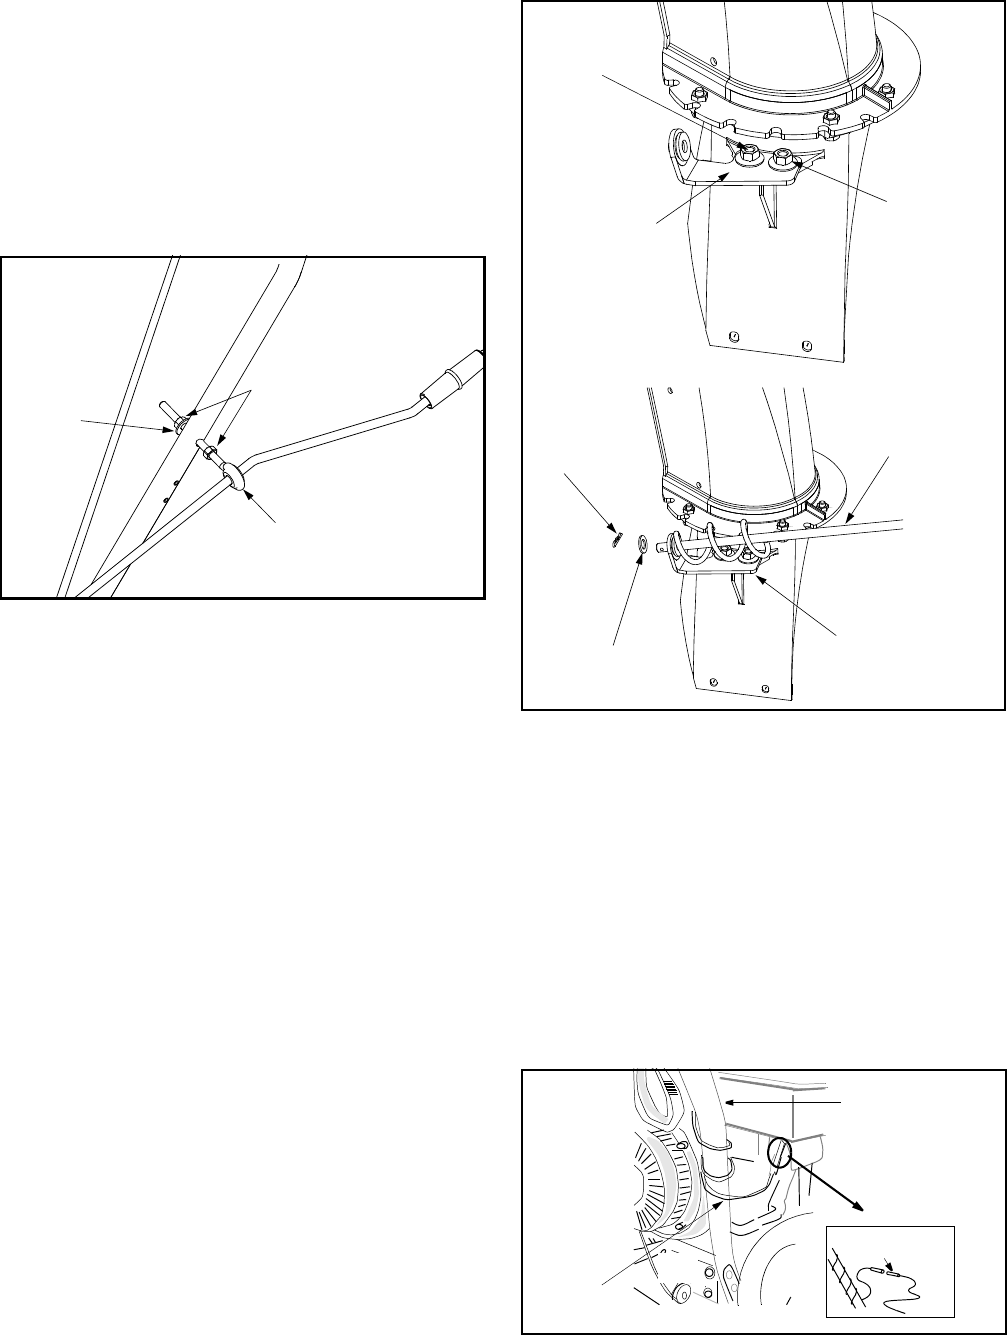
Lamp Wiring (If Equipped)
NOTE: A lamp is an optional feature of some model
snow throwers and is NOT standard equipment. On
models so equipped, a lamp will either be installed on
the dash panel at the factory OR packaged separately
as a Kit within the carton, depending on the model.
• If so equipped, wrap the wire from the lamp down
the right handle until the wire can be plugged into
the alternator lead wire located under the fuel tank.
See Figure 15. Lamp wire must not interfere with
any controls or cables.
Figure 15
Eye Bolt
Hex Nut
Cupped
Washer
Lower Chute
Bracket
Hex Lock
Nuts
Carriage
Bolts
Chute
Hairpin
Lower Chute
Bracket
Flat
Washer
Clip
Directional
Control
Lower Handle
Alternator
Lead
Lamp
Wire